Hi, some of us beside collecting vintage computers, like to build or own computers, just like Steve Woz or Mr. Sinclair did one day, we still can get some discrete components and old processors like the Z80 or 6800 or maybe take parts from savaged old computers.
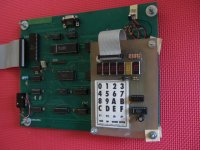
Attached is a picture of my home brew Z80 computer still only assembler programmable but I'm working on adding new functions, like a full functional keyboard and a display adapter.
Any body else want to post pictures, schematics, comments of their Homebrew Vintage like computer?
Hi!
I am currently using KiCad which is a free electronic design tool for schematics and PCB design. As the starter project, I am entering in the design from my old "Test Prototype" Z80 home brew computer I built last year. The design is not exactly the same but pretty similar:
Z80 CPU
8255 PPI
16550 UART
512K bank switched SRAM
1M bank switched ROM (new, was 32K EEPROM)
DS1302 RTC (pins for battery backup)
Standard ECB layout (100x160 mm)
DIN 41612 ECB connector with standard pinout
Uses standard AT/ATX drive connector type power supply.
My plan is to get the design entered and refined for both the schematic and the PCB layout. Then use the freerouting.com tool to autoroute the board.
The PCB is not overly complex but it has enough on it to pretty much fill the board. Getting the autorouter to come to a solution is starting to be a problem so I think I am at the practical limit for what can be added to it.
I am not a professional PCB designer so if there are some experienced designer/builders out there who'd be willing to review my design for improvements, I would certainly appreciate it a whole bunch. Please PM or email me for the files.
Eventually, I am going to get some prototype PCBs made and I have a few ideas as to where to go for that. Here is my list of low cost prototype PCB makers:
https://www.barebonespcb.com/!BB1.asp
http://olimex.com/pcb/pcb-doubleside.html
The first PCB costs about $53 plus shipping. Additional PCBs really drop the price considerably. The second PCB unit cost is about $32 and for four PCBs the unit cost drops to $22 plus shipping. Of course, that does not include any parts.
If anyone is interested in joining me in a "build it yourself from scratch" Z80 computer project, please let me know. This may be your opportunity! In my experience the most difficult part is the PCB.
Using prototype boards for wire wrap or point to point soldering each have their strengths and weaknesses however both approaches are plagued by overly complex wiring and debug procedures.
A ready made PCB should dramatically reduce build and debug complexity, assuming I can get it to work. There are no guarrantees in that department! As a result, this project is probably not suitable for total newbies and assumes some basic electronic familiarity and design principles. Of course, having parts and basic test equipment (soldering iron and VOM at minimum, logic probe and oscilloscope would help too).
At any rate, I am still ALPACA mailing list and this topic is probably more appropriate there. If anyone wants the schematic, netlist, PCB layout, just let me know. The whole thing is in flux at the moment so it will definitely change before the final PCB design is sent to the manufacturer.
Thanks!
Andrew Lynch
PS, I made some PDF prints of the design so far but cannot attach them to this message due to file size limits.
 !
!