salamontagne
Experienced Member
Intro:
The MSS-100, now discontinued, is a great little gadget for connecting to online Telnet BBS's or even running your own. I bought one after getting one loaned to me from a friend back in 2011 for getting my old BBS running (Tag 2.7d)
After fighting with tech support and having quite a few nasty words I now regret, I got
mine and a backup to work as both a receiver of telnet connections and an initiator.
For those interested, my forum post can be found here: http://www.vcfed.org/forum/showthread.php?27312-For-anyone-Considering-buying-a-Lanronix-MSS-100-or-other-device-from-Lantronix
Unfortunatly, I was pretty burned out at the end and didn't correct my mistakes in that post. I was happy to see later on that others have posted guides better then my ramblings!
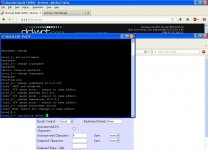
Recently, I tried to get one working for a friend. Unfortunately, I didn't document what made the Dynamic mode setting work. The Dynamic mode setting allows the MSS-100 to both "Call" and "Receive Calls" No matter what settings i used, I always wound up with this problem:
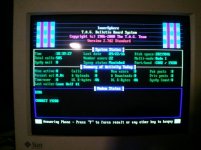
As you can see, my BBS dosent have a clue how to proceed because the MSS-100 already answered the call!
So, to keep the story short, (Too late, sorry) I wasted 2 days trying to re-do the correct
setup.
Please note: If you have setup the MSS-100 before, you can skip down to the dynamic port settings then look under the terminal settings for the AT commands you need, and finally the modem configuration.
Note: I take no responsibility for any damages. The MSS-100 is considered old. Please make sure you DO NOT plug in the serial portion while power to either your computer or the MSS is On!
Here's how I did it:
Requirements:
1: MSS-100 and adapters/converters for connecting to your hardware
(At the bare minimum, a null modem converter) and the last firmware. (3.8/1)
Instructions can be found elsewhere for updating it.
2:Terminal Program/BBS/Software Capable of Sending CR/LF and software flow control.
(Carriage Return/Line Feed, The Return/Enter keys) VERY IMPORTANT! This
WILL NOT WORK if your software cannot insert return after sending AT modem commands
or if your software/hardware cannot utilize hardware flow control (CTS/RTS). Also note
that if your setup cant send the 'ATA' (Answer call) command fast enough the MSS-100 will
answer on its own, though it SHOULD inform your software that a call is incoming.
3: Knowledge of setting up your hardware/software to use the AT (Hayes) command set.
4: (Optional) DHCP & DNS server on your network. Note: More recent DHCP servers will sometimes cause problems with older DHCP clients, such as the MS TCP/IP & the MSS-100 due to a slight change in the protocol. What usually ends up happening is the MSS-100 does not receive a valid answer and after a period of time, it aborts. What I've found to work best is after you've configured dhcp via the web interface, connect the serial side to whatever your using and watch it boot. Do this enough times (You may have to re-boot your router a couple of times too) and eventually it will get a valid response. At this point you can disable DHCP in both places on the web interface (more on this later) and set the IP that your router gave it. Then set a static IP in the DHCP server so it knows where to route connections. Most modern routers include a DNS server so you can enter its IP in the MSS-100's DNS entry. (Again, more on this later)
5: Putty (Google it)
For my purposes, I'm setting this up with a 80486 and using Telix as a dos comm program.
Reset your MSS-100 and your router. If you already have one setup, switch the settings in the web configuration to the Dynamic mode setting and skip ahead to the terminal setup. Note: Once you have configured the telnet server to connect to the serial port, you cannot access its console settings. Refer to your routers documentation to find out how to access its DHCP Client table and Static IP entries.
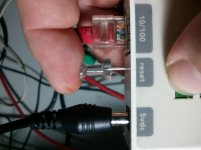
Using a push-pin, hold down the reset switch (you should feel
it click) while you connect the power. Wait 3 seconds or until the 'Link' light goes out. Unplug the Ethernet cable (Some routers answer a TFTP request and this confuses the little guy) and wait until the 'OK' light stops flashing red intermittently. (NOTE: The red light flashes VERY fast. The entire process takes over 2 minutes sometimes. When it completes, the 'OK' light will continue to flash green only. Ensure that its only flashing green slowly and proceed to plug the Ethernet cable back in. Unplug your router (Or stop your DHCP server)
and plug your router back in (Or restart your DHCP server) and plug the MSS-100 back in. This should allow the MSS-100 to get a valid DHCP response and your Router/DHCP server to have its entry. For those interested in integrating it into a system, the power requirements and plug type are: 5V, Center-positive PL06 2.5mm x 5mm plug, .8a.
Wait until the "OK" light stops flashing red and "LINK" are solidly lit (Note: it is ok for the "OK" Light to continue to flash green)
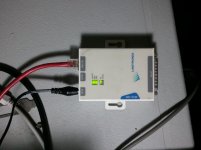
Open your browser and look at the DHCP client table of your router. Refer to your routers
documentation. Note that sometimes you will see only a * in front of the MSS-100 IP entries. Also note that you will probably have to reset your router a few times to get the MSS-100 to show up. Reset your router and then unplug and plug (NOT RESET) the MSS-100 a couple of times until you see its entry in the DHCP client table:
Note that sometimes no name is shown.
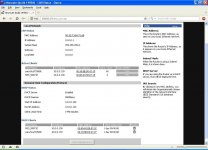
Now go to the MSS-100 Web-client page at the IP address you just got:
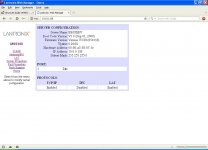
Verify that the Firmware version is 'Version V3.8/1' I have not checked other versions. Note its hardware address. Write both the hardware address and IP address down.
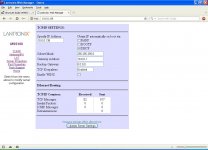
Click on the Tcp/Ip link. Enter "System" as the password. Uncheck BOOTP and RARP. Leave
DHCP alone for now. Click 'Update Server Settings'.Don't worry, we only need to-do this about 5 more times! MAKE SURE YOU DO THIS AFTER CHANGING ANY ENTRY!:
Click on the Server properties link. Disable IPX and Name your MSS. I used bbsserv. Make sure you click 'Update server settings'! You'll get a message that it must be rebooted. A fine idea, lets do it now. Click on the Server properties link and select 'Reboot router'
Once again, click 'Update Server Settings'. Wait a minute or two, then reload the home page.
Now, go back to your router, and put an entry under its static ip table (Find this in its documentation) You can directly copy and paste the hardware address if you've got a web-based router. (note my dd-wrt router isn't showing anything, but the entry IS there)
This helps slightly when it comes to connecting to the MSS because the router already has its addresses. Or so its hoped! Make sure its set for an infinite lease and reboot your router/restart your DHCP server. Wait and re-logon to the MSS and go back to Port Properties
Dynamic Port Setup:
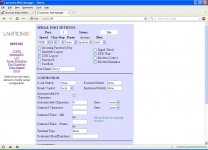
Now click on 'Port Properties' and adjust the speed and settings you will be using in your setup. Speed is the most widely variable parameter here. 8 bits, No Parity, 1 Stop bit are almost the standard everything uses, so leave them alone. Select Dynamic under 'Access'. Ensure you selected ctsrts under 'Flow'. Select 'DSR Logout' 'DTR Wait' and 'Modem Emulation' of course. Enter a capital 'A' under 'Autostart with Characters'. This instructs the MSS-100 to start paying attention to the serial port as soon as an 'A', as in AT, is sent. Again, click 'Update port Settings'
Now, go back to 'Server Properties' and click 'Reboot Server' followed by 'Update Server settings' The device will reboot and you will have to enter 'System' as the password again. It may take a few minutes during this or any reboot. Be patient, the little guy is doing his best!
Connect with Putty. Enter the IP you got from your router, and ensure you've got Telnet, not
ssh selected. I recommend connecting once to ensure you have the right settings and then
closing out putty and re-entering everything again, followed by typing a name in the 'Saved sessions' window and hitting 'Save'. It will make future connections easier. Now that you've connected, here are the commands that need setting up in the console:
Login under 'system'
Use 'set privileged' to elevate your access to full. Enter 'system' as the password.
Use 'change loginpass' and 'change privpass' to change your password. Note it can only be up to 6 characters and no special characters are allowed. You will be asked to verify the new password. There is a slight delay after you enter passwords and other commands. Also note: This is the only time you will be able to enter the console without doing a total reset of the MSS-100 so pick a password you are going to remember.
Use 'change ipaddress xxx.xxx.xxx.xxx' where xxx is the ip address you got from above. Its also in the top bar of your putty window. It will tell you you need to reboot. We will do this later.
Use 'change gateway xxx.xxx.xxx.xxx' where xxx ip the ip address of your router.
Use 'change nameserver xxx.xxx.xxx.xxx' where xxx is the ip address of your nameserver (Usually your router) Again, if you change routers you will have to do a factory reset to get back here.
Use 'change telnetdest serial' to change incoming telnet connections to go directly to the serial port. You will get a message that a reboot is required. There will be a slight delay.
Use 'initialize delay 0' to reboot the MSS-100. Wait awhile. Again, the MSS is doing the best it can! This should only take a few minutes.
Refresh your browser window to verify all settings, then unplug the MSS-100. Connect it to whatever system your using and open the terminal program. Plug in the power.
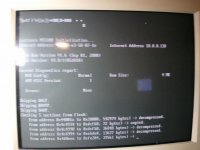
(I'm using Telix under dos ) Verify the firmware version, Its listed as 'Flash Version' You may have to update the firmware as I've not tried it with anything else. This screen is quite helpful if you ever forget what IP address you set the device to.
Setting things in the Terminal:
Now we get to the part that I foolishly didn't document. We need to tell the MSS-100 to not answer the telnet "call" and allow your BBS to answer. Furthermore, we need to instruct it to remember the setting. Otherwise, the next time it's initialized it will forget. Also, remember that your software needs to be able to send a CR/LF (Enter/Return) automatically or the initialization commands we will be getting to later WILL NOT WORK.
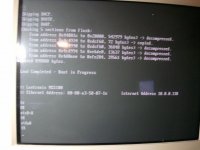
Anyway, the commands you need to send are: 'ATZ' 'ATS0=0' (ATSzero=zero) and 'ATW&W0'. The ATS0=0 tells the MSS-100 to not answer the call and to let your software do it. The ATW&0
tells the MSS-100 to save the setting so its not lost when the virtual modem is re-initialized. Also remember that your software needs to be able to send the "answer call" command fast enough or else the MSS-100 will just barge right on. You wont see the 'A' in your terminal window because that's the autostart character.
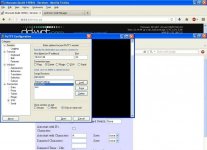
Now we get to the other tricky part of using the dynamic mode setting: Setting up your bbs software to control the MSS-100. The below picture is of my BBS modem config page:
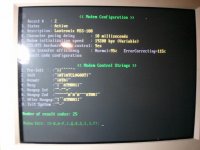
Looks confusing, dosen't it? Well, thank god not all of it is strictly essential. The most
important commands are the initialization strings: '|AT|ATCLOGOUT|' and the answer call strings: '|ATA|'. Also of note is the RTS/CTS setting. It is required to use the device. The
'|' (Pipe) entry is telling the BBS to send that magic CR/LF to the MSS-100. Many communications programs cannot send it by themselves, including the venerable Telix. While using a comm program, you can simply hit Enter/Return and are fine, a BBS is a different matter. The 'ATCLOGOUT' is the essential part of using the MSS-100 in the Dynamic Configuration. It tells the device "Hey, I'm done with you" after which the MSS-100 promptly
stops paying attention to the serial port and switches its attention to the Ethernet port, waiting for an incoming telnet connection. It cannot do this until it is entered.
So, that's it! Enjoy being able to use your MSS-100 to both Answer AND receive calls WITHOUT
needing to enter the web configuration to change it back and forth between 'REMOTE' and 'LOCAL'! Run your BBS and when there are no callers, go straight to your terminal program and dial one!
Or....As I'm trying todo, run Frontdoor to allow messages to be sent between BBS's like FidoNet used to do! (Or still does, I haven't looked into that yet)
Enjoy!
The MSS-100, now discontinued, is a great little gadget for connecting to online Telnet BBS's or even running your own. I bought one after getting one loaned to me from a friend back in 2011 for getting my old BBS running (Tag 2.7d)
After fighting with tech support and having quite a few nasty words I now regret, I got
mine and a backup to work as both a receiver of telnet connections and an initiator.
For those interested, my forum post can be found here: http://www.vcfed.org/forum/showthread.php?27312-For-anyone-Considering-buying-a-Lanronix-MSS-100-or-other-device-from-Lantronix
Unfortunatly, I was pretty burned out at the end and didn't correct my mistakes in that post. I was happy to see later on that others have posted guides better then my ramblings!
Recently, I tried to get one working for a friend. Unfortunately, I didn't document what made the Dynamic mode setting work. The Dynamic mode setting allows the MSS-100 to both "Call" and "Receive Calls" No matter what settings i used, I always wound up with this problem:

As you can see, my BBS dosent have a clue how to proceed because the MSS-100 already answered the call!
So, to keep the story short, (Too late, sorry) I wasted 2 days trying to re-do the correct
setup.
Please note: If you have setup the MSS-100 before, you can skip down to the dynamic port settings then look under the terminal settings for the AT commands you need, and finally the modem configuration.
Note: I take no responsibility for any damages. The MSS-100 is considered old. Please make sure you DO NOT plug in the serial portion while power to either your computer or the MSS is On!
Here's how I did it:
Requirements:
1: MSS-100 and adapters/converters for connecting to your hardware
(At the bare minimum, a null modem converter) and the last firmware. (3.8/1)
Instructions can be found elsewhere for updating it.
2:Terminal Program/BBS/Software Capable of Sending CR/LF and software flow control.
(Carriage Return/Line Feed, The Return/Enter keys) VERY IMPORTANT! This
WILL NOT WORK if your software cannot insert return after sending AT modem commands
or if your software/hardware cannot utilize hardware flow control (CTS/RTS). Also note
that if your setup cant send the 'ATA' (Answer call) command fast enough the MSS-100 will
answer on its own, though it SHOULD inform your software that a call is incoming.
3: Knowledge of setting up your hardware/software to use the AT (Hayes) command set.
4: (Optional) DHCP & DNS server on your network. Note: More recent DHCP servers will sometimes cause problems with older DHCP clients, such as the MS TCP/IP & the MSS-100 due to a slight change in the protocol. What usually ends up happening is the MSS-100 does not receive a valid answer and after a period of time, it aborts. What I've found to work best is after you've configured dhcp via the web interface, connect the serial side to whatever your using and watch it boot. Do this enough times (You may have to re-boot your router a couple of times too) and eventually it will get a valid response. At this point you can disable DHCP in both places on the web interface (more on this later) and set the IP that your router gave it. Then set a static IP in the DHCP server so it knows where to route connections. Most modern routers include a DNS server so you can enter its IP in the MSS-100's DNS entry. (Again, more on this later)
5: Putty (Google it)
For my purposes, I'm setting this up with a 80486 and using Telix as a dos comm program.
Reset your MSS-100 and your router. If you already have one setup, switch the settings in the web configuration to the Dynamic mode setting and skip ahead to the terminal setup. Note: Once you have configured the telnet server to connect to the serial port, you cannot access its console settings. Refer to your routers documentation to find out how to access its DHCP Client table and Static IP entries.

Using a push-pin, hold down the reset switch (you should feel
it click) while you connect the power. Wait 3 seconds or until the 'Link' light goes out. Unplug the Ethernet cable (Some routers answer a TFTP request and this confuses the little guy) and wait until the 'OK' light stops flashing red intermittently. (NOTE: The red light flashes VERY fast. The entire process takes over 2 minutes sometimes. When it completes, the 'OK' light will continue to flash green only. Ensure that its only flashing green slowly and proceed to plug the Ethernet cable back in. Unplug your router (Or stop your DHCP server)
and plug your router back in (Or restart your DHCP server) and plug the MSS-100 back in. This should allow the MSS-100 to get a valid DHCP response and your Router/DHCP server to have its entry. For those interested in integrating it into a system, the power requirements and plug type are: 5V, Center-positive PL06 2.5mm x 5mm plug, .8a.
Wait until the "OK" light stops flashing red and "LINK" are solidly lit (Note: it is ok for the "OK" Light to continue to flash green)

Open your browser and look at the DHCP client table of your router. Refer to your routers
documentation. Note that sometimes you will see only a * in front of the MSS-100 IP entries. Also note that you will probably have to reset your router a few times to get the MSS-100 to show up. Reset your router and then unplug and plug (NOT RESET) the MSS-100 a couple of times until you see its entry in the DHCP client table:
Note that sometimes no name is shown.

Now go to the MSS-100 Web-client page at the IP address you just got:

Verify that the Firmware version is 'Version V3.8/1' I have not checked other versions. Note its hardware address. Write both the hardware address and IP address down.
Click on the Tcp/Ip link. Enter "System" as the password. Uncheck BOOTP and RARP. Leave
DHCP alone for now. Click 'Update Server Settings'.Don't worry, we only need to-do this about 5 more times! MAKE SURE YOU DO THIS AFTER CHANGING ANY ENTRY!:

Click on the Server properties link. Disable IPX and Name your MSS. I used bbsserv. Make sure you click 'Update server settings'! You'll get a message that it must be rebooted. A fine idea, lets do it now. Click on the Server properties link and select 'Reboot router'
Once again, click 'Update Server Settings'. Wait a minute or two, then reload the home page.
Now, go back to your router, and put an entry under its static ip table (Find this in its documentation) You can directly copy and paste the hardware address if you've got a web-based router. (note my dd-wrt router isn't showing anything, but the entry IS there)
This helps slightly when it comes to connecting to the MSS because the router already has its addresses. Or so its hoped! Make sure its set for an infinite lease and reboot your router/restart your DHCP server. Wait and re-logon to the MSS and go back to Port Properties
Dynamic Port Setup:

Now click on 'Port Properties' and adjust the speed and settings you will be using in your setup. Speed is the most widely variable parameter here. 8 bits, No Parity, 1 Stop bit are almost the standard everything uses, so leave them alone. Select Dynamic under 'Access'. Ensure you selected ctsrts under 'Flow'. Select 'DSR Logout' 'DTR Wait' and 'Modem Emulation' of course. Enter a capital 'A' under 'Autostart with Characters'. This instructs the MSS-100 to start paying attention to the serial port as soon as an 'A', as in AT, is sent. Again, click 'Update port Settings'
Now, go back to 'Server Properties' and click 'Reboot Server' followed by 'Update Server settings' The device will reboot and you will have to enter 'System' as the password again. It may take a few minutes during this or any reboot. Be patient, the little guy is doing his best!
Connect with Putty. Enter the IP you got from your router, and ensure you've got Telnet, not
ssh selected. I recommend connecting once to ensure you have the right settings and then
closing out putty and re-entering everything again, followed by typing a name in the 'Saved sessions' window and hitting 'Save'. It will make future connections easier. Now that you've connected, here are the commands that need setting up in the console:

Login under 'system'
Use 'set privileged' to elevate your access to full. Enter 'system' as the password.
Use 'change loginpass' and 'change privpass' to change your password. Note it can only be up to 6 characters and no special characters are allowed. You will be asked to verify the new password. There is a slight delay after you enter passwords and other commands. Also note: This is the only time you will be able to enter the console without doing a total reset of the MSS-100 so pick a password you are going to remember.

Use 'change ipaddress xxx.xxx.xxx.xxx' where xxx is the ip address you got from above. Its also in the top bar of your putty window. It will tell you you need to reboot. We will do this later.
Use 'change gateway xxx.xxx.xxx.xxx' where xxx ip the ip address of your router.
Use 'change nameserver xxx.xxx.xxx.xxx' where xxx is the ip address of your nameserver (Usually your router) Again, if you change routers you will have to do a factory reset to get back here.
Use 'change telnetdest serial' to change incoming telnet connections to go directly to the serial port. You will get a message that a reboot is required. There will be a slight delay.
Use 'initialize delay 0' to reboot the MSS-100. Wait awhile. Again, the MSS is doing the best it can! This should only take a few minutes.
Refresh your browser window to verify all settings, then unplug the MSS-100. Connect it to whatever system your using and open the terminal program. Plug in the power.

(I'm using Telix under dos
Setting things in the Terminal:
Now we get to the part that I foolishly didn't document. We need to tell the MSS-100 to not answer the telnet "call" and allow your BBS to answer. Furthermore, we need to instruct it to remember the setting. Otherwise, the next time it's initialized it will forget. Also, remember that your software needs to be able to send a CR/LF (Enter/Return) automatically or the initialization commands we will be getting to later WILL NOT WORK.

Anyway, the commands you need to send are: 'ATZ' 'ATS0=0' (ATSzero=zero) and 'ATW&W0'. The ATS0=0 tells the MSS-100 to not answer the call and to let your software do it. The ATW&0
tells the MSS-100 to save the setting so its not lost when the virtual modem is re-initialized. Also remember that your software needs to be able to send the "answer call" command fast enough or else the MSS-100 will just barge right on. You wont see the 'A' in your terminal window because that's the autostart character.
Now we get to the other tricky part of using the dynamic mode setting: Setting up your bbs software to control the MSS-100. The below picture is of my BBS modem config page:

Looks confusing, dosen't it? Well, thank god not all of it is strictly essential. The most
important commands are the initialization strings: '|AT|ATCLOGOUT|' and the answer call strings: '|ATA|'. Also of note is the RTS/CTS setting. It is required to use the device. The
'|' (Pipe) entry is telling the BBS to send that magic CR/LF to the MSS-100. Many communications programs cannot send it by themselves, including the venerable Telix. While using a comm program, you can simply hit Enter/Return and are fine, a BBS is a different matter. The 'ATCLOGOUT' is the essential part of using the MSS-100 in the Dynamic Configuration. It tells the device "Hey, I'm done with you" after which the MSS-100 promptly
stops paying attention to the serial port and switches its attention to the Ethernet port, waiting for an incoming telnet connection. It cannot do this until it is entered.
So, that's it! Enjoy being able to use your MSS-100 to both Answer AND receive calls WITHOUT
needing to enter the web configuration to change it back and forth between 'REMOTE' and 'LOCAL'! Run your BBS and when there are no callers, go straight to your terminal program and dial one!
Or....As I'm trying todo, run Frontdoor to allow messages to be sent between BBS's like FidoNet used to do! (Or still does, I haven't looked into that yet)

Enjoy!
