• Please review our updated Terms and Rules here

Please cry with me - My Osborne 1 chewed up my DD boot disk :( Advice sought.

cj7hawk

Veteran Member
Joined
Jan 25, 2022
Messages
1,112
Location
Perth, Western Australia.
Please help me mourne the passing of my Osborne 1 Double Density boot disk (original). I just finished repairing my O1 and had it booting nicely, and even the bad sector errors disappeared. So I pulled out my DD floppy disks and went looking for some kind of format utility on the other disks, and one disk just gave me read errors, so I rebooted, then my boot disk gave read errors. Pulled it out, and saw scratch lines around boot sector and where the disk had been seeking.

It was a tragic end - I can only assume something came out of the failed disk and attached to the head, which then destroyed my boot disk.

I tried washing away the head debris with the tears I wept, but that didn't work, so I tried cleaning with Alcohol, and that didn't work either, so I will have to take the disk apart and go looking for what happened. Should these disk drives be easily damaged by just reading and old disk? Is this a common fault?

It's the first time I've had a bad disk cause the drive to fail in an old computer in such a way. :(

So I'm going to try to get a Gotek going... Does anyone know what the sector translation order for an Osborne 1 disk image is? I can't boot so reading it from the BIOS is out of the question.

Thanks
David
 
I’ve had bad experiences with old (cheap) floppy media (sounds like an ED problem… TMI? ;-)
By all means clean the heads but you can expect old floppies to disintegrate occasionally.
All the more reason the GoTek is a god sent.
 
The problem is called "shedding"

A disk goes bad, and sheds it's material onto the head. It is not caused by the drive, but if you don't clean the drive afterwards it can damage subsequent disks. Discard the original disk and clean the drive. Modem7 is in AUS and would probably be willing to make you another boot disk
 
We are way past the point where one can safely just put a random untested floppy disk in to a drive.

When one obtains an untested disk, or uses a disk that has not been tested in a long, long, long time, it is essential to inspect the surface of the disk before putting it in any drive.

It is best to first test such disks in a drive that is not enclosed and can be easily cleaned and inspected. At least, seek over each track if the contents are not compatible with the system. For disks that you wish to store data on, ideally use some kind of media test (The SuperCard Pro has a flux level media write test).

Of course, keep a cleaning disk handy. Even tested good disks can fall apart for various reasons. Also, archive and keep backups of all important software. Vintage disks, drives, and OSes can be very finicky.
 
My FF.CFG for flashfloppy in my OS1

interface = shugart
host = unspecified
pin02 = nc
pin34 = nc
write-protect = no
side-select-glitch-filter = 0
track-change = realtime
index-suppression = no
head-settle-ms = 50
ejected-on-startup = no
image-on-startup = static
display-probe-ms = 3000
autoselect-file-secs = 1
autoselect-folder-secs = 2
nav-mode = native
nav-loop = yes
twobutton-action = eject
rotary = none
display-type = auto
oled-font = 6x13
oled-contrast = 143
display-off-secs = 255
display-on-activity = yes
display-scroll-rate = 200
display-scroll-pause = 2000
nav-scroll-rate = 80
nav-scroll-pause = 300
step-volume = 10
da-report-version = ""
extend-image = yes

and IMG.CFG

[default]
cyls = 40
heads = 1
secs = 16
bps = 128
id = 1
mode = fm
interleave = 1
cskew = 0
hskew = 0
rpm = 300
gap3 = 0
iam = yes
rate = 125
file-layout = sequential

One of these is essential


Then its just a matter of fitting it in the case

I got a full height Gotek adapter 3d printed
 
3d full height case, works perfectly. Used surfacescan to print it.

 
Hi Gary,

Thanks for the FF config file - that saves me a lot of time, especially when I can't boot the system and check it manually in the B: drive.

That full-height adapter doesn't look optimised yet. I'll design up a nice looking one with a recessed display and knob and controls and add a latch that looks like the one already in the Osborne to eject the USB if I can find a way to do that - I'll send you a STL when I'm done if you're interested - I remember now we talked about a full height model a few years back - I assume it was for the Osborne you were talking about then? How did the Amstrad Gotek adapter go? I see I sparked a bit of a trend with people putting displays in at 45 degrees after that.

Thanks again -
David
 
It works ok as most of it is actually hidden behind the Osbornes front panel and the texture is similar to the original drives.

The Amstrad one works perfectly :)
 
I've carefully cut open disks with factory labels and replaced the donut with one from another disk, then glued the edges back down. If you are sad about ruining an original factory disk, I mean. You gotta blow the schmoo out of the fibery stuff pretty well though.
 
Yeah, I am ashamed to say I too have considered this "mod" to the existing disk... I am keeping all my other disks well away from it. I need to find a cheap supply of DD disks to try that kind of stuff out, as most of the local supply is HD, which I've never tried with a drive as old as the Osborne's.

Way back in Uni, I remember a disk dying on me, so I hooked my finger through the hole in frustration and pulled the disk straight out of the sleeve through the middle, chucked it into the drive, and amazingly it worked. At least well enough to read what I was having problems reading, or maybe I just got lucky.. So my breakout work got done... Then the teacher came around and asked for a copy, and I just said "My disk is in the drive" and walked off. There was a solid sound of laughter from everyone in the room when they went to access it and pulled out sleeveless media. I was also fortunate they let me off on that, but I think they found it amusing also.

I am still crying about my Osborne disk but :( I haven't moved it off the bench since it happened.

Fortunately, another Osborne arrived this morning, so I will see how that is.
 
I've carefully cut open disks with factory labels and replaced the donut with one from another disk, then glued the edges back down. If you are sad about ruining an original factory disk, I mean. You gotta blow the schmoo out of the fibery stuff pretty well though.
I have had nearly 100% success transplanting labels from 5.25" disks. Since the jacket is slightly textured the label almost always peels off clean. Half the time the glue is dried out making it even easier. Then you can stick the factory label on a new/good disk with a gluestick or spray adhesive.

(On 3.5" disks the label surface is smooth, making removal more difficult. But it's usually possible if the label doesn't wrap around the top.)
 
Regarding OEM disks - Archive once, never use again. My floppy drives only ever see 3M floppies I've bought as unopened NOS. Never had one that didnt work or that shed so far.

My method for archiving:
Remove disk cookie, place on clean tissue, clean in cyclic movements, from inside to out using anhydrous IPA soaked cotton ball. Similarly, dry with clean cotton ball. Repeat on reverse side. Ensuring lint - free, re-insert disk cookie into protective floppy disk envelope, correctly oriented and without damage to the magnetic media. Apply a few few drops of cyclomethicone applied to the exposed disk media, where the head makes contact. Clean you disk drive's head/s. Insert into disk drive and make an image using suitable software. Dave Dunfield ImageDisk etc - I'm using a Greasweasle these days, so much less hassle using a modern PC. Buy pack of sutable 'new' unopened 3M brand floppies off auction site and copy the image back to the 'new' disk. Never use the original disk again - save for posterity and those desperate situations where you have no choice (but use cyclomethicone) Some people 'bake' the cookie first, I've never tried/needed to.

Never used a GoTek - probably will at some point, although I like the feel of original hardware if possible.

Using this familiar method, I've archived my Superbrain 5.25" floppies, and my IMS 8000 SSDD 8" floppies and my NEC APC DD/DD 8" floppies. Someone here mentioned cyclomethicone some years ago and I've not looked back since. Thankyou, whoever it was!
 
Oh, that is something I hadn't considered before... I might have a go at that. What brand/type of gluestick do you recommend?
I use a 3M gluestick but I don't think the brand really matters.

If the old glue isn't dried out, you can gently use a razor blade to get a corner started. Try to keep the label flat and curl the disk away from it, since the disk is trash anyway.

Once you get the label off, place it sticky side up on some scrap paper, then apply glue to the entire backside of the label. Hold it in one place so it doesn't slide around and get any glue from the scrap paper on the front of the label. You will probably get a little on your fingers. Stick it on the good disk, being careful not to use fingers that have glue on them. Then put a clean piece of scrap paper over the label and press firmly from the center of the label outward.

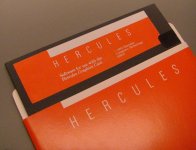
Here is one of the labels that I have transplanted with a gluestick.
 

Attachments

  • hercules.jpg
    hercules.jpg
    183.5 KB · Views: 7
Thanks for the suggestion - I ordered some cyclomethicone... Will see how it goes.

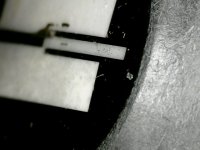
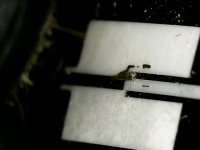
So took that drive apart, and aside from connecting up a Gotek ( Thanks Gary - You made it too simple ) I had a look at the heads... First I got some Q-tips and some industrial iso, and cleaned it. Looked OK.

WIN_20230304_15_29_11_Pro.jpgWIN_20230304_15_29_17_Pro.jpg

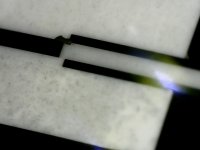
Uh, hang on, what is that hard crystal looking thing near the read head and what is that stuff on the head itself.

Try again. This time with an ISO wipe and my finger, a little harder.

WIN_20230304_15_32_03_Pro.jpg

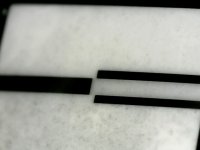
Much better, that sharp jaggie is gone and the head is clean... Wait, wut?

WIN_20230304_15_32_39_Pro.jpg


Ok Mr Osborne, let's see how stong you can make a disk drive... This time I use my fingernail and an ISO wipe and give the head a damn good clean, then check it, then more clean still, and finally I get this - Looks good now.
So this is what came off of that other diskette. I'll leave the disk drive out, then wait for my order of 5.25" disks to arrive, then I'm going to check each one and keep the microscope handy and see what's going on with the heads carefully this time.

Anyway, I found out the best solution for an Osborne 1 that has broken my heart is to order more Osborne 1's... So now I have three. An early one, SN around 27000, a second generation, which is the one that ate my disk, and a blue-plastic model, which I assume is an extension on the second generation Osborne 1.... Which I am waiting on the arrival of as we speak... My bank balance is destroyed. It was way out of my price range. :( So now I am crying a different type of tears. The differences between the First and Last generation were actually pretty amazing... Also I'm wondering what revision BIOS they released with? I have 1.44 and a 1.3.

I need a Kaypro now.

Will let you all know how it goes when the new disks arrive- Speaking of which, how do you format a disk on an Osborne 1?

David.
 
Some disks just fall apart and worse, some as in this case really like sticking to the head and destrory every disk you then put in :(

Reminds me of the almost obsessive caution we had with the 80MB CMD drives with the removable platters, every single disk had to be logged in and out of a drive so that if it head crashed we could go back through the record and inspect the heads in every machine the removable had been in.

Mind you, a head crash in one of those drives was quite memorable, smoke would pour out of the drives vent filling the room quite quickly :)
 
I only ever remember working with machines like that for a very short time during work experience while at high school. It was fun. Then I went into microcomputer design and never saw another mainframe.

How many I saw being scrapped in the late 80s though as Micro's overtook them.

Anyway, now my osborne is booting, I think it really needs an 80 column display... The screen pak was way too complicated - and came with it's own ROMs. I wonder how hard it would be to simply capture the writes to F000 and build my own screen image? I think it has some weird modes, but definitely a future project, along with a switch somewhere to switch between the two.

Also, it looks like the copy command is responsible for formatting new disks - is that correct?

Thanks
David
 
to format, boot to Osbornes CPM and type COPY

It then gives you an option to format a disk

You can copy files from the hotels pushbuttons, but its often easier just to copy a file using the PC and rename it there

You have the screenpak ? nice but I suppose the endearing feature of the OS1 is its tiny screen. The setup program. I have an early with the white screen and the later unit with the green screen and its sooo much better made :)

The one thing I keep forgetting, when you use shift " to boot, it doesn't just boot off of the 'B' drive, it makes the B drive the A drive so I keep formatting the system disk :(
 
Back
Top