• Please review our updated Terms and Rules here

Tandy M100 Keyboard Problem

cgrape2

Experienced Member
Joined
Jun 11, 2009
Messages
285
Location
Lodi,CA
I acquired a M100 Portable recently.It fires up well,but there is a keyboard fault I don't have a clue as to fixing.The 7,U,J,M,. and > keys seem dead.They don't register in either "Basic" or the built in Word Processor.
I did try using Cap Lock and Shift,but no dice.
Anyone have a suggestion?
Thanks!
cgrape2
 
You'll notice those keys are in line; most likely they're all wired to some common path in the keyboard traces that's broken. I'd recommend opening the unit and seeing if it's repairable. I don't know what an M100 keyboard looks like internally; some keyboards are easier than others. Recently I dealt with a keyboard that had traces inside layered plastic sheets, and a bit of gunk had formed on the very edge of them, creating a short that was causing key malfunctions.
 
Ok,that's worth a try.It seemed odd that they were all in a line,so I wondered if that was a "common" problem.
Thanks for the tip!
cgrape2
 
tezza tried polishing the pins that go to they keyboard. you should try that and see if it works and thank tezza if it does.
 
tezza tried polishing the pins that go to they keyboard. you should try that and see if it works...

That particular issue was with a Tandy Colour Computer. I'm not sure what the keyboard connector is like in a Model 100 but connections can oxidise over time and it's certainly worth giving them a clean to see if that fixes the problem. As well as the CoCo problem, cleaning connector pins also fixed an Apple keyboard issue I had in the past.

Tez
 
Good Advice!

Good Advice!

I will do so and report back after I do some exploritory surgery.
cgrape2

Ok,opened it up and looked for broken traces(Nope,they all look good on the underside),Check Connector for Keyboard and clean pins(Did it,no help)I did try shorting the soldered connection for the dead keys and that didn't work.It did work for keys that tested good.
I guess what's next is prying off the key caps and looking to see if there are traces on the top of the board as well.
 
Last edited:
I believe the keyboard is a matrix type with one chip reading the rows and another reading the columns.

If the input to one of these chips has gone bad, you'll lose a whole row or a whole column. It's a dead giveaway.

As long as you have it out, take a good picture of the chip area on the keyboard and post it.

If any of the chips start with XR, I can tell you, from experience, that you're screwed.
 
I will do so and report back after I do some exploritory surgery.
cgrape2

Ok,opened it up and looked for broken traces(Nope,they all look good on the underside),Check Connector for Keyboard and clean pins(Did it,no help)I did try shorting the soldered connection for the dead keys and that didn't work.It did work for keys that tested good.
I guess what's next is prying off the key caps and looking to see if there are traces on the top of the board as well.
Don't bother; nothing to see and you might break a keystem.

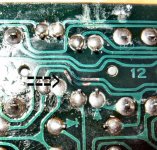
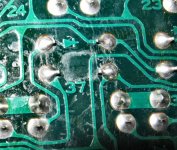
The most common problem is a cracked pcb; there's a support spacer in the middle and if the keyboard gets squashed hard enough it will bend around that spacer; as it happens the trace in question here is right beside that spacer.

Your problem is with the KR6 line. On the edge of the keyboard are the wires going to the main board, numbered 1 to 20; KR6 is number 18. Get a short piece of wire and while in TEXT short out pin 18 to each of pins 1 to 6; you should get mju.7<

If you do, then it is almost certainly a cracked pcb; follow the trace from pin 18 to the various switches and somewhere along the way there will be a break; use an ohmmeter if you have one (disconnect the keyboard first). Once you've found it, scrape away the paint on either side and bridge the break with a short piece of thin wire, or jumper between the last switch before the break to the first one after.

If you don't get any characters typed when you short pin 18 to 1-6 I'm afraid it's bad news.
Check for continuity between pin 18 of the keyboard and pin 13 of M15 on the main board in case it's the cable or a problem on the main pcb, but that's pretty unlikely. The two chips that read the keyboard are M15 (40H244) and M25 (81C55).

But my money's on a cracked keyboard pcb.

While you're at it, what's the part number of your system ROM (M12)?

Good luck!

mike

PS: When following the trace, note that each keyswitch has 4 pins; two are the switch itself and the other two are just a straight jumper not connected to the switch at all, and the traces go through several of these 'jumpers' on the way to the 'real' switches. Except for the function keys, the switch contacts are a little wider apart and thinner than the 'jumpers'.
 
Last edited:
Pictures of the Keyboard PCB

Pictures of the Keyboard PCB

Here are a couple of pictures.One has a maybe problem that is obvious.The second is a picture of where the Keyboard Support touches the PCB(it looks ok to me).
Any guidance is requested!!!
cgrape2

I also performed the "Cable Pin Shorting" test and the 7,U,J,M,. all showed up.There was a symbol that displayed for the > symbol,but not a "carrot".
 

Attachments

  • 004.jpg
    004.jpg
    99.6 KB · Views: 1
  • 011.jpg
    011.jpg
    98.7 KB · Views: 1
Last edited:
Can't really tell much from the pictures other than it looks like it could use a little cleaning ;-)

Don't you have any way of tracing continuity from pin 18? An Ohmmeter? 99 cent LED flashlight? A piece of wire connected to pin1?
 
Ok,I did a Continuity test from KB pin18 to pin13 of the IC M15.It registered as a 0,which is good.That works!
The two pictures show a spot om th PCB where I found some erosion of the coating over the traces.The second picture shows where the Kbrd support touches the Kbrd PCB.
The System ROM part# is LH535618.
I really appreciate the VERY detailed help I've been given.
cgrape2
 
You're tracing in the wrong direction ;-) We already knew that the cable and system board are OK.

Just follow the trace from pin 18 and check continuity along the way until you find the break. I think it goes first to the cursor up key and goes through it without actually connecting to the keyswitch; you'll find several bridges across keyswitches like that.
You'll find in the centre around that support post your trace goes to three or four of the bad keys; the break has to be between pin18 and there. Maybe it is that suspicious looking spot in your picture; no way to know until you check continuity.

Good luck; I've repaired a couple of those, it's a simple repair.
 
Thanks for being specific.I'm pretty sure I'll be able to find the problem now.
cgrape2
 
Fixed!

Fixed!

Yes I fixed it at last.It took me awhile to process the instructions,but 5 minutes a small piece of wire and a bit of solder later.It's FIXED!!!
Thanks for the patient help in guiding me through this.
cgrape2
 
Back
Top