• Please review our updated Terms and Rules here

Discovered 2 types of Tantalums in my Kaypro drives...

cj7hawk

Veteran Member
Joined
Jan 25, 2022
Messages
2,340
Location
Perth, Western Australia.
1. Those that have died and shorted.
2. Those that are just fine, and are waiting for me to replace the died-and-shorted ones before they too die and short.

They are 16v 4.7uF Tantalums... Bright orange to warn me of their danger.

Best replacement? I'm getting tired of this "Fix and rebuild and smoke and open and fix" cycle happening every time I power back up with the drive attached.

( I noticed they changed the board on my A drive - it has only 1 Tantalum - a yellow one... Not like the 9 orange ones on my B drive...)

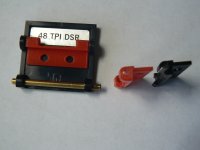
Also, are these double-sided boards on a single-sided drive? They seem to have all the electronics for the second head in place?
 
Some pics.

IMG_20240801_142951.jpg
Kaypro A drive - has a single yellow tantalum on the 12v line. I left it there. Top left. Yes, I know the terminator should be in the B drive.

IMG_20240801_142915.jpg
Kaypro B drive - Still has two bright orange tantalums, but they are not on power rails.

IMG_20240801_143013.jpg
IBM Drive for comparison ( double sided, double density ). Arrived a couple of days ago, and seems to be the same PCB, though has yellow tantalums. Seems to be the same as the Kaypro, though slightly different A jumper setting and has two heads plugged in lower left.

IMG_20240801_143101.jpg
A bunch of bright orange tantalums... ( replaced with yellow 10uF monolithics/50v ) on the B drive.
 
David,
While you have those Tandon TM-100 Floppy Drives removed there are several things that you need to look at
on each Floppy Drive.

1. Remove the RPM Board on the back of the Drives and Check the two 16 Volt Caps to make sure they
have not leaked acid that has eaten away the PCB traces. I have seen several of these, and I use the
Hollow Copper Rivets when replacing the two caps and repair the PCB traces with jumper wires.

2. Open the Floppy Door and look for two short White Nylon Pins in the Hinge area. If you see two short
White Nylon Pins, they need to be replaced with a solid piece of Brass Rod to keep from breaking the Hinge
part. If there are two short White Nylon Pins, then your Hinge Part is likely broken. Replacement parts
are available. I use Tough Resin to 3D print those parts.

3. Check the Taunt Band Hub to Stepper Motor Set Screw to make sure it is tight on the stepper shaft, but do
not use excessive force. Lots of these slip just a bit causing alignment issues.

4. I clean the Head Guide Rod rails with Alcohol and use Dri-Slide (a Motorcycle Cable Lubricant) to lubricate
the Rails. It does not attract dirt, and lasts a long time. Any Motorcycle shop should carry it. Works good on
Scanner Rails too!

Larry
 

Attachments

  • P1030878.JPG
    P1030878.JPG
    2.2 MB · Views: 3
  • Tandon-TM-100.png
    Tandon-TM-100.png
    13.8 KB · Views: 3
I already repaired one of the hinges that was broken. I just print new ones too. it works OK now and boots. That's also the one I recapped.

The other drive has a different problem. The motor doesn't start at all. I haven't had any further chance to look at it yet though.

The third drive should work OK and it for my PC.

I'm not too worried about the faulty Kaypro drive as I've been making a new full-height facia that resembles the Kaypro/IBM type front face ( my previous one was for the Osborne, where the slot is 6mm lower ). Then I'll install a Gotek into the Kaypro.

Normally I leave Tantalums alone when I can, but I've had three failures of the orange ones, one after another... One fails, then I fix it, then the next fails... After three sequential failures within minutes of power up, I just decided to replace all the tantalum filter caps.
 
Back
Top