• Please review our updated Terms and Rules here

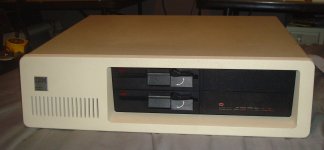
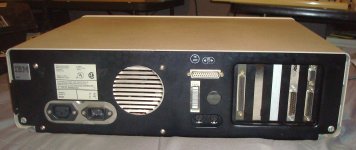
IBM PC 5150 Rev. A S/N: 0126215

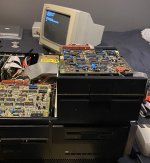
Wow, the original single sided drives was an absolute PAIN IN THE ASS to rebuild! But we got it. It fought me tooth and nail every step of the way.

Here it is after successfully booting PS-DOS 2.1 from a single-sided formatted floppy!
IMG_9436.jpeg

First, the latch mechanism was broken (common on early Tandons). I had a slightly broken TM-100-2A and was able to scavenge the needed parts from that.

Next issue was the stepper motor was almost completely seized, so completely tore the drive and motor apart to re-lubricate it. That obviously misaligned the heads, so I hooked it to my IBM XT and used ImageDisk to realign it.

BUT, at first I was not able to get it aligned at all. It turns out it was a combination of the pressure pad over the head being loose, the track-0 sensor being misadjusted, AND the stepper motor was misaligned as well. With all of that out of wack, it was impossible to align the drive with the adjustment screw alone. I was just about to throw in the towel, but I’m so glad I didn’t.

This success gives me confidence to finally tear apart the original DS drive in my other Rev A 5150, because the stepper motor is VERY stiff on that one, yet somehow the drive still works most of the time (though it sounds awful).

So there you have it, an original single-sided Tandon saved! This drive was manufactured in late 1981 as far as I can tell. I will set it up as the A: drive in this PC, and I will install a DS drive as B: for running programs.
 
Last edited:
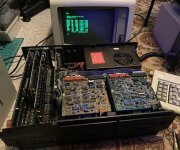
Made lots more progress on the PC!

Just about done now aside from doing some rust removal and paint work on the top cover.

IMG_9444.jpeg
The original single-sided drive is working great. And I installed a spare double-sided Tandon I had. It has an IBM part number, but it doesn’t have the logo, so it’s fitting for this Rev A system.

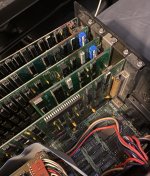
I got the 64KB-256KB memory expansion card it came with working after replacing one bad RAM chip. So now between that, the 64KB memory expansion and the 64KB on the board, it has 384KB total. Very good for a floppy-only machine.

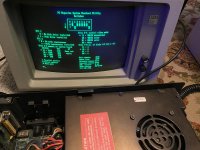
Now here’s something that has me stumped. You see, I thought this machine had been upgraded to the 10/27/82 BIOS, but that’s not actually the version it has.

IMG_9442.jpeg

The BIOS date is 08/16/82! There is an IBM XT BIOS version with that date, but I could not find a single record of a 5150 BIOS dated 08/16/82.

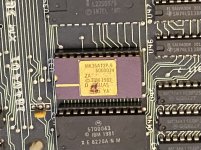
I also took a closer look at the chip, and realized the part number does not match any of the known three 5150 BIOS versions!

IMG_9421.jpeg
The part number is 5000024. And it’s dated 1982. I have never seen another 5150 BIOS chip with a 1982 copyright printed on it. The first two versions are copyrighted 1981, and the final version is copyrighted 1983.

So what’s up with this? Have I stumbled upon something extremely rare here?
 
The BIOS date is 08/16/82! There is an IBM XT BIOS version with that date, but I could not find a single record of a 5150 BIOS dated 08/16/82.

I also took a closer look at the chip, and realized the part number does not match any of the known three 5150 BIOS versions!The part number is 5000024. And it’s dated 1982. I have never seen another 5150 BIOS chip with a 1982 copyright printed on it. The first two versions are copyrighted 1981, and the final version is copyrighted 1983.

So what’s up with this? Have I stumbled upon something extremely rare here?
I added my comments to the dedicated thread that you created about this ROM.
 
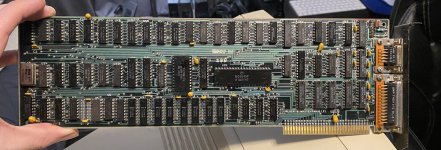
Wow, I thought it was fixed, but the original MDA card started flaking out again and I could NOT figure out what was wrong with it. Pushing on the card with the machine on would make the screen flicker and if there was a bad solder joint, so I ended up resoldering EVERYTHING on the card, which still didn’t fix it! Was still cutting out and half of the time I would get no video at all.

So as a last-ditch effort, I put a ton of flux on the legs of the main controller chip and reflowed it with my heat gun! I figured that would either completely ruin it or fix it, and it actually fixed it! No idea why resoldering with my iron didn’t fix it but the heat gun did, but I’m happy. The card has worked fine ever since and pushing on the card does not make it cut out like it previously did.

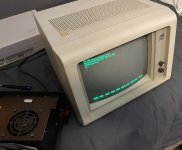
Here’s a pic of the card and of it working after the heat gun treatment.

IMG_9449.jpeg

IMG_9450.jpeg

The way the chassis was dented on the front was actually “squishing” the MDA card into a bent position, so that’s probably what caused the bad connection overtime. It was extremely hard to get the card out on the first disassembly too. Now the case is straightened out and the card can sit in the slot without being flexed so hopefully it won’t have that issue again.

So, functionally, it’s pretty much set now I think. Quite a lot of work was needed, but it’s so worth it to have another working Rev A! I just love these early 5150s. This probably won’t be my last one either… :ROFLMAO:

Next thing to do is to try and get that top cover looking a bit nicer!
 
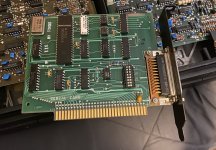
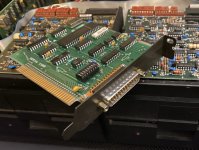
Picked up an expansion card for this PC, it’s an original IBM serial card! It’s the early version with the wider, black slot cover and no jumper for the XT slot 8.

IMG_9477.jpeg
IMG_9478.jpeg
IMG_9479.jpeg

This is great to have since this PC didn’t have a serial port. I haven’t plugged anything into it yet, but I ran a system checkout utility and it does see the serial port, so I’m pretty confident it’s working.

I still haven’t done any work on the top cover. Are there any off-the-shelf spray paints that are close? Most stuff I’m seeing is too warm or too cold. I really want the color to be as close as possible.

Pantone 413 is the exact shade IBM used I believe. I would love to have some matched spray paint made, but I’ll have to look into that and see if there’s any place that can do it for an even remotely reasonable price.
 
Picked up an expansion card for this PC, it’s an original IBM serial card! It’s the early version with the wider, black slot cover and no jumper for the XT slot 8.
And, no U15 shunt block. Before U15, there was J9 and J10, and that is the card you have.

The circuit diagram for your early version is in the AUG81 edition of the IBM 5150 Technical Reference.
 
How is the case cover restoration coming along? With that odd semi flat colour on that textured surface, it will be a challenge.
 
How is the case cover restoration coming along? With that odd semi flat colour on that textured surface, it will be a challenge.
I actually haven't gotten to it yet! The machine is pretty much done otherwise though, so what will be the last step. Now that it's a little warmer here I hope to get to it fairly soon. I don't plan on trying to replicate the textured finish exactly, as that would be impossible with the tools I have. I just want the color to at least be fairly close (which it should be with the paint I found).

I will definitely post updates when I start working on it!
 
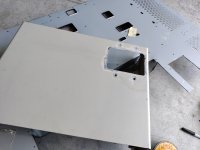
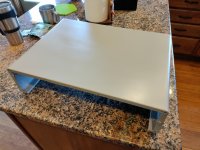
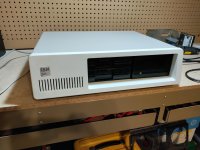
If you haven't already completed the paint restoration, figured I would share what I did. I had an old 5150 case that was empty and rusty so decided to build out one with a modern ATX mobo and GPU. The case had a large hole cut in it for a SATA HD reader so I needed to weld in a patch panel and refinish the case. After welding in the patch, I added body filler to fill in the small imperfections, sanded down the entire case, and then primed everything. In order to get the texture, I used Rust-Oleum Stops Rust Black Textured Spray Paint - 12 oz. I already had the black color from when I painted my 3d printed drive facia but would suggest you get the white or sandstone color since it will be easier to cover with your final paint coat. For the color, I wanted to get something off the shelf as well and found Rust-Oleum Universal All-Purpose Matte Farmhouse Greige Spray Paint - 12 oz. The final color was close to my old case albeit, a bit more grey than I would've liked. I've attached pictures of what the case looked like before and then after the build. Hopefully this helps.

Original case with hole in it.
IMG_20240525_134506.jpg

Case after patching and painting. Note the texture and sheen.
IMG_20240527_103026.jpg

Completed computer. Looks more grey here since I have it under a cool LED light.
IMG_20240527_220455.jpg
 
Sniderman, considering what you started with, it came out pretty good. Looks like you're ready to delve into a classic car restoration as I can't see any sign of the patch panel work. :)
 
@Andrettigto Ha! I don't have the patients for auto body work but thanks for the complement. I was just hoping to show others a way to achieve a factory like finish with affordable off the shelf paint products.
 
Back
Top