• Please review our updated Terms and Rules here

Dumb terminal agetty keyboard layout filter

nerdhouse

Member
Joined
May 11, 2022
Messages
40
Location
WA
I recently acquired an old Heathkit dumb terminal, and I've got it connected to my modern linux machine. I'd like to get the terminal working with the colemak keyboard layout since it's what I use every day. Because the terminal sends ascii codes directly over serial, I don't believe anything like `loadkeys` will work. (If there is a simple solution to changing the layout, I'd love to know.)

My current plan is to filter every byte that is received or transmitted in a simple piece of software. There are also a few command line programs that still use incompatible escape codes (despite `TERM` being set correctly) which I would like to manually filter out as well.

Essentially I'd like to create a program that sits between agetty and the terminal and allows me to filter bytes manually as they are sent or received.

The filtering of bytes is simple enough, but I'm unsure how to create an interface to agetty that can do this. Will I need to create my own device using `mknod`?

(I've also considered using a microcontroller or raspberry pi sitting between the terminal and linux machine to read bytes in and write the new bytes out. This solution would be clunky and I'd like to avoid it if possible.)

Any advice on where to look/read would be extremely helpful.

P.S. I wasn't sure what board to post this question on, so if I've chosen wrong, I'd appreciate if a mod moved the post. Thanks <3
 
The key map in the h19 is a 2 stage encoding. The keyboard controller (U431) maps a key to a unique key code.
That key code is used as the address for the key map rom (U430) that then outputs the ASCII code for that key.
It will take a good bit of reverse engineering to develop the new bit pattern for U430.

joe
 
I was hoping to just do it in software on the linux machine.

It would be extremely cool to replace the rom and have it in colemak regardless of what machine it's connected to though. I don't own an oscilloscope or logic analyzer, so for now reverse engineering isn't an option for me, at least for now.
 
Has anyone made their own keyboard PCB for H19/H89? I'm thinking about doing one for my Z19. I'm not really a fan of the stackpole switches so I would use Cherry MX. Similar to this Atari 800 project. There could be qwerty/dvorak/colemak versions of the PCB.
 
Has anyone made their own keyboard PCB for H19/H89? I'm thinking about doing one for my Z19. I'm not really a fan of the stackpole switches so I would use Cherry MX. Similar to this Atari 800 project. There could be qwerty/dvorak/colemak versions of the PCB.
The switches are pretty crummy, but the keycaps are so nice, it'd be a shame to use generic MX ones. I may try to lubricate the sliders and see if that helps at all, the main issue I have with them is that they are kinda scratchy.

The keys on mine just barely fit into the bezel as is, when I got it a few of the keys on the number pad were rubbing against it, and I had to adjust it. It was a huge pain to get all the keys moving freely.

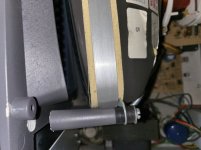
Speaking of the bezel, does anyone know what material the case is made out of? The manual only refers to it as a "stylish molded case," lol, but I don't think it's plastic. Three of the posts that hold the CRT to the front of the case are broken, so I want to epoxy them back in place, but I'm not sure what kind of epoxy to use on the case. I'm sure whatever I used would be fine, but I figured I'd ask anyway.
 

Attachments

  • cracked-post-small.jpg
    cracked-post-small.jpg
    61.4 KB · Views: 5
The Atari project I linked has 3D printed adapters that let you reuse the original stackpole caps with cherry switches.

I'm not sure about the case material.
 
The key map in the h19 is a 2 stage encoding. The keyboard controller (U431) maps a key to a unique key code.
That key code is used as the address for the key map rom (U430) that then outputs the ASCII code for that key.
It will take a good bit of reverse engineering to develop the new bit pattern for U430.

joe

What he said. It may be as simple as burning a new keymap rom.

I was hoping to just do it in software on the linux machine.

It would be extremely cool to replace the rom and have it in colemak regardless of what machine it's connected to though. I don't own an oscilloscope or logic analyzer, so for now reverse engineering isn't an option for me, at least for now.

I suspect that you can probably use named pipes to get some kind of translation program sitting between the serial port and getty. I've never tried something like this though, so I can't offer any concrete advice. Honestly, it may be easier/faster to dump the keymap rom, rearrange it, and burn a new one. With the fifos in the way, getty may not be able to control the serial port as it needs to, watching DCD and all that I mean.

It would probably also be possible to use some kind of $5 atmega32 to sit between the computer and the terminal and translate. One port would probably have to be bit banged, but it's only 9600 baud anyway. You could probably pull the serial level converter ICs in the terminal and plug the uC into the TTL-level side of things to save a chip or two, and then reuse them on the other side to attach to the computer's RS-232 level port, and do it all for the cost of the uC, a couple sockets, and a scrap of protoboard. Although it makes me sad inside to remove parts from old hardware like that.

Personally if it were me I'd go with burning a new keymap rom, though. You might even be able to stack it on top of the old one and bend a couple of the chip enable pins up and put a switch on them to select between the keymap roms without having to pop the top and mess around changing ICs.
 
Personally if it were me I'd go with burning a new keymap rom, though. You might even be able to stack it on top of the old one and bend a couple of the chip enable pins up and put a switch on them to select between the keymap roms without having to pop the top and mess around changing ICs.
I'll do some investigation when I haven time. Luckily the manuals have a ton of good info. I think I have what I'd need to read/write the roms. If all it has are ascii codes for each key, it might be pretty easy to rearrange the bytes for colemak.
 
The key map in the h19 is a 2 stage encoding. The keyboard controller (U431) maps a key to a unique key code.
That key code is used as the address for the key map rom (U430) that then outputs the ASCII code for that key.
It will take a good bit of reverse engineering to develop the new bit pattern for U430.

joe
Okay, I did a bit of digging thru manuals and looking at the main board.

U430 is a Z-80, and
U431 is a quad 2-input positive-NAND Schmitt trigger.

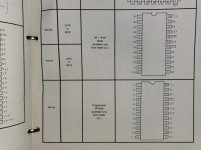
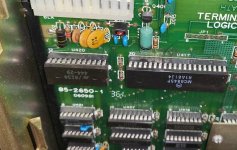
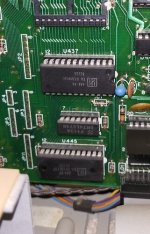
There are three ROMs listed in the manuals, U420 (444-29) and U445 (444-37) which are both "2K x 8-bit ROM"s, and U437 (444-46) which is just listed as "Programmed EPROM".
 

Attachments

  • manual.jpg
    manual.jpg
    67.9 KB · Views: 4
  • u420.jpg
    u420.jpg
    138.7 KB · Views: 4
  • u445-437.jpg
    u445-437.jpg
    63.4 KB · Views: 5
Here's a commented "disassembly" of the keyboard ROM that I did a couple of years ago.
I can't remember why it was okay that the F1 key was represented by a 00H byte.

It looks like handling for the "special" keys is the KAE3 table of the terminal source code.
 

Attachments

  • h19-keyb.asm.txt
    11.9 KB · Views: 5
Okay, I did a bit of digging thru manuals and looking at the main board.

U430 is a Z-80, and
U431 is a quad 2-input positive-NAND Schmitt trigger.

There are three ROMs listed in the manuals, U420 (444-29) and U445 (444-37) which are both "2K x 8-bit ROM"s, and U437 (444-46) which is just listed as "Programmed EPROM".
The manual I downloaded for the h19a is really for the h19. They renumbered the parts in the revision.
Sorry for the confusion.

joe
 
The manual I downloaded for the h19a is really for the h19. They renumbered the parts in the revision.
Sorry for the confusion.

joe
No problem, I'm still not clear what the difference is between the H19 and the H19A anyway.

I really need to scan these manuals, because I don't believe they are online anywhere. It's just going to take me forever on my flatbed though, so I've been putting it off lol. There are some handwritten notes dated to the early 80s in the binder with them which is cute. There's also an ET-4300 Trainer manual in there which may or may not be online.

Here's a commented "disassembly" of the keyboard ROM that I did a couple of years ago.
I can't remember why it was okay that the F1 key was represented by a 00H byte.

It looks like handling for the "special" keys is the KAE3 table of the terminal source code.
Wow this is great. I'll dig through it later tonight. Thanks a bunch!
 
The manual I downloaded for the h19a is really for the h19. They renumbered the parts in the revision.
Sorry for the confusion.
I'm pretty sure I noticed my part numbers being wrong. I had taken out my main board anyhow to check that the tantalums looked okay and were properly over-specced, then never actually put it back. (it's right next to the terminal, not lost.) So yeah, that version probably never got scanned before. I typed a bunch of part numbers into a text file, but I never get around to making a real doc of stuff like that.
 
sorry to resurrect an old thread, but i wanted to post a small update. i finally found time to work on my H19A, since it needed some repairs, and while i had the thing apart i worked on modifying the ROM.

it took a lot of work -- mostly because it's extremely difficult to remove the ROM from the socket without discharging the CRT and disassembling a lot of the terminal -- but i was able to get colemak working perfectly with an updated ROM. I found that a CAT28C16AP EEPROM was a drop in replacement and was easy to program on my TL866 II Plus.

the 8316/2316 ROM which is used in the H19A (and probably the H19/Z19 though i couldn't confirm it) was programmed by Heath/Zenith to be active low (you could apparently choose active high or low when you ordered the ROMs) which is convenient, since the 28C16 has its control lines active low as well.

because of the way the control lines were wired, dropping the new EEPROM in works perfectly. pin 21 (WE on the EEPROM) is tied high which will write protect the EEPROM, and pins 20 and 18 (OE and CE on the EEPROM) are tied together. easy!

i was wiring a small ROM switcher, which would involve only switching pin 20 -- tying it high to disable the rom, but the wiring was too fiddly for my hands so i think i will eventually order a PCB. for now i just have my new updated rom in the H19A, and i'll keep the original QWERTY ROM somewhere safe. if i do order PCBs i will update this thread with the KiCad file.


the character decoding ROM was remarkably simple to hack.

00-7F are the unshifted characters, 80-FF are the control characters, and 100-17F are the shifted characters. there are a bunch of nulls in there for unused parts of the ROM.

in a hex editor it is very simple to just change the ascii alpha-characters to whatever you want for your new layout, then make sure to modify the control characters by adding 0x80 to the letters in the matching spots that you changed in the 00-7F block. that's all you have to do.

attached is my new colemak ROM. (I added .TXT to the end because VCFed wouldn't allow me to upload a .BIN)
 

Attachments

  • COLEMAK.BIN.TXT
    2 KB · Views: 2
Back
Top