danwerner21
Member
- Joined
- Feb 9, 2012
- Messages
- 29
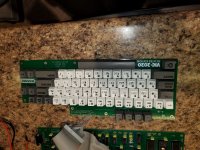
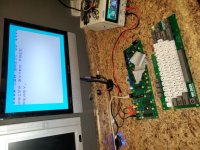
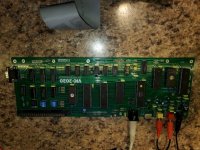
Finally, the VIC-2020 is working well and is far enough along where I can publish all of the project materials. The board works great and has passed all of my initial tests. I really like the Cherry MX keyboard and the custom printed keycaps.
All of the KiCad files, Gerber files and the Keycap art is located at:
https://bitbucket.org/danwerner21/vic2020
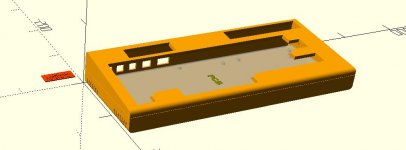
There are some project docs that describe the differences from the original VIC-20 and give some general information on how to build the system. ONE NOTE THOUGH -- the 3d printed case is still a work in progress (and will be for a few more days) do not print the STL files that are in the project as the boards will not quite fit in them yet. Will post again once the case is complete and ready to print.
Enjoy! and please feel free to reach out with any questions.
Dan Werner
(See attached images)
All of the KiCad files, Gerber files and the Keycap art is located at:
https://bitbucket.org/danwerner21/vic2020
There are some project docs that describe the differences from the original VIC-20 and give some general information on how to build the system. ONE NOTE THOUGH -- the 3d printed case is still a work in progress (and will be for a few more days) do not print the STL files that are in the project as the boards will not quite fit in them yet. Will post again once the case is complete and ready to print.
Enjoy! and please feel free to reach out with any questions.
Dan Werner
(See attached images)