• Please review our updated Terms and Rules here

5150 short +12v to ground... need help

The U26 (74LS175) readings:
pin 1: dead
pin 2: dead
pin 3: low
pin 4: dead
pin 5: dead
pin 6: low
pin 7: dead
pin 8: low
pin 9: pulsing (slow steady flashing/beeping on the logic probe)
pin 10: pulsing
pin 11: pulsing
pin 12: pulsing
pin 13: dead
pin 14: low
pin 15: dead
pin 16: dead

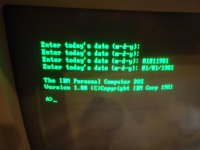
I have previously been advised that pin1 should be high. I am trying to figure out the schematics to probe upstream if necessary. These readings were taken with the Supersoft diagnostic ROM installed. Logic probe powered by +12v from power supply to floppy drive connector.
Have a look at the diagram [here].

Pin 1 of U26 is an inverted reset signal.

At first power on of the PC, the PWR GOOD signal from the PSU is low, indicating that the PSU output voltages have yet to become suitable for use.
In that time (PWR GOOD signal low), the 8284 chip drives its output RESET line high, holding the motherboard in a reset state.
Pin 1 of U26 will be low (driven low by pin 2 of the U51 inverter).

When the PSU drives PWR GOOD high (i.e. output voltages now suitable for use), the 8284 chip drives its output RESET line low, releasing the reset state of the motherboard.
Pin 1 of U26 will be high (driven high by pin 2 of U51).

The above is totally independent of ROM code.

-------------------------------------------------------------------------------

A note about using the logic probe (or oscilloscope proble, whatever). In my experience, particularly with old circuit boards, oxide build-up on pins can cause voltage measuring problems. Many a time, I will have the probe pressed up hard against a pin, thinking, "that is enough force", but it turns that it isn't enough force to 'break through' the oxide layer. More pressure, and of of a sudden, a reading.

Could that be happening with your measurement of pin 1 ?

No, I am using adequate force and it has a fairly sharp tip. I had set this aside and just went back to it after receiving your reply. Oddly enough, I just probed almost every chip on the board and have not measured a single "high" reading except when I measure the +12v line directly. ALL readings are low, or are pulsing low. I measured the caps by the power supply input and I can confirm the +5, the -5, and the -12... but the +12v cap is dead (has a very low reading of only 1.6mv)... and yes, I checked both legs. I think we have found the problem!

EDIT: I am getting +12v at the cap near the power supply connector... sorry... the cap is deep in the board and I must not have been touching the actual bare leg. So i get +12v to the tantalum next to the power supply connector, but not anywhere else on the board.

thanks for the diagram also... makes things so easy for an amateur like me to follow! Time for me to trace the +12v line past the cap.

UPDATE: I also get a "high" reading on the 9th pin of the card slots.
 
Last edited:
OK... so my logic probe may be bad. It reads "low" if I touch ground, and high if I touch +12v. It reads nothing (dead) when I touch +5v.
 
Your logic probe doesn't have a TTL/CMOS switch on it, by chance? You want the TTL setting if so.

It has both settings... I was on CMOS, but it behaves the exact same way in TTL. Mine is reading +12v = high, ground = low, +5v = nothing... This is incorrect, right?
 
Try powering the logic probe with 5v. You are measuring 5v logic.

You are absolutely right!! Now the U26 (74LS175) readings are:
pin 1: high
pin 2: high
pin 3: low
pin 4: high
pin 5: high
pin 6: low
pin 7: high
pin 8: low
pin 9: pulsing (switches between low and high)
pin 10: high pulsing
pin 11: high pulsing
pin 12: high pulsing
pin 13: dead
pin 14: low
pin 15: high
pin 16: high
 
The clock is running it seems. Can you get some more readings?

U3 (8088)
U3 Pin 8 (A8) = ?
U3 Pin 15 (AD1) = ?
U3 Pin 16 (AD0) = ?
U3 Pin 17 (NMI) = ?
U3 Pin 18 (INTR) = ?
U3 Pin 19 (CLK) = ?
U3 Pin 21 (RESET) = ?
U3 Pin 22 (READY) = ?
U3 Pin 23 (-TEST) = ?
U3 Pin 26 (-S0) = ?
U3 Pin 27 (-S1) = ?
U3 Pin 28 (-S2) = ?
U3 Pin 30 (-RQ/-GT) = ?

U7 (LS373)
U7 Pin 12 (A1) = ?

U6 (8288)
U6 Pin 7 (-MEMR) = ?
U6 Pin 8 (-MEMW) = ?
U6 Pin 12 (-IOW) = ? (when powering on)
U6 Pin 13 (-IOR) = ? (when powering on)

U46 (LS138)
U46 Pin 7 (-CS U33) = ?
U46 Pin 9 (-CS U32) = ?
U46 Pin 10 (-CS U31) = ?
U46 Pin 11 (-CS U30) = ?
U46 Pin 12 (-CS U29) = ?
U46 Pin 13 (-CS U28) = ?

U48 (LS138)
U48 Pin 15 (-RAM ADDR SEL) = ?

U64 (LS20)
U64 Pin 6 (-ROM ADDR SEL) = ?

U35 (8237)
U35 Pin 25 (-DACK0) = ?
 
Thanks H-A-L 9000... modem7 actually nailed it in post #13 of this thread "check for bent pins", which I did, but obviously not good enough. When I was reading pins on the processor (to provide the readings that H-A-L requested), I noticed that pin #40 was on a slight outward angle. I pulled the chip and found the lower part of the leg had folded up. I corrected this without breaking the leg off (whew!), and now it boots up! I brought the MB, PSU, speaker, and logic probe to work with me. I do not have a monitor, but I am now getting the SuperSoft beep codes through the speaker.

I apologize for wasting everyone's time. A little more vigilance on my part would have resolved this long ago.

Now it is time for me to learn beep codes... Thank you so much for the help! If it wasn't for everyone's patience and advice, I would have likely given up on this.
 
Last edited:
Woohoo!!!! Success!!! (I hope). With no monitor and relying solely on the Supersoft Diagnostic ROM's beep codes, I have the following "errors":

5-9 Cannot initialize monitor
2-9 Keyboard controller
3-2 Floppy controller
3-3 Floppy disk read

Since there is no keyboard, video card, or floppy controller card attached (just a bare motherboard, PSU, and speaker), there are no errors! I do not see beep codes for bad RAM so there may still be RAM issues.
 
You must be relieved.
So, one failure cause; a tantalum capacitor.
I have added this event to the list at [here] (your fifth appearance there).

I am very pleased and relieved. I have maybe 15 of these 5150's that I am going through and getting them working. I will no doubt have more issues. I am disappointed in myself for not repairing the tantalum without the need to post. I have seen this more than once. I am also disappointed that I failed to see the processor pin 40 not properly seated. It looked good until I really got a close look at it. i should have taken a photo of it before i corrected it. Once again, thank you for your help!

On a side note... I have 5150's or parts of 5150's from the following serial numbers. i have made many observations about approximate manufacture dates and slight differences. I know that does not belong in this thread, but perhaps it would be helpful to someone?
I have studied (most with photos):
0101XXX
0103XXX
0110XXX
0117XXX
0122XXX
0125XXX
0191XXX
0195XXX
0201XXX
and a few more... these are just my oldest. Again, sorry to hi-jack my own thread.
 
Back
Top