• Please review our updated Terms and Rules here

Atari 520ST

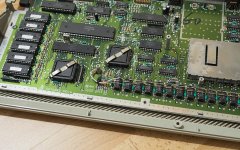
Unfortunately the HDD driver itself sits in RAM, so anything which originally launched from floppy disc and took up 98% of available RAM won't be able to live side by side with the HDD driver in a base machine with only 512K of RAM. As mbliss11 said, 512K titles which have been 'converted' to launch from HDD usually need a little bit more RAM to wallow around in than they originally did.

If you are using a HDD (or device which emulates one) then it will be worth trying TOS 1.4 because the load times from HDD with that TOS are really noticeably faster.

Another good thing about TOS 1.4 vs. TOS 1.0 - The floppy disc format used by the ST (TOS 1.0) was not originally exactly the same as the format used by DOS and the two systems could not initially read from or write to each other's discs, but this was tweaked in later TOSes so that (SD 360K / DD 720K) discs formatted and written to by a PC could be read by an ST and vice-versa.

This makes it very easy to download something for the ST from the internet onto a PC, put a floppy formatted by TOS 1.4 into the PC's floppy drive and save the downloaded material onto the ST formatted floppy for immediate use in the ST.
 
Last edited:
I found the US 1.04 TOS upgrade rom files. I think I am going to burn them to 27c256 eproms and try the upgrade myself to see if it helps with HDD images. I still think I need to do the ram upgrade. What do you guys think about the 4mb RAM "STRIP" that was shown on Adrians digital basement?

IF the previous 4mb ram upgrade still needs the ram removed this is no different and I make it myself to save money.
 
Adrian approved! If I remember from his video he used sockets instead of soldering it directly to the ram slots and I think he had trouble with the keyboard fitting after that
 
Adrian approved! If I remember from his video he used sockets instead of soldering it directly to the ram slots and I think he had trouble with the keyboard fitting after that
Yes the github even states you cant use sockets as the KB wont clear it but I couldnt tell you if they added that because of Adrians video. I think I and going to go this route. I will use hot air to remove the chips (they are all good) and build these boards.
 
I think I am going to burn them to 27c256 eproms and try the upgrade myself to see if it helps with HDD images.

Unfortunately I don't think it will help with the RAM shortage problem but it will decrease the HDD load times quite noticeably - comparatively speaking. Don't expect it to suddenly go like a PC which has just been fitted with an SSD.

I like the look of that upgrade a lot better than the ones which cling perilously to the shifter and MMU. Much neater and more physically robust.
 
Unfortunately I don't think it will help with the RAM shortage problem but it will decrease the HDD load times quite noticeably -
I understand that. I think I am doing it for more native HDD support. The ram is still an issue so I am going with the 4mb bar design I just mentioned. Spending over $100+ for 4mb is not really something I can easily swallow although thier product is quite nice looking.
 
I used 6 27c512's in my 520st to upgrade to 1.04.. Pin 1 in gnd so it uses the upper part of the roms.
(I've still got a few tubes of these left over from the ancient days.)

And as for that ram upgrade... Is your board that exact one??

If not, it might not fit.

There's a different 4mb board available also. I just ordered one for myself a few days ago.

https://www.van-radecke.de/STUFF/tfhh_HW_info.pdf
 
I used 6 27c512's in my 520st to upgrade to 1.04.. Pin 1 in gnd so it uses the upper part of the roms.
(I've still got a few tubes of these left over from the ancient days.)
Is the only reason you used 27c512 eproms because you had them? Rather than 27c256?
 
Yep, we quit carrying them at my work around 20 years ago and they handed me like 20 tubes of them.
I've used them for tons of arcade board repairs, Commodores, Atari 2600 DIY carts, etc.. Really handy to have around, and you can't beat free.
 
Pin 1 in gnd so it uses the upper part of the roms.

Surely that's pin 1 in GND to select the LOWER half of the EPROMs, or pin 1 held high to select the UPPER half of the EPROMS? (That's how I did my dual TOS in 6 x 27C512s).
 
I was assuming low to enable , and that's the high address line. I actually just doubled up each rom and burned so they would work either way.
 
This discussion about the 520ST reminds me that I had one early on. I adopted an OMTI RLL-to-SCSI board to work with the ACSI interface (mostly a matter of inverting the right signals) and ran my 520ST for about a year using the setup. I despised the 520 keyboard--even installed booster springs--didn't help much. But for spits and grins, here's the code I wrote for it almost 40 years ago.
 

Attachments

  • atarihd.zip
    9.5 KB · Views: 0
Spending over $100+ for 4mb is not really something I can easily swallow although their product is quite nice looking.

I know you are a veteran at this game and very capable when it comes to this sort of work but for many people the prospect of trying to desolder a load of RAM ICs from their one antique double sided PCB cleanly and non-destructively would turn them ashen grey. That's why, historically speaking, most of the add-on memory solutions tried to be as plug-in and solder-free as possible.

For those of us who are able to do that sort of work more easily, the replacement memory strip you've got your eye on is a much nicer way to do it.

My STFM has a first-generation memory upgrade in it which adds 2MB to the existing 0.5MB but it is a visual mess with heavy ribbon cables trailing all over the insides of the machine. I may seriously consider replacing it with the one you are considering, if it will fit in my version of the STFM motherboard.

I'll wait for your 'review' of it first, though. :) I have heard a few stories of some apps / games which will not run in 4MB, ironically - something to do with them detecting the size of the available memory incorrectly, possibly. At least one 4MB upgrade that I have seen recently has a couple of pads which you can join / unjoin (with a switch) to select the full 4MB or just 1MB of the memory, perhaps with this issue in mind.
 
My STFM has a first-generation memory upgrade in it which adds 2MB to the existing 0.5MB but it is a visual mess with heavy ribbon cables trailing all over the insides of the machine.
Don't worry, Atari itself didn't do it any better. Look at my 520+ with 1 MB. This is stock from factory, not after-market. :ROFLMAO:
 

Attachments

  • PC140932_web.jpg
    PC140932_web.jpg
    183.3 KB · Views: 14
I know you are a veteran at this game and very capable when it comes to this sort of work but for many people the prospect of trying to desolder a load of RAM ICs from their one antique double sided PCB cleanly and non-destructively would turn them ashen grey.
I tell you what, I have been using hot air to remove ICs lately and its been alot easier. When just alot fo cleaning out the holes is the only tedious part.
 
I have to admit I favour the use of a an electric pump-assisted desoldering iron for that sort of work but it definitely does help to pre-heat the area with a hot air wand so that there are no cold areas nearby to wick away the heat from the desoldering iron bit.

I would be too afraid of burning / overheating areas of the irreplaceable PCB to use only a hot air wand to extract DIP ICs, but everyone has a way that works best for them. Soldering / desoldering is one of those odd skills where different methods work best for different people.

At one time the likes of Weller, Antex and so on - maybe you don't have those brands over there - used to sell a specialised 'block' soldering iron tip which was specifically designed to melt the solder on all of the pins of a 14 / 16 / 18 pin DIP IC at once, but they seem to have gone out of fashion now.
 
I have to admit I favour the use of a an electric pump-assisted desoldering iron for that sort of work

So do I. but You are more likely to get trace damage. And as I mentioned all my ram works so I want to save it.. Heat seems to be faster and work better I find. For components and chips I dont care about, I will use the hakko desolder gun.
 
I can honestly say I've never damaged a track or pad using a 'proper' desoldering iron. Attached, an example of where I desoldered an Atari STe processor socket from a few years ago. This was with an OKI / Metcal desoldering gun. Unfortunately I don't have a picture of the underside but it looked just the same.

But as I said, everyone develops their own favoured way of doing things which works best for them.
 

Attachments

  • CPU_out.JPG
    CPU_out.JPG
    381.4 KB · Views: 2
Proper irons mean very little on a board where the solder was ruined by electrolyte or battery leakage over a long period. It turns to powder and removal of anything becomes a frustrating chore.
 
Back
Top