NeXT
Veteran Member
While it is my belief that next to the Toshiba Satellite series, the Compaq LTE Lite series of laptops were perhaps some of the best of the premium white-label laptops of the early 90's that were NOT built by IBM. Unfortunately it is still a laptop that like many others, requires preventative maintenance not just to keep it running 30 years later but to also prevent it from destroying itself in storage. Disassembly of the laptop likewise does not benefit from time due to the plastics becoming more stiff with time.
1 - Remove the cover for the modem and memory expansion
2 - Remove the main battery
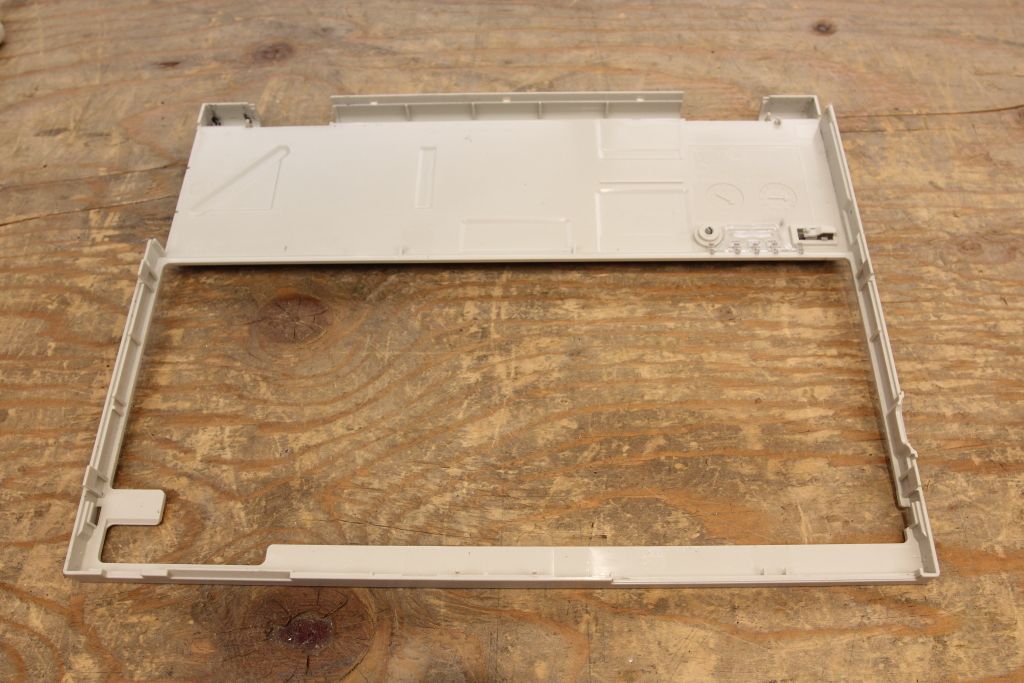
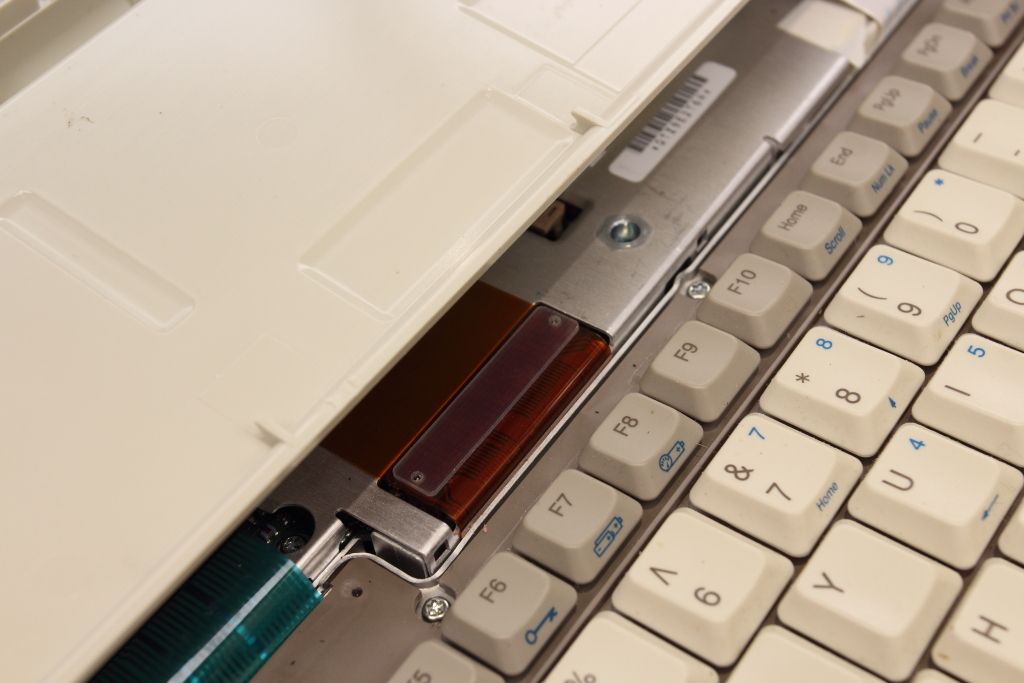
3 - Use a spudger or similar flat tool to reach around and hook the many latches that keep the keyboard bezel and the top of the laptop snapped together. The three clips at the rear between the hinges are typically the easiest to release first.
4 - At some point while releasing the clips you come up against the LCD being in the way. Position the screen flat so it is all the way back and parallel with the main body of the laptop, then the unclipped cover will lift off if you shift it towards you (the front of the laptop). There are tiny little hooks along the top edge of the LCD that slot into the metal cover of the logic board. They will not let you pull straight up.
5 - There are Torx screws around the edge of the keyboard. Remove those and unplug the green/black ribbon cable in the middle of the laptop to remove the keyboard. Pry up slightly on either end of the ribbon cable connector to release the cable BUT DO NOT COMPLETELY REMOVE THE TOP OF THE CONNECTOR.
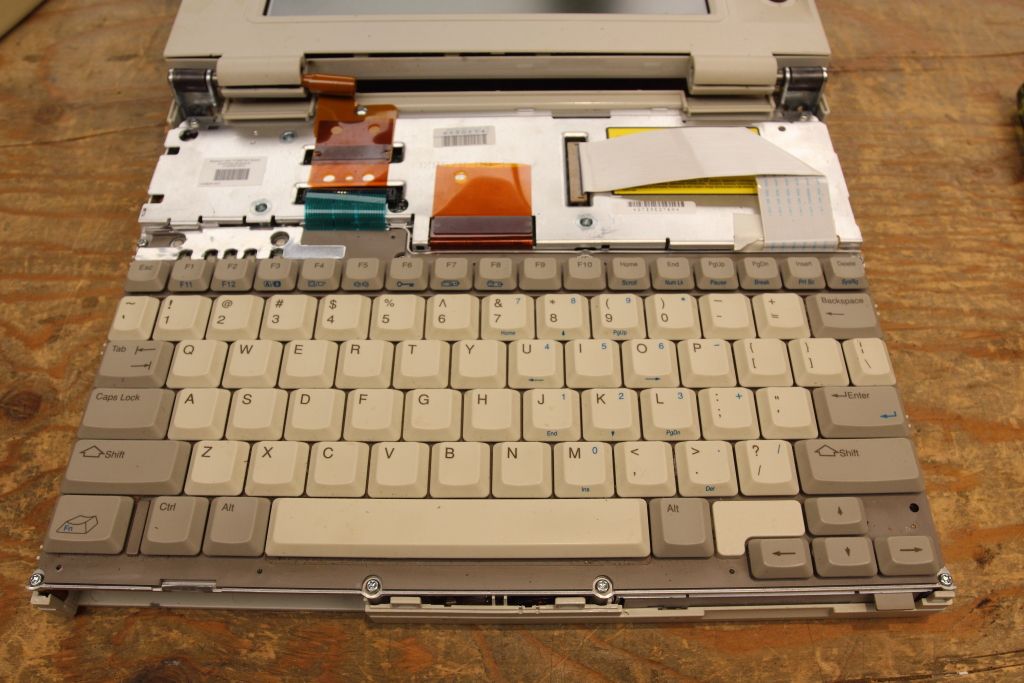
6 - To make your life easier, you can remove the LCD screen by removing the hinge anchor screws (two per side on the back of the laptop, the grounding screws for the ribbon cable (you'll rip the cable if you forget this!) and then work the connector straight up and out.
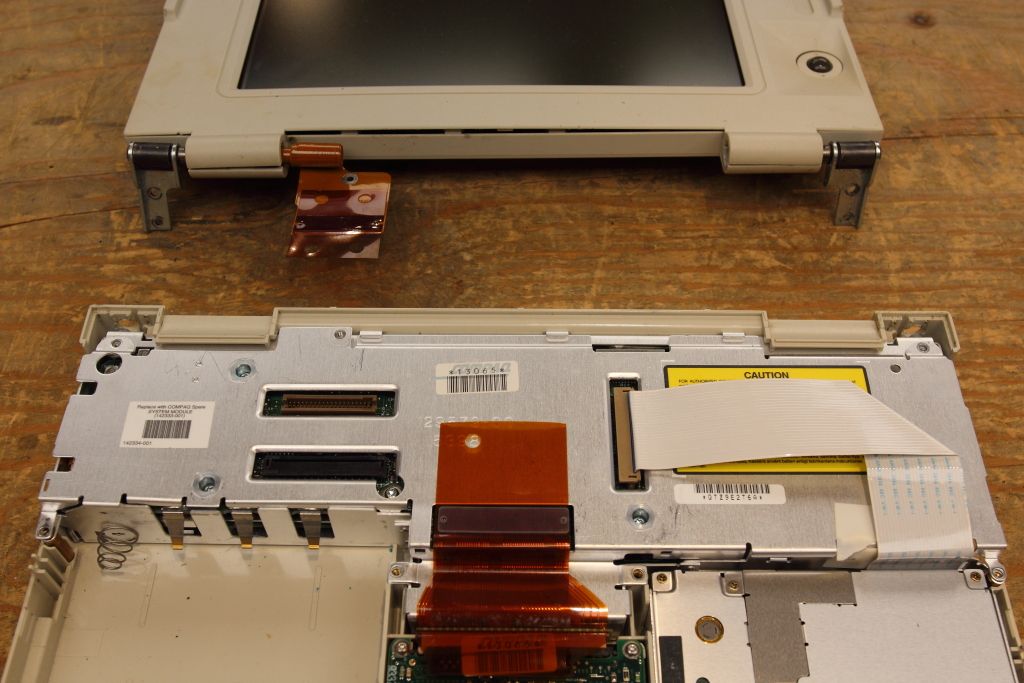
7 - If you are in here to fix possibly broken hinges you can now unsnap the bezel around the LCD in the same fashion and hipe it's just the screws that have worked loose from the plastic anchors on the rear of the screen assembly, otherwise......
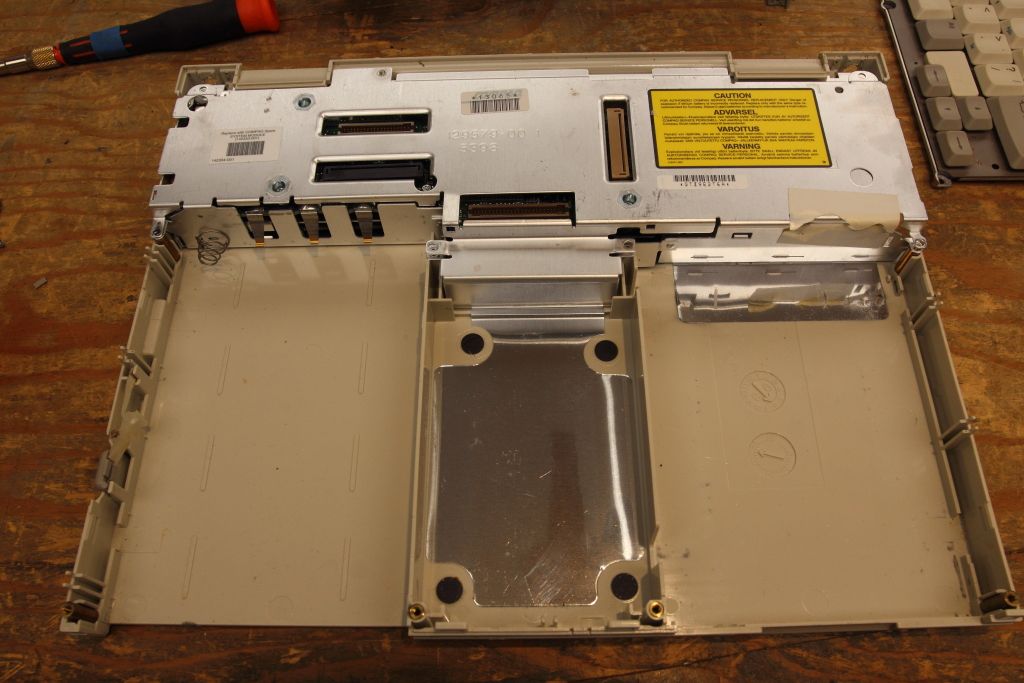
8 - With the keyboard removed you can see the hard drive at the front-middle of the laptop. The ribbon cable above it in the middle of the laptop is the only thing it's connected to. Unplug it and lift the drive cage out.
9 - The floppy drive likewise lifts out once you disconnect the ribbon cable where it connects to the logic board. Carefully pull the light brown bezel of the connector up and then remove the ribbon cable. DO NOT COMPLETELY REMOVE THE LIGHT BROWN BEZEL AS IT COMING COMPLETELY OFF MEANS YOU BROKE THE CONNECTOR.
You should now have the base of the laptop looking like this:
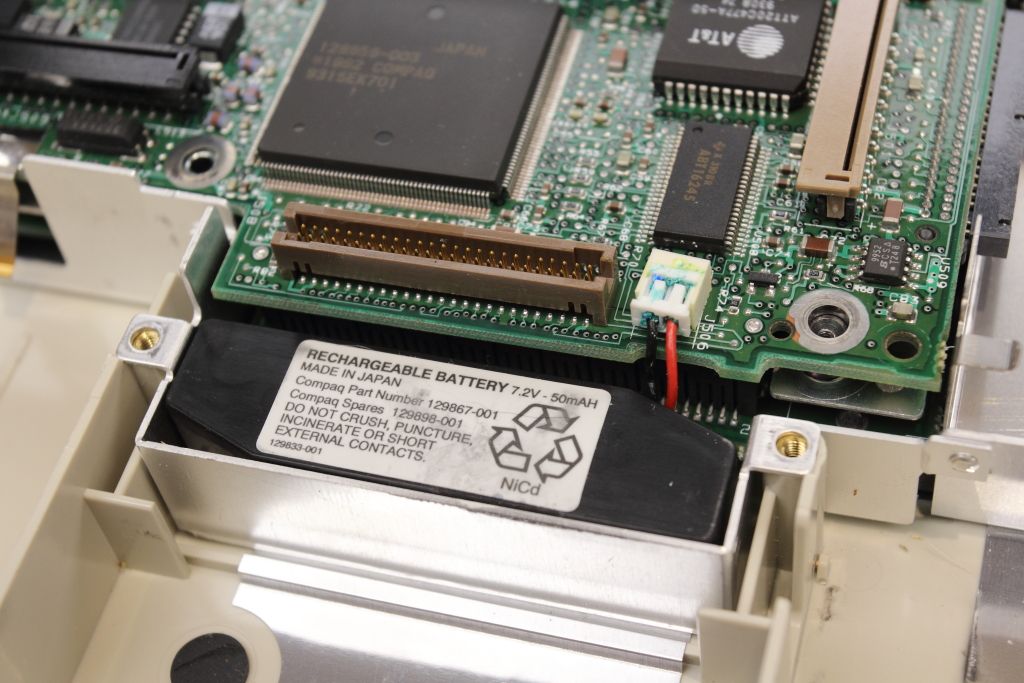
10 - Remove the remaining torx screws keeping the silver cover over the logic board. Once removed you will see a small battery hiding behind the hard drive bay. Unplug it and remove it. Clean the area around the socket if the battery leakage has reached the board.
1 - Remove the cover for the modem and memory expansion
2 - Remove the main battery
3 - Use a spudger or similar flat tool to reach around and hook the many latches that keep the keyboard bezel and the top of the laptop snapped together. The three clips at the rear between the hinges are typically the easiest to release first.
4 - At some point while releasing the clips you come up against the LCD being in the way. Position the screen flat so it is all the way back and parallel with the main body of the laptop, then the unclipped cover will lift off if you shift it towards you (the front of the laptop). There are tiny little hooks along the top edge of the LCD that slot into the metal cover of the logic board. They will not let you pull straight up.
5 - There are Torx screws around the edge of the keyboard. Remove those and unplug the green/black ribbon cable in the middle of the laptop to remove the keyboard. Pry up slightly on either end of the ribbon cable connector to release the cable BUT DO NOT COMPLETELY REMOVE THE TOP OF THE CONNECTOR.
6 - To make your life easier, you can remove the LCD screen by removing the hinge anchor screws (two per side on the back of the laptop, the grounding screws for the ribbon cable (you'll rip the cable if you forget this!) and then work the connector straight up and out.
7 - If you are in here to fix possibly broken hinges you can now unsnap the bezel around the LCD in the same fashion and hipe it's just the screws that have worked loose from the plastic anchors on the rear of the screen assembly, otherwise......
8 - With the keyboard removed you can see the hard drive at the front-middle of the laptop. The ribbon cable above it in the middle of the laptop is the only thing it's connected to. Unplug it and lift the drive cage out.
9 - The floppy drive likewise lifts out once you disconnect the ribbon cable where it connects to the logic board. Carefully pull the light brown bezel of the connector up and then remove the ribbon cable. DO NOT COMPLETELY REMOVE THE LIGHT BROWN BEZEL AS IT COMING COMPLETELY OFF MEANS YOU BROKE THE CONNECTOR.
You should now have the base of the laptop looking like this:
10 - Remove the remaining torx screws keeping the silver cover over the logic board. Once removed you will see a small battery hiding behind the hard drive bay. Unplug it and remove it. Clean the area around the socket if the battery leakage has reached the board.