• Please review our updated Terms and Rules here

Need help getting to 5150 to boot from sd card

jtan2000

Experienced Member
Joined
Jun 8, 2023
Messages
73
Location
Vancouver, BC Canada
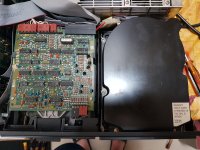
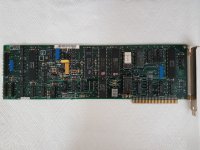
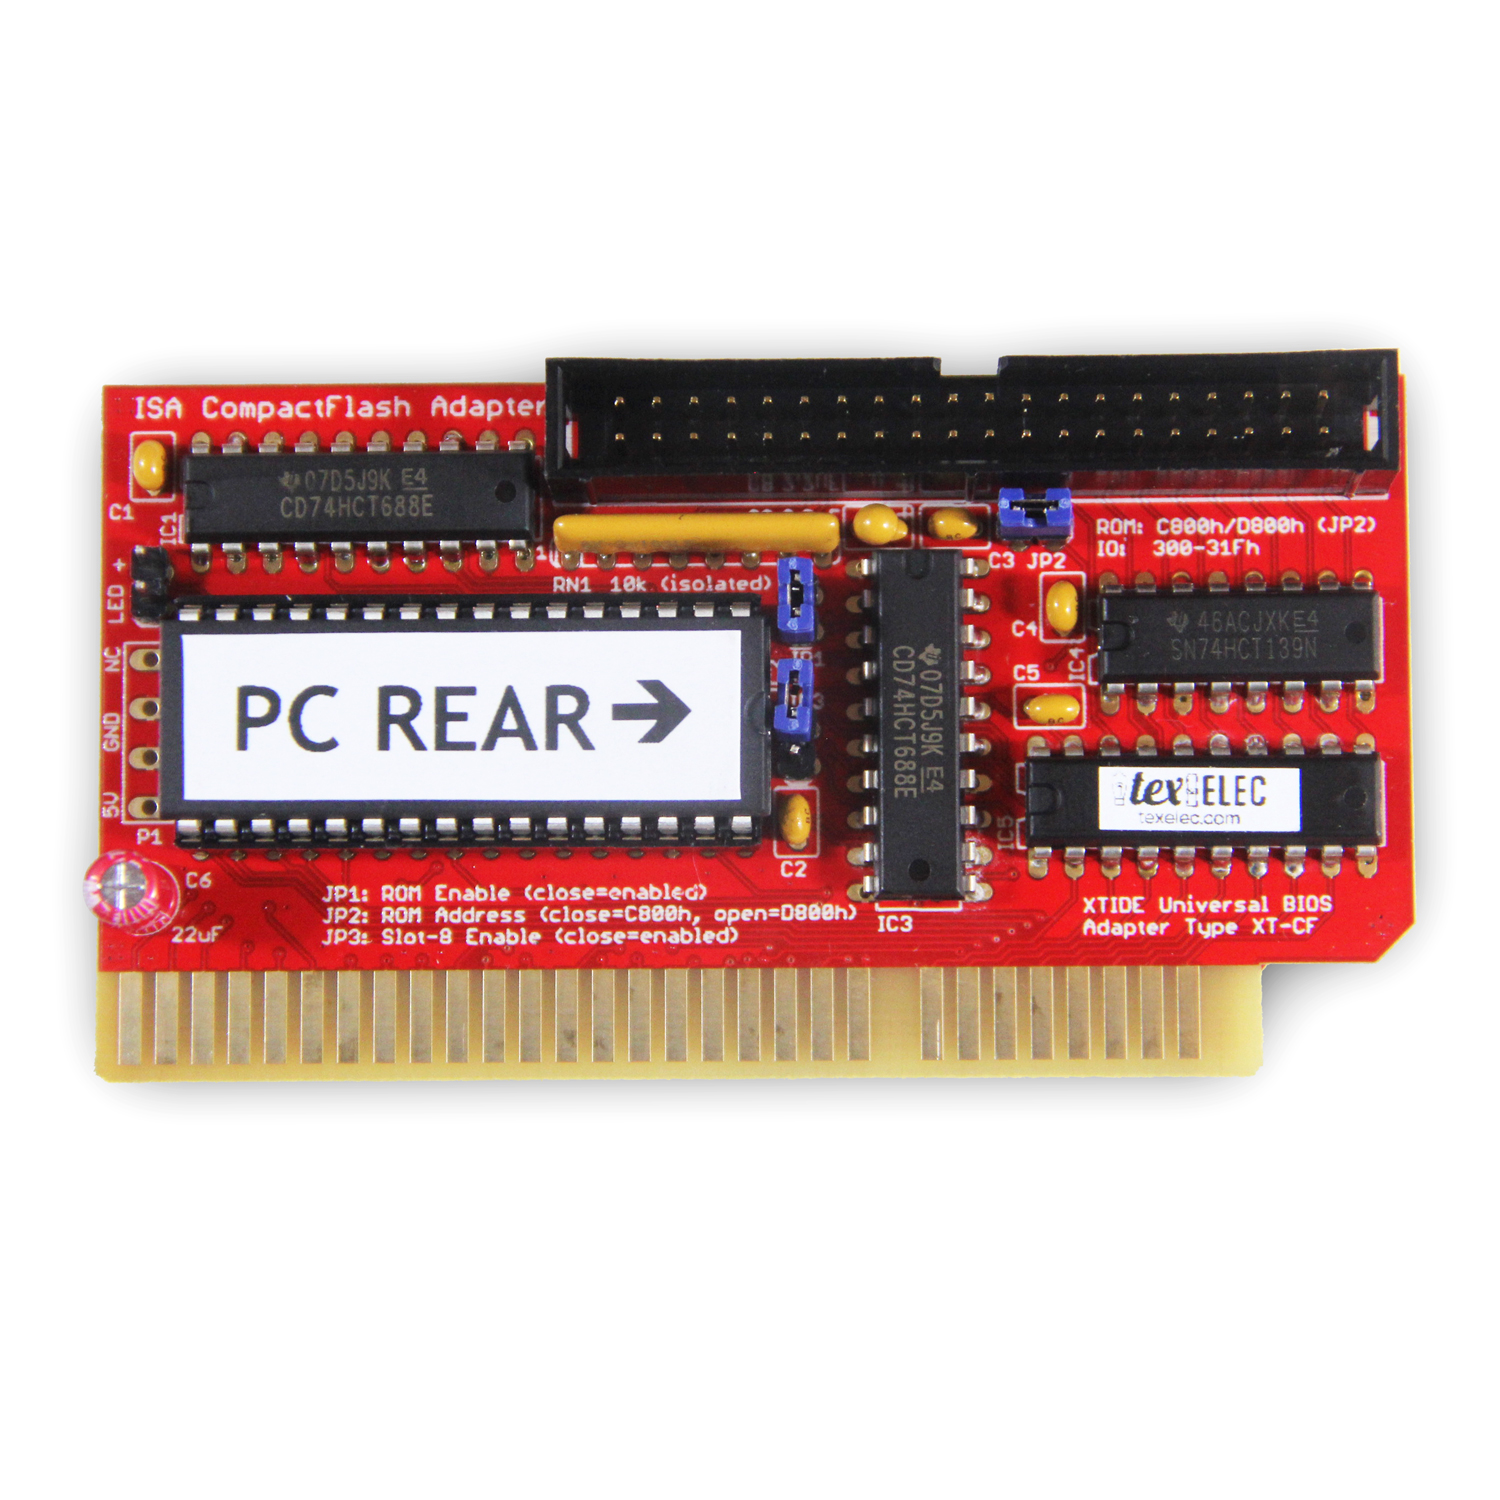
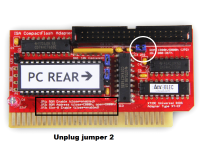
Hi, I have Lo-tech XT-IDE XT ISA to IDE CompactFlash Adapter - IDE for 8-Bit ISA connected to
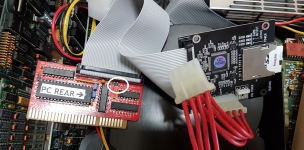
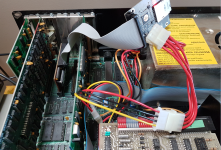
SD Card to 3.5 Inch IDE Adapter, ASHATA SD Memory Card to 3.5" 40Pin Male IDE Hard Disk Drive Adapter Secure Digital Converter
please refer to the attachment picture


I have tried the following first to prepare the SD card in windows 11
- Windows 11 format to Fat32
- SD Card Formatter
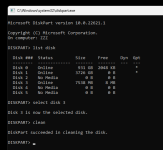
- Use MiniTool Partition Wizard to delete the format of the SD card


On IBM 5150 boot dos 3.30 installer on drive A
FDISK use the whole partition
FORMAT /s/v
COPY DOS 3.30 files to C:\DOS
Remove the floppy

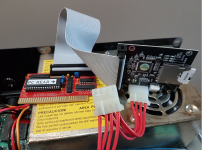
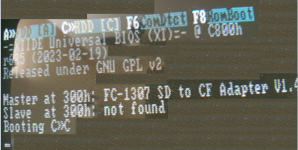
Still unable to boot to C (sd card) please refer to the picture hang at Booting C>>C

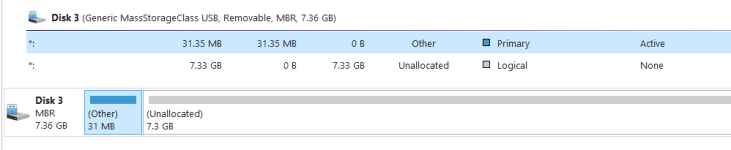
The last picture show the partition structure after the DOS 3.30 is installed.

Please help how to format or partition the SD card and Thank you.
 

Attachments

  • 1.png
    1.png
    1.6 MB · Views: 7
  • 2.png
    2.png
    1.6 MB · Views: 8
  • 3.png
    3.png
    1.2 MB · Views: 8
  • 4.png
    4.png
    73.8 KB · Views: 7
  • 5.png
    5.png
    10.2 KB · Views: 6
Try MS-DOS 5. I have pretty much the same setup and also never got 3.30 to boot.

Also, do not format the SD card on a Windows system. Use diskpart to issue the "clean" command to it. Do not do anything else, ignore Windows telling you that the drive has to be formatted.
 
Try MS-DOS 5. I have pretty much the same setup and also never got 3.30 to boot.

Also, do not format the SD card on a Windows system. Use diskpart to issue the "clean" command to it. Do not do anything else, ignore Windows telling you that the drive has to be formatted.

Thank you Timo for your reply.

Also I am bit rusty on DISKPART please guide what do I do after clean ?

Plug the SD card on 5150 and FDISK. Do I need to partition it 1 primary 2gb , extended partition of 2, 2, and the remaining space ? Please guide me a little bit more in DOS FDisk.

Thank you.
 

Attachments

  • 1.png
    1.png
    17.6 KB · Views: 7
Create a primary partition of 2 GB and then create an extended partition of 6 GB; then, in the extended partition, create 3 logical drives of 2 GB each.
 
On 5150 PC still working on that.

I got it to boot to Dos 6.22 in SD card in 5160 XT with the MFM harddrive card unplugged.

How do I get it to boot on SD card with the MFM harddrive as slave so I can transfer files to SD card ?


When boot are connected to the motherboard
I got error message during booting

C8000 ROM
Error Resume = F1
when I press F1 it goes to basic and does not boot in SD card or the MFM harddrive
 

Attachments

  • 20230804_173414.jpg
    20230804_173414.jpg
    5 MB · Views: 9
  • 2.png
    2.png
    1.6 MB · Views: 9
  • 20230804_174420.jpg
    20230804_174420.jpg
    5 MB · Views: 9
How large is the MFM hard drive? Maybe just backing up the files to floppy and then reinstalling them to the IDE would be quicker than trying to figure out how to have two hard drive controllers.
 
It looks like JP2 will let you set to D800 instead of C800:

 
An IBM MFM harddisk controller should have the address C000 and there is no address conflict. Is the MFM drive bootable (can you boot without the Compact Flash)? The Compact Flash becomes drive D and the harddrive is drive C. Default behavior is to try to boot drive C. You can swap C and D by typing D when you see the line with A and C and some other text.
 
How large is the MFM hard drive? Maybe just backing up the files to floppy and then reinstalling them to the IDE would be quicker than trying to figure out how to have two hard drive controllers.

10 meg and yes I can use the floppy to backup but I am seeking for the knowledge how to have MFM harddrive and sd card both working at the same time.
 
Last edited:
An IBM MFM harddisk controller should have the address C000 and there is no address conflict. Is the MFM drive bootable (can you boot without the Compact Flash)? The Compact Flash becomes drive D and the harddrive is drive C. Default behavior is to try to boot drive C. You can swap C and D by typing D when you see the line with A and C and some other text.

Without the SD card, the MFM 10 meg harddrive is bootable.
And for the SD card to be able to boot, I need to unplug the power of the MFM harddrive and pull out the harddrive controller card.
 
In the configuration that I just wrote of (IBM card at C8000, Lo-tech card at D8000), use of both drives is possible.

By default, the MFM drive will be booted from. Result: MFM=C:, SD=D:

To instead, boot from the SD card, press the D key when the XUB's splash screen appears. The SD card will be booted from. Result: SD=C:, MFM=D:
 
It looks like JP2 will let you set to D800 instead of C800:


Thank you @jafir it works ! C drive is the MFN harddrive , D drive is the SD card
 

Attachments

  • 1.png
    1.png
    1.5 MB · Views: 5
  • 2.png
    2.png
    582.6 KB · Views: 5
  • 3.png
    3.png
    1.2 MB · Views: 5
Last edited:
In the configuration that I just wrote of (IBM card at C8000, Lo-tech card at D8000), use of both drives is possible.

By default, the MFM drive will be booted from. Result: MFM=C:, SD=D:

To instead, boot from the SD card, press the D key when the XUB's splash screen appears. The SD card will be booted from. Result: SD=C:, MFM=D:

Thank you @modem7.

I learn something new "To instead, boot from the SD card, press the D key when the XUB's splash screen appears. The SD card will be booted from. Result: SD=C:, MFM=D:" :)
 
Last edited:
I learn something new "To instead, boot from the SD card, press the D key when the XUB's splash screen appears. The SD card will be booted from. Result: SD=C:, MFM=D:" :)
But Old Bill Bailey gets the points (see post #11). :)

If you want the SD card to be the default boot drive, reconfigure the XUB: change the 'Default boot drive' setting from 80 to to 81.

And related to booting, is the entry at [here] that starts with, "Before I added the XT-IDE card to my computer, if I had put a floppy in drive A: shortly ...".
 
Back
Top