NeXT
Veteran Member
I've wanted a paper tape reader for my machines for years. No joke. Even way back in highschool I was in the machine shop trying to mill parts for a reader but I never managed to build a working unit. Really if you are a sensible person you can buy a reader but get ready to dig deep. In some cases you better be prepared to pay $100 just for part of the optic block. Googling around you will find quite a few hobbyist grade readers and there's a lot of old articles from back in the early microcomputer era before the floppy disk became standard but you will be hard pressed to find proper schematics or diagrams. Eventually I got fed up and decided it was time to try again and build one from scratch.
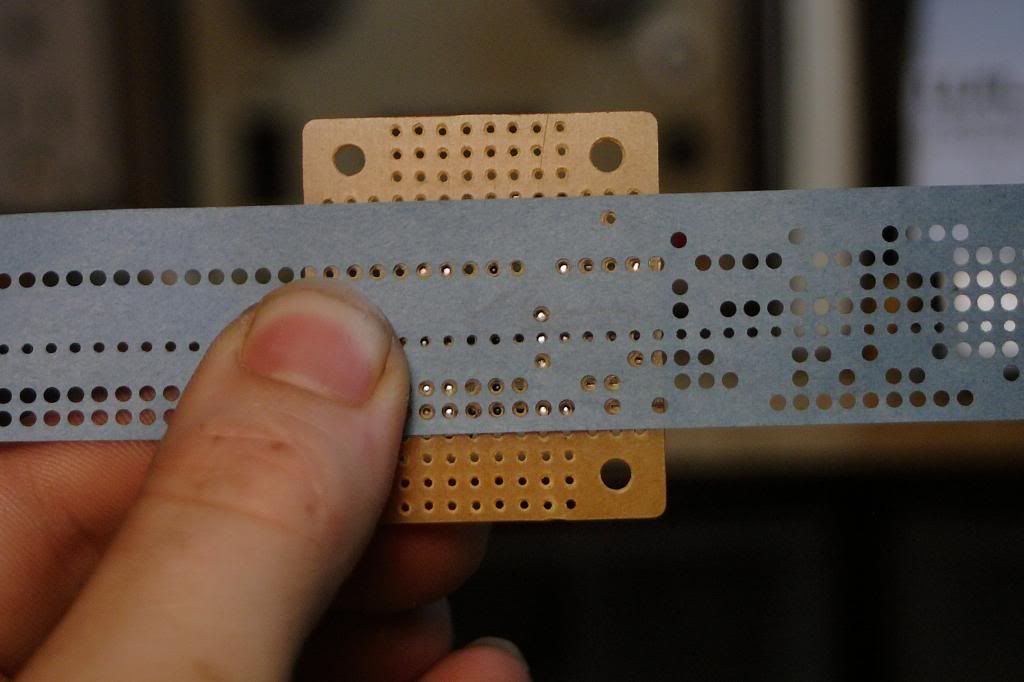
Now I do already own an ASR33 so why do I need another reader? Well in reality a teletype's reader isn't the most elegant. Loading 8K Altair BASIC can take anywhere between 6-8 minutes and you can't go faster because the reader is locked at about 10 characters per second. Newer readers are optical devices and can technically read as fast as you can feed the tape through. They are also far easier to build. My optic block (the component of a paper tape reader which aligns the tape with the nine pickup phototransistors) I conveniently discovered could be assembled from two small squares of perfboard. The hole spacing of perfboard is perfect for using as channels for light to pass through the tape. Sandwiched between the PCB's is two sheets of thin plastic to help prevent jamming and paper guides which also serve to keep the tape from shifting too far from the left or right. A set of bolts then hold the whole thing together.
>>IMAGE<<
For the whole conversion of light to electrical signals I used some "ebay special" NPN IR phototransistors. Normally you can't place them side by side as they are too bulky however you can grind either side away until they sit next to eachother. Again, I'm using the holes in the perfboard so when it came to soldering down the phototransistors they all sat over a hole. Once you have them in place and the block bolted together you're pretty much done the hard part. From then on you don't need to worry about critical alignments.
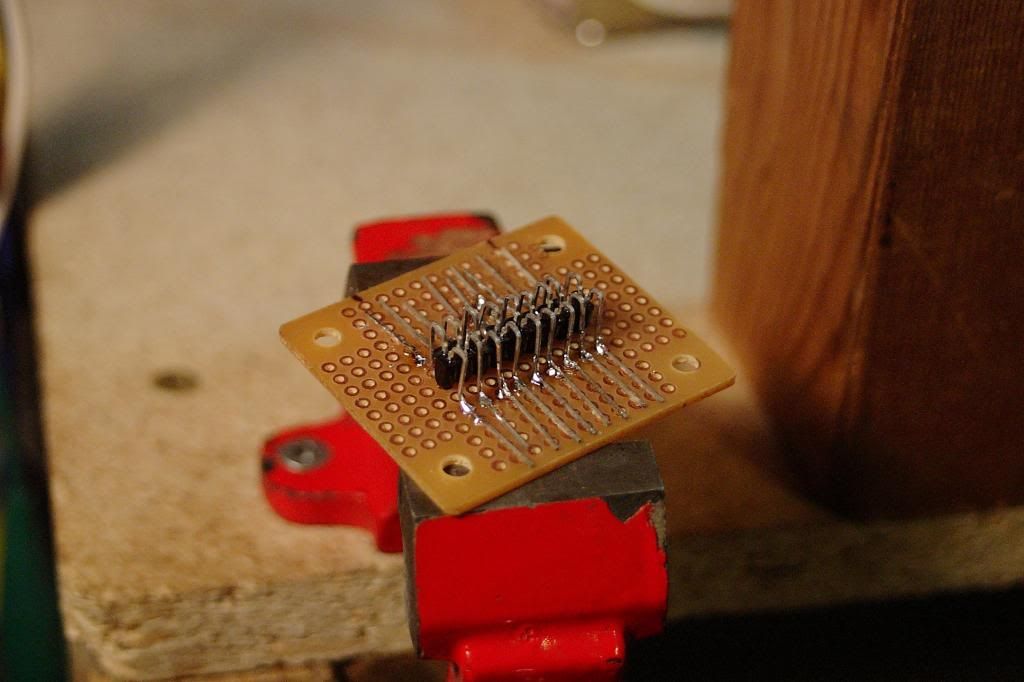
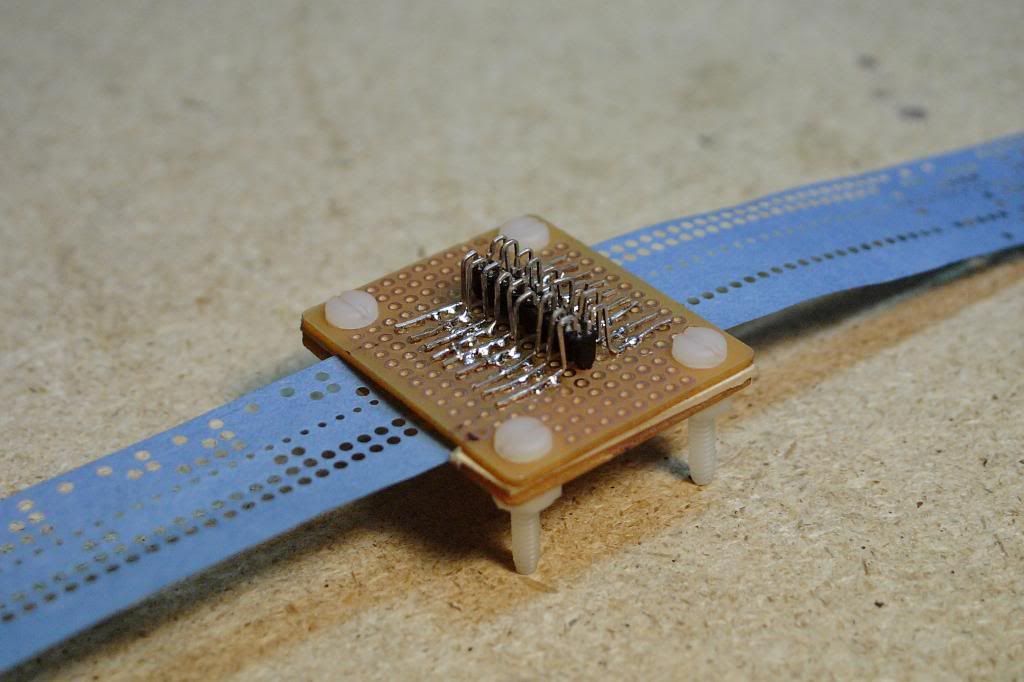
The light source needs to be something with a strong IR output in this case because of the phototransistors used. Originally I planned to use regular LED's however they were not bright enough. Plan B was to use a filament bulb but that produced too much IR light. Eventually a perfect combination was found by using nine IR LED's. Again, the sides had to be ground to make them fit.
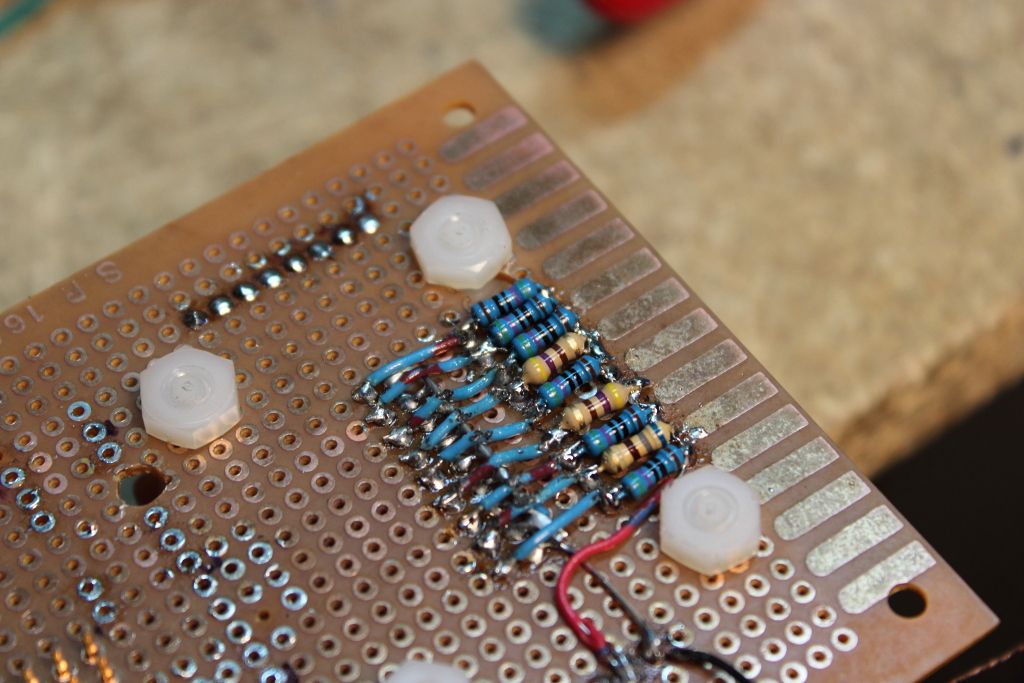
At this point I was noticing that sometimes certain logic levels would stick high depending on weather or not the neighboring photoransistors were high as well. It was found using a camera with Nightshot that the PCB's in the optic block were diffusing light. A quick fix was made by replacing the previously mentioned thin plastic strips with black plastic as to block any light from travelling into the PCB. After the LED's were done we could secure down the optic block and start soldering in the wiring that brought the data channels down to the main PCB and power to the nine pullup resistors so we could now begin to attach the logic analyzer.

>>IMAGE<<
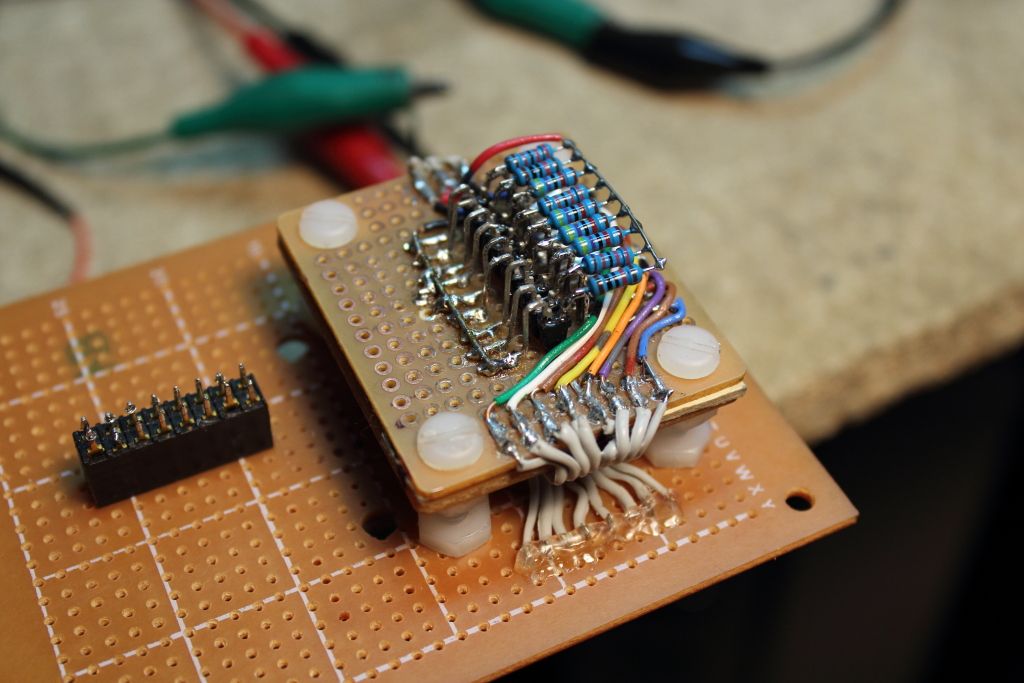
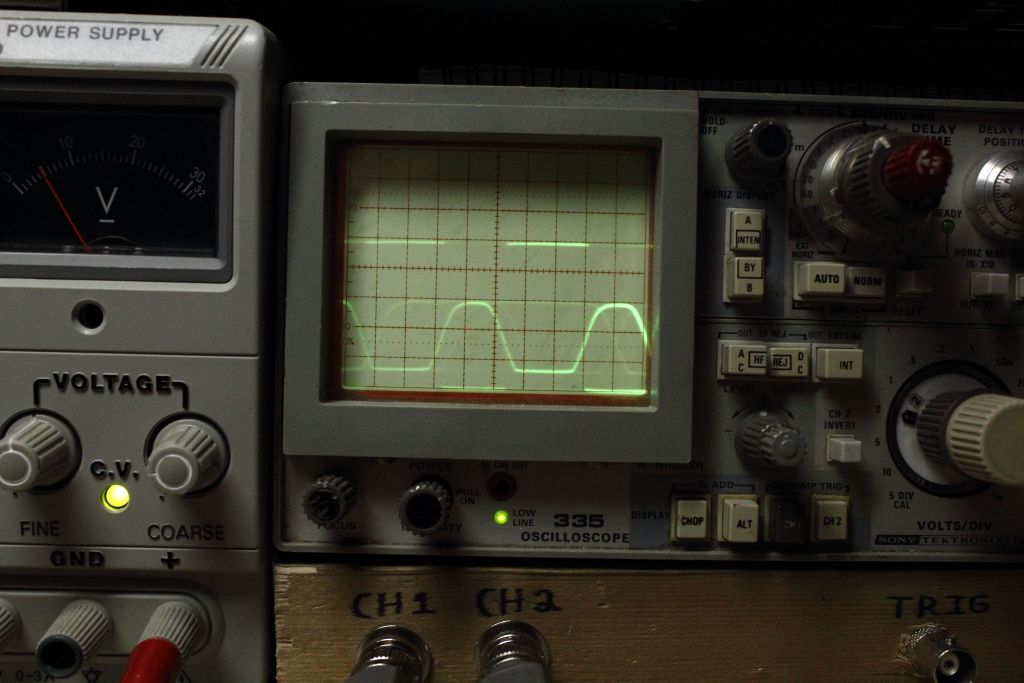
The logic analyzer would help me better fine tune the phototransistors so that if there were any errors I could prevent them before the 4093's conditioned them. It pretty much became several hours of picking resistor values and playing with them under varying light conditions until I could pull a paper tape through and there would be no errors. I learned of one weird quirk in the process: even though direction shouldn't matter, if I pulled tapes in reverse it was impossible to get an accurate read however you could live with pulling one way and once tuning was finished the eight data channels were passed through two 4093 Schmitt Triggers which conditioned the signals to proper 5V TTL. A 2N3904 is used for the ninth hole which is used for timing in the next step because both my Schmitt Triggers were quads.

>>IMAGE<<
>>IMAGE<<
>>IMAGE<<
Now you have taken the optical hole/no-hole from the paper tape and converted it to logical 1's and 0's, We can now feed all nine channels into a microcontroller of choice. Originally I planned to use a PIC16 but after attending an Arduino workshop I switched to the Pro Mini because they were cheaper and easier to program. If you've looked at the paper tape photo above you will notice the fourth hole is smaller than the rest. Normally this hole is used for a feed sprocket however in optical readers because this hole is ALWAYS centered with the other eight holes you are guaranteed a good data capture if hole 4 pulls a high signal. In this case here the microcontroller waits until this timing line (hole 4) goes high, then it looks at the eight data channels and compares to its own ASCII table (EG: Input 01000001 is the letter A). If it matches a binary string it then transmits it through a MAX232 and finally out to the computer. Rinse and repeat. There's just enough space on my Main PCB for both the MAX232 and the microcontroller.

>>IMAGE<<
The output can be fixed to any specific baud rate and in my case it's at 9600 bps. That's enough that I won't overflow the serial channel, nor will it be painfully slow. It's possible that I can change the baud rate with a jumper but I've yet to learn how exactly that would be programmed so we'll leave that for another day. When I want to reprogram it the same four pin header that powers it and connects it to the host also holds an Rx pin so I can talk to it. In the end I decided while this makes a very nice and portable reader I decided the best home would be in my DEC LA-120 hard copy terminal. It has an option knockout on one side and you could easily build it into the overall terminal by taking the Tx line from the reader and tapping into the TxD line on the terminal's serial port. That way so long as you were in 9600 baud mode if you wanted to read in a paper tape you threaded it through the optic block, set the computer to capture through the serial port and then pulled the tape through.

Yeah, it isn't yet wired up in that photograph but you get the idea.
Now I do already own an ASR33 so why do I need another reader? Well in reality a teletype's reader isn't the most elegant. Loading 8K Altair BASIC can take anywhere between 6-8 minutes and you can't go faster because the reader is locked at about 10 characters per second. Newer readers are optical devices and can technically read as fast as you can feed the tape through. They are also far easier to build. My optic block (the component of a paper tape reader which aligns the tape with the nine pickup phototransistors) I conveniently discovered could be assembled from two small squares of perfboard. The hole spacing of perfboard is perfect for using as channels for light to pass through the tape. Sandwiched between the PCB's is two sheets of thin plastic to help prevent jamming and paper guides which also serve to keep the tape from shifting too far from the left or right. A set of bolts then hold the whole thing together.

>>IMAGE<<
For the whole conversion of light to electrical signals I used some "ebay special" NPN IR phototransistors. Normally you can't place them side by side as they are too bulky however you can grind either side away until they sit next to eachother. Again, I'm using the holes in the perfboard so when it came to soldering down the phototransistors they all sat over a hole. Once you have them in place and the block bolted together you're pretty much done the hard part. From then on you don't need to worry about critical alignments.


The light source needs to be something with a strong IR output in this case because of the phototransistors used. Originally I planned to use regular LED's however they were not bright enough. Plan B was to use a filament bulb but that produced too much IR light. Eventually a perfect combination was found by using nine IR LED's. Again, the sides had to be ground to make them fit.
At this point I was noticing that sometimes certain logic levels would stick high depending on weather or not the neighboring photoransistors were high as well. It was found using a camera with Nightshot that the PCB's in the optic block were diffusing light. A quick fix was made by replacing the previously mentioned thin plastic strips with black plastic as to block any light from travelling into the PCB. After the LED's were done we could secure down the optic block and start soldering in the wiring that brought the data channels down to the main PCB and power to the nine pullup resistors so we could now begin to attach the logic analyzer.


>>IMAGE<<

The logic analyzer would help me better fine tune the phototransistors so that if there were any errors I could prevent them before the 4093's conditioned them. It pretty much became several hours of picking resistor values and playing with them under varying light conditions until I could pull a paper tape through and there would be no errors. I learned of one weird quirk in the process: even though direction shouldn't matter, if I pulled tapes in reverse it was impossible to get an accurate read however you could live with pulling one way and once tuning was finished the eight data channels were passed through two 4093 Schmitt Triggers which conditioned the signals to proper 5V TTL. A 2N3904 is used for the ninth hole which is used for timing in the next step because both my Schmitt Triggers were quads.

>>IMAGE<<
>>IMAGE<<

>>IMAGE<<
Now you have taken the optical hole/no-hole from the paper tape and converted it to logical 1's and 0's, We can now feed all nine channels into a microcontroller of choice. Originally I planned to use a PIC16 but after attending an Arduino workshop I switched to the Pro Mini because they were cheaper and easier to program. If you've looked at the paper tape photo above you will notice the fourth hole is smaller than the rest. Normally this hole is used for a feed sprocket however in optical readers because this hole is ALWAYS centered with the other eight holes you are guaranteed a good data capture if hole 4 pulls a high signal. In this case here the microcontroller waits until this timing line (hole 4) goes high, then it looks at the eight data channels and compares to its own ASCII table (EG: Input 01000001 is the letter A). If it matches a binary string it then transmits it through a MAX232 and finally out to the computer. Rinse and repeat. There's just enough space on my Main PCB for both the MAX232 and the microcontroller.

>>IMAGE<<
The output can be fixed to any specific baud rate and in my case it's at 9600 bps. That's enough that I won't overflow the serial channel, nor will it be painfully slow. It's possible that I can change the baud rate with a jumper but I've yet to learn how exactly that would be programmed so we'll leave that for another day. When I want to reprogram it the same four pin header that powers it and connects it to the host also holds an Rx pin so I can talk to it. In the end I decided while this makes a very nice and portable reader I decided the best home would be in my DEC LA-120 hard copy terminal. It has an option knockout on one side and you could easily build it into the overall terminal by taking the Tx line from the reader and tapping into the TxD line on the terminal's serial port. That way so long as you were in 9600 baud mode if you wanted to read in a paper tape you threaded it through the optic block, set the computer to capture through the serial port and then pulled the tape through.

Yeah, it isn't yet wired up in that photograph but you get the idea.
