• Please review our updated Terms and Rules here

Tektronix 4050 Vector Graphics computers - need a game controller!

nikola-wan

Veteran Member
Joined
Mar 7, 2018
Messages
1,304
Location
Texas, USA
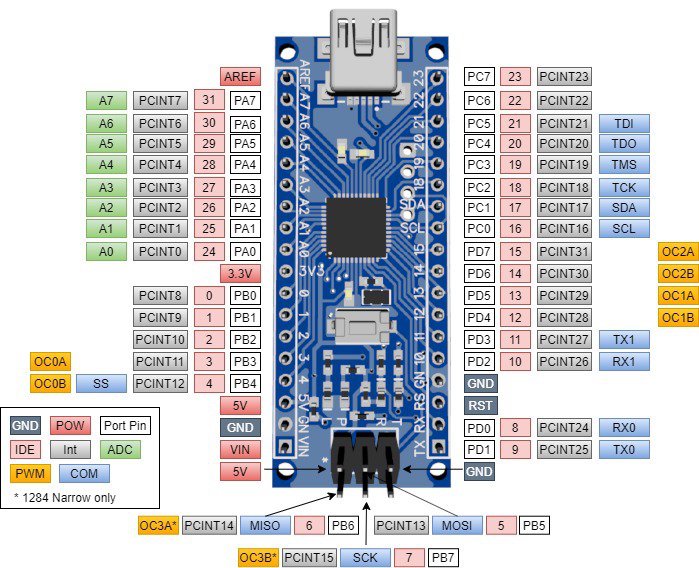
My concept for a Tektronix 4050 gamepad interface is to use an Arduino with two 10-bit ADC to digitize an analog joystick and four I/O pins for four switches. The gamepad I have in mind is the Vectrex game controller which has an analog joystick and four buttons and uses a DB-9 connector.

For the interface to the 4050 computer - I would like to use Jos Dreesen's 4052/4054 Multifunction ROM Pack which has a socket for the Motorola MC6250 ACIA (UART). We can develop a circuit board with an Arduino that plugs into the MFM 6250 socket and supports one DB-9 connector. The Arduino board should support 5V directly so we don't need level shifters to connect to the 8-bit data interface and register control signals of the 6250 socket.

The BASIC game program would use one input command to poll the one X/Y joystick and 4 buttons and return X,Y,A,B,C,D as integers (which would be converted by BASIC into 'normal' floating point variables.

INPUT @41:X,Y,A,B,C,D

The game program would then be able to use the gamepad data without further data conversion.

1691889037104.png

Here is the schematic of the Vectrex game controller:

1691889082852.png

The Vectrex hand control uses +5V and -5V on the joystick, and the Vectrex CPU uses an 8-bit DAC to do successive approximation in software to find the 8-bit DAC value of the X and Y pot positions. The X value should be zero for center, negative for left and positive for right. The Y value should be zero for center, negative for down and positive for up. But I haven’t measured these values – they should be checked.

Since the potentiometer for X and Y is 10K and it is in series with two 4.7K resistors, it looks like the min voltage would be 25% of Vin, the center voltage would be 50% of Vin, and the max voltage would be 75% of Vin. I think we would have the Arduino (or op-amp?) double the ADC value by 2x in both directions around 0 to get the full 10-bit resolution (2.5V if we connect the -5V pin to analog ground and connect +5V to the +5V pin).

My concept is to try to use @jdreesen Tektronix 4052 Multifunction ROM Pack - RS232 Printer interface. Remove the Motorola MC6850 ACIA IC and all the support logic and either design a board that plugs into the MC6850 connector or design a new version of the MFM that adds an Arduino that would interface a Vectrex game controller to the Tektronix 4052/4054 computers.

If we could modify the 4052 Printer RS-232 ROM to add INPUT capability - then I envision a single BASIC INPUT @51:X,Y,A,B,C,D statement would return the X and Y integer values and the four switch binary values to the computer.

The Arduino would wait for the READ signal to the data register and then ADC the X and Y potentiometer positions and scan the four buttons and return the integer values to the computer.

Likely I will need help from Jos on this project. :biggrin:
 
We can talk about a new MFM version end of September, that is if AK's bears dont get me first !...

Relying on a 4054 does limit the audience though...
 
We can talk about a new MFM version end of September, that is if AK's bears dont get me first !...

Relying on a 4054 does limit the audience though...
The game controller would work for all 4052/4054 computers with the MFM+Game interface option :biggrin:
 
We can talk about a new MFM version end of September, that is if AK's bears dont get me first !...

Relying on a 4054 does limit the audience though...
If we made the game interface use the backpack COMM serial - then it would work with all the Tektronix 4050 computers. It would need a baud rate switch to provide 2400 baud for the 4051 and 9600 baud for the 4052/4054. But I think it would also need to use a USB interface to attach a PC USB joystick like this:

71se60rnXTL._SL1500_.jpg
 
I have been refactoring my Cylon Attack game by moving the object data from DATA statements to a separate binary file. This also included converting R12 explosion object from absolute X/Y vectors to relative X/Y vectors. I also used a Tekniques programming tip to create a numeric array for each vector object which simplifies each Option 30 vector object initialization to three BASIC statements:

Code:
300 FOR I=1 TO 120
310 RDRAW @32,E(1,I):E(2,I),E(3,I)
320 NEXT I

In the example above, E is the explosion object and is DIMensioned to E(3,120). E(1,I) contains the RMOVE (21) or RDRAW (20) secondary address.
This allows the RDRAW @32 (primary address 32 is the 4050 display) to either perform an RMOVE or RDRAW operation with a single command.

The result of the refactoring also gave me the opportunity of adding a second Cylon object - which the Option 30 User Manual recommended for better object animation to minimize flickering as the object moves. Simply move one of the objects to the new position while leaving the other object in the previous position, then move the second object to the new position.

The result appears to double the brightness of the Cylon (bonus points!).

Since the main CPU can run sound effects while the Option 30 CPU is refreshing the graphics - this eliminates the flicker I had in my first two videos. The flicker was due to the main CPU doing video operations - which blocks the Option 30 CPU from being able to access the display for refresh (dynamic) graphics.

As soon as I added the POINTER or GIN command to get the joystick position to the main game loop - the Option 30 image began to flicker - AGAIN.

Bottom line - the 4052-4054A Technical DATA service manual indicates both the Joystick and Thumbwheels are connected to the Display board and the GIN or POINTER command use the X and Y DACs and comparators to determine the X and Y position of the Thumbwheels or Joystick - which blanks the Option 30 video until the X and Y analog to digital conversions are complete :(

So I am back to trying to figure out how to get the Joystick inputs digitized and provided to my BASIC program without accessing the X and Y DACs on the Display and Vector boards.

My Tektronix 4050 GPIB Flash Drive board has several unused I/O pins - including some with ADC (analog to digital converter) capability:

Arduino IDE Pin NumberATmega 644/1284 Pin NameADC CapabilityGame Controller function
25PA1YJoystick X ADC
26PA2YJoystick Y ADC
27PA3Y
28PA4Y
29PA5Y
30PA6Y
0PB0NButton 1
1PB1NButton 2
2PB2NButton 3
3PB3NButton 4

This mapping would work for my Vectrex controller:

index.php


For Asteroids - the 4 buttons would provide: Rotate Left, Rotate Right, Thrust, and Fire.
The Joystick would provide the 5th 'button' for Hyperspace by pressing forward.

I think we would have the Arduino return the joystick X and Y as 8-bit values in four ASCII Hex characters - which would be compatible with all the 4050 computers since the 4051 only supported 7-bit ASCII characters. The 4 buttons could be encoded as a single ASCII Hex character.

The Flash Drive Arduino program would be extended by adding one secondary address command to digitize the X and Y values plus the four button values, encode into 5 ASCII Hex characters plus a CR to terminate the string.

The 4050 BASIC program to fetch the current joystick values would be a single INPUT @5,X:A$ command where X is the secondary address we would pick for the gamepad command.

Looking at the published Tek BASIC secondary addresses, I would pick 31 which is listed as Undefined.

I wonder if my Flash Drive software partner @WaveyDipole could help me with adding this command to the Flash Drive firmware while I work on prototyping connecting my 9-pin Vectrex joystick to the Flash Drive.

Looks like a 10-pin header would pick up PA1, PA0, NC the 3.3V pin, PB0-PB3, NC the PB4, +5V and GND from the left side of the 644-Narrow diagram below.

narrow-v0-9-pinout-edit_jpg_md-xl.jpg
 
Last edited:
I did some experiments on using Arduino ADC feature with an Arduino MEGA connected to my Vectrex joystick.

Arduino ADC test with ATMEGA 2560 board

Connect Vectrex 9-pin D connector as follows:
Pin 9 to Arduino GND
Pin 5 to Arduino A0
Pin 7 to Arduino +5V

Arduino code - from https://www.arduino.cc/en/Tutorial/BuiltInExamples/ReadAnalogVoltage
I added the last print statement to print the ADC sensorValue in addition to printing the calculated voltage.

Code:
// the setup routine runs once when you press reset:
void setup() {
  // initialize serial communication at 9600 bits per second:
  Serial.begin(9600);
}

// the loop routine runs over and over again forever:
void loop() {
  // read the input on analog pin 0:
  int sensorValue = analogRead(A0);
  // Convert the analog reading (which goes from 0 - 1023) to a voltage (0 - 5V):
  float voltage = sensorValue * (5.0 / 1023.0);
  // print out the value you read:
  Serial.println(voltage);
  Serial.println(sensorValue);
}

Voltage outputs from the Arduino Serial Monitor:

Vectrex X pot centered:
X=2.38V
sensorValue=486

Vectrex X pot stick full right:
X=4.04V
sensorValue=826

Vectrex X pot stick full left:
0.86V
sensorValue=176

-----------------------------------------

Vectrex Y pot centered:
Y=2.64V
sensorValue=542

Vectrex Y pot stick full up:
Y=4.49V
sensorValue=914

Vectrex Y pot stick full left:
1.09V
sensorValue=222

-----------------------------------------

This makes sense because the 10K vectrex pot has a series 4.7K fixed resistor to GND and series adjustable 10K resistor on +5 to calibrate the center to 0V (Vectrex powers +5 and -5 across the pot and two series resistors).

When we only supply +5V and GND to the potentiometer circuit we would expect 5V*4.7/19.4=1.21V across the fixed resistor and 5V*14.7/19.4=3.79V across the fixed resistor + 10K pot if it is set for 4.7K. The fixed resistor is +/- 5% tolerance according to the service manual - so it could be high by 5% = 4.935K The Vectrex 10K pot does not have tolerance specified in the service manual - but I suspect it could be +/- 10 percent.

The centered voltage of the potentiometer slider would be 5V*(4.7+5)/19.4=2.5V

From my Vectrex joystick output measurement using an Arduino MEGA with the Arduino program above - it looks like the Arduino code for returning the ADC output should report the centered value =2.5V (sensorValue=511), max value =4.00V (sensorValue=818), and the min value =1.00 (sensorValue=204) for both X and Y.

My 4050 BASIC program could read the Flash Drive reported centered X and Y joystick ADC values and then adjust for the slightly different centered voltages from the X and Y pots with a tiny deadband.

With no joystick connected the ADC value reported on X and Y varies between 0V and 1.0V - so should be reported by the Arduino as 0.0V - which can be reported to the player by the BASIC program as "No joystick connected" error.

The Arduino will convert the 10-bit ADC readings to signed integer:
Code:
X=max(sensorValue,204)
X=min(X,818)
X=X-204-307

Y=max(sensorValue,204)
Y=min(Y,818)
Y=Y-204-307

The last calculation above will return 0 at the expected centered position (818-204)/2=307 and negative numbers for left or down positions and positive numbers for right or up positions.

The Arduino can return the X, Y, A, B, C, D where A,B,C,D are buttons 1, 2, 3, and 4 (1=pressed, 0=open) as six integer values to BASIC.

Each BASIC INPUT@5,31:X,Y,A,B,C,D command to the Flash Drive will cause the Arduino to ADC X and Y joystick adjusted sensorValues and four digital button values as six comma or space delimited integers which can be directly used in my BASIC program without further conversion - other than an initial offset value for the X and Y joystick centered position with small deadband.
 
Last edited:
I added the Arduino code to adjust the sensorValue and print Volts, sensorValue, and outputValue and found that since the X and Y pots do not have the same calibration I couldn't get a single adjustment to fit both, so I used slightly different adjustments based on full-scale travel and the centered position of the stick and got both outputValues to center at 0 +/-5.

Here is my modified test program:

Code:
// the setup routine runs once when you press reset:
void setup() {
  // initialize serial communication at 9600 bits per second:
  Serial.begin(9600);
}

// the loop routine runs over and over again forever:
void loop() {
  // read the input on analog pin 0:
  int sensorValue = analogRead(A0);
  // Convert the analog reading (which goes from 0 - 1023) to a voltage (0 - 5V):
  float voltage = sensorValue * (5.0 / 1023.0);
  // print out the value you read:
  Serial.print("Volts: ");
  Serial.print(voltage);
/*
  // following values work for my Vectrex X pot: center 0 +/- 5 max 330 min -320
  int outputValue=max(sensorValue,176);
  outputValue=min(outputValue,826);
  outputValue=outputValue-176-320;
*/
  // following values work for my Vectrex Y pot: center 0 +/- 5 max 372 min -320
  int outputValue=max(sensorValue,222);
  outputValue=min(outputValue,914);
  outputValue=outputValue-222-320;
 
   char buffer[40];
  sprintf(buffer, "  sensorValue %d   outputValue %d", sensorValue, outputValue);
  Serial.println(buffer); 
}

Here is the Arduino serial monitor output for my Vectrex Y pot with the stick centered:

Volts: 2.64 sensorValue 541 outputValue -1


Now I will try to tackle adding it to the Flash Drive Arduino code.
 
Why not just plot the Arduino output of the X and Y pots?

Here is the Arduino program slightly modified to use the Arduino Serial Plotter feature:

Code:
// the setup routine runs once when you press reset:

#define SERIAL_PLOTTER

void setup() {
  // initialize serial communication at 9600 bits per second:
  Serial.begin(9600);
  Serial.println("Xout:,Yout:,MAX,MIN");
}

// the loop routine runs over and over again forever:
void loop() {
  // read the X input on analog pin 0:
  int Xin = analogRead(A0);

  // following values work for my Vectrex X pot: center 0 +/- 5 max 330 min -320
  int Xout=max(Xin,176);
  Xout=min(Xout,826);
  Xout=Xout-176-320;

  // read the Y input on analog pin 1:
  int Yin = analogRead(A1);
 
  // following values work for my Vectrex Y pot: center 0 +/- 5 max 372 min -320
  int Yout=max(Yin,222);
  Yout=min(Yout,914);
  Yout=Yout-222-320;

  Serial.print(Xout+1500);
  Serial.print(",");
  Serial.print(Yout+500);
  Serial.print(",");
  Serial.print(2000);
  Serial.print(",");
  Serial.println(0);
}

I moved the X plot up by 1500 and the Y plot up by 500 and added a max and min line to prevent Serial Plotter auto-scaling.

Vectrex Joystick Arduino ADC plot.png
 
Ok - I took the plunge and added a GAMEPAD function to the Flash Drive code modeled after the STATUS function and used a fixed string of test data: "-253,100,0,1,0,0" that is sent to the 4050 computer using a single BASIC command: INPUT@5,31:X,Y,A,B,C,D.

I uploaded the program to my Flash Drive - and it worked!

Now to add the joystick X and Y ADC functions and four debounced buttons to the code and add the joystick wiring to the Flash Drive with a 9-pin D connector - and try it out!
 
I just posted my Cylon Attack work-in-progress BASIC game part 4 video:

Cylon Attack - Part 4!


Cylon Attack thumbnail.png

I root caused the Cylon flickering issue in my last video to the Tektronix Joystick I was using. Looking at the service manuals for my Tektronix 4054A vector graphics computer - the theory of operation section for the joystick and keyboard X/Y thumbwheels indicated both joystick and thumbwheels are connected to the display board. When the BASIC POINTER command is used to input the X and Y coordinates of the joystick or thumbwheels, the display board X and Y D/A converters are used with comparators and BASIC ROM code to perform successive approximation to determine the analog X and Y values.

This use of the display board blocks the Option 30 dynamic graphics coprocessor from accessing the video bus - which causes a moment of flicker every time the POINTER command is run in my tight loop of logic for the game.

So I spent last week designing a new joystick interface for my Tektronix computer - by leveraging six unused pins on the Arduino running my Micro SD Flash Drive which replaces the internal tape drive. I added a new function to the Flash Drive code to convert the X and Y analog joystick output of my Vectrex game controller and read the four buttons on the game controller when the Flash Drive received the BASIC program INPUT@5,31:X,Y,A,B,C,D command on the GPIB bus.

In this video I'm only currently using one of the buttons to fire at the Cylon. I have added random logic for Cylon position and velocity for this video.

The attached photo shows my prototype of the Vectex controller connected to an Arduino MEGA board that I used to develop the code I put on the Flash Drive.

Vectrex joystick connected to Arduino MEGA.jpeg
 
Back
Top