mrthreeplates
Experienced Member
- Joined
- Jul 22, 2018
- Messages
- 114
Hi,
I recently acquired a TRS-80 model 1 and was inspired by Ian Mavric's FreHD ROM mod supporting switching between the stock level 2 ROM and a modified version supporting autoboot.
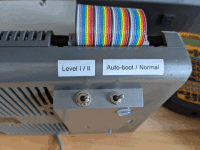
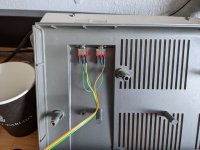
Before I got a chance to install it, I happened to acquire a second TRS-80 model 1 with some mysterious switches. It turns out that one of the switches selected between Level 1 and Level 2 ROMs! I thought this was pretty cool as I could play with the somewhat different BASIC supported by Level 1.
After studying Ian's mod, I wondered if I could extend this idea to support additional ROM images.
I was half way through designing an adapter when I stumbled across a ready made (and customizable) one that is nearly perfect.
See 23xx-adapter from Retro Innovations. All I needed was a larger 27C512, and a few odds and ends.
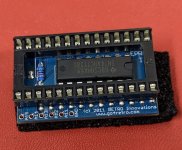
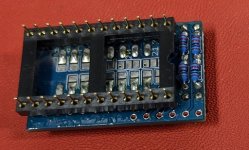
Here is the unmodified 23xx adapter:
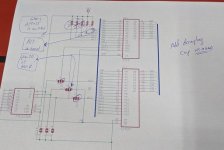
Here is the schematic:
I only needed to make the following changes:
* Cut out R1, R2 and R5 (the pull ups for A11, A12 and A13)
* Cut out IC4 (unused and not needed)
* Bridge the solder jumpers at SJ2, SJ4 and SJ5 (connecting ~OE, A11, and A12)
* Connect wires to ~CS, A13, A14, A15 and GND
* I also added a bypass cap for good measure
I kept the pull-up resistors for A14 and A15.
Note, the soldering is kind of tricky. If you take your time and have a fine tipped soldering iron, it isn't too bad.
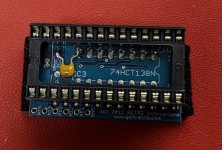
Here is the adapter all finished:
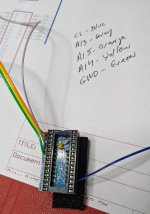
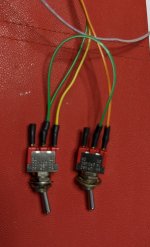
And here is the adapter installed:
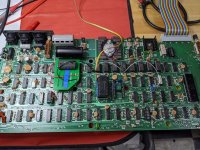
BTW: my goal was to minimize the soldering on the motherboard. In this case I only had to solder the A13 wire, everything else is reversible by just pulling out the adapter.
I should probably point out that I have a rev G motherboard. This likely makes the installation a bit easier. In my case, I only needed to deal with the additional chip select for the second ROM image. This is accomplished by shorting the chip selects between the two sockets (see the blue wire running from the adapter to pin 20 of the second ROM). I could have also modified the switches at Z3, but I figured the jumper was more reversible. Connecting the chip select lines allows the EEPROM in the adapter to be used for the entire 12K of the ROM address space.
Note that other (older) motherboard versions might require different installation steps.
I also installed machine pin sockets so that the adapter would be held securely in place.
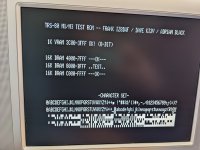
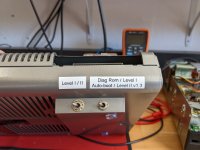
All that remained was for me to program the 4 ROM images. I used Ian Mavric's Autoboot ROM for the first two images (at 0x0000 and 0x4000) and used identical copies of the Level 1 ROM images for the last two (at 0x8000 and 0xc000). This allows me to select Level 1 or Level 2 ROMS by toggling the switch connected to A15. If Level 2 is selected, then the switch connected to A14 selects FreHD autoboot or not.
I haven't yet mounted the switches as I'm still thinking about the best location. I might change the ROM images in the future. Using an adapter means I can easily reprogram the EEPROM.
The one problem I ran into is that the 23xx adapter is slightly too tall and presses on the bottom of the TRS-80 case. I'm still able to close up the case, but am not happy about the pressure this puts on the motherboard and case. Ideally, the adapter should be redesigned to be lower profile to eliminate this problem.
Anyway, just thought I'd share for others who might be interested.
A huge thanks goes to Ian Mavric for providing the Auto boot rom and images (see downloads)!
Cheers,
I recently acquired a TRS-80 model 1 and was inspired by Ian Mavric's FreHD ROM mod supporting switching between the stock level 2 ROM and a modified version supporting autoboot.
Before I got a chance to install it, I happened to acquire a second TRS-80 model 1 with some mysterious switches. It turns out that one of the switches selected between Level 1 and Level 2 ROMs! I thought this was pretty cool as I could play with the somewhat different BASIC supported by Level 1.
After studying Ian's mod, I wondered if I could extend this idea to support additional ROM images.
I was half way through designing an adapter when I stumbled across a ready made (and customizable) one that is nearly perfect.
See 23xx-adapter from Retro Innovations. All I needed was a larger 27C512, and a few odds and ends.
Here is the unmodified 23xx adapter:


Here is the schematic:

I only needed to make the following changes:
* Cut out R1, R2 and R5 (the pull ups for A11, A12 and A13)
* Cut out IC4 (unused and not needed)
* Bridge the solder jumpers at SJ2, SJ4 and SJ5 (connecting ~OE, A11, and A12)
* Connect wires to ~CS, A13, A14, A15 and GND
* I also added a bypass cap for good measure
I kept the pull-up resistors for A14 and A15.
Note, the soldering is kind of tricky. If you take your time and have a fine tipped soldering iron, it isn't too bad.
Here is the adapter all finished:


And here is the adapter installed:

BTW: my goal was to minimize the soldering on the motherboard. In this case I only had to solder the A13 wire, everything else is reversible by just pulling out the adapter.
I should probably point out that I have a rev G motherboard. This likely makes the installation a bit easier. In my case, I only needed to deal with the additional chip select for the second ROM image. This is accomplished by shorting the chip selects between the two sockets (see the blue wire running from the adapter to pin 20 of the second ROM). I could have also modified the switches at Z3, but I figured the jumper was more reversible. Connecting the chip select lines allows the EEPROM in the adapter to be used for the entire 12K of the ROM address space.
Note that other (older) motherboard versions might require different installation steps.
I also installed machine pin sockets so that the adapter would be held securely in place.
All that remained was for me to program the 4 ROM images. I used Ian Mavric's Autoboot ROM for the first two images (at 0x0000 and 0x4000) and used identical copies of the Level 1 ROM images for the last two (at 0x8000 and 0xc000). This allows me to select Level 1 or Level 2 ROMS by toggling the switch connected to A15. If Level 2 is selected, then the switch connected to A14 selects FreHD autoboot or not.
I haven't yet mounted the switches as I'm still thinking about the best location. I might change the ROM images in the future. Using an adapter means I can easily reprogram the EEPROM.
The one problem I ran into is that the 23xx adapter is slightly too tall and presses on the bottom of the TRS-80 case. I'm still able to close up the case, but am not happy about the pressure this puts on the motherboard and case. Ideally, the adapter should be redesigned to be lower profile to eliminate this problem.
Anyway, just thought I'd share for others who might be interested.
A huge thanks goes to Ian Mavric for providing the Auto boot rom and images (see downloads)!
Cheers,

