Upcoming Events:
| VCF West | Aug 01 - 02 2025, | CHM, Mountain View, CA |
| VCF Midwest | Sep 13 - 14 2025, | Schaumburg, IL |
| VCF Montreal | Jan 24 - 25, 2026, | RMC Saint Jean, Montreal, Canada |
| VCF SoCal | Feb 14 - 15, 2026, | Hotel Fera, Orange CA |
| VCF Southwest | May 29 - 31, 2026, | Westin Dallas Fort Worth Airport |
| VCF Southeast | June, 2026 | Atlanta, GA |
-
Please review our updated Terms and Rules here
You are using an out of date browser. It may not display this or other websites correctly.
You should upgrade or use an alternative browser.
You should upgrade or use an alternative browser.
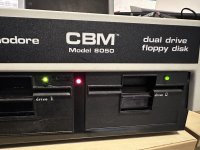
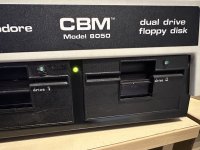
CBM 8032 for repair
- Thread starter Sarnian
- Start date
daver2
10k Member
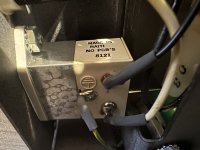
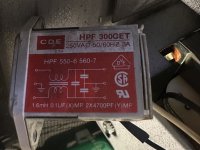
If the mains socket is integrated with the filter, just replace the whole lot with what you have ordered.
Dave
Dave
daver2
10k Member
It is amazing how this magic smoke is very important to the operation of vintage electronics!
I wonder why no one is selling it on eBay so you can replace it !
!
Dave
I wonder why no one is selling it on eBay so you can replace it
Dave
Hugo Holden
Veteran Member
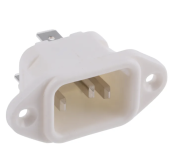
You can buy a replacement IEC connector with the inductors & capacitors in it. But it is a complete waste of time and money. The PET computer, because of its iron cored transformer based anao;g power supply neither injects RFI onto the line,unlike most modern appliances, nor is susceptible to RFI on the line (due to many modern appliances with switch mode power supplies). So simply, as you have decided, throw that filter unit away and fit a plain IEC Connector.And rid yourself of the magic smoke forever.
daver2
10k Member
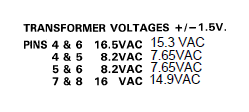
Those voltages are fine.
Dave
Dave
daver2
10k Member
The Commodore PET manuals...
All are available online.
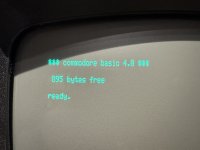
Which version of the PET BASIC do you have? Can you post a photograph of the initial start up screen.
Don't use your cable yet!
Does the connector that plugs onto the PET edge connector have a key fitted?
Dave
All are available online.
Which version of the PET BASIC do you have? Can you post a photograph of the initial start up screen.
Don't use your cable yet!
Does the connector that plugs onto the PET edge connector have a key fitted?
Dave
Good news, cable works, bad news, I have some work to do.
So after a crash course on what commands to use on two drives that don't work I finally got somewhere.
Drive 0
Does not spin when you put a floppy in. However the microswitch is working.
Head twitches when doing a DIRECTORY D0
Drive 1
Spins but fails to read until I worked out that the "L" shaped thingy (red line in picture) needed to be pushed down so the thing circled in green pushes down on the floppy.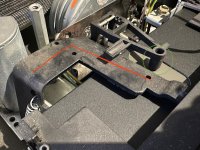
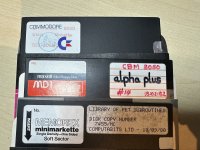
I now know I have 2 readable floppies out of the three that I have.
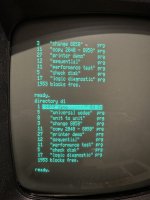
So guessing I need to lubricate "L" shaped thingy to free it up so it works on its own and maybe try swapping over the drives to see if its a board issue or drive issue?
So after a crash course on what commands to use on two drives that don't work I finally got somewhere.
Drive 0
Does not spin when you put a floppy in. However the microswitch is working.
Head twitches when doing a DIRECTORY D0
Drive 1
Spins but fails to read until I worked out that the "L" shaped thingy (red line in picture) needed to be pushed down so the thing circled in green pushes down on the floppy.

I now know I have 2 readable floppies out of the three that I have.

So guessing I need to lubricate "L" shaped thingy to free it up so it works on its own and maybe try swapping over the drives to see if its a board issue or drive issue?
daver2
10k Member
Hi Dave
With the door open you can’t push that “L” shaped thing down.
When you close the door you have to manually push the “L” shaped thing down as it’s very stiff, spring doesn’t have enough strength to pull it down by itself. When you open the door its lifted automatically.
With the door open you can’t push that “L” shaped thing down.
When you close the door you have to manually push the “L” shaped thing down as it’s very stiff, spring doesn’t have enough strength to pull it down by itself. When you open the door its lifted automatically.
daver2
10k Member
Just thought I would state the obvious just in case!
I assume (from the photographs) that the drives are from Micropolis?
This manual: http://www.primrosebank.net/computers/pet/documents/8050_8250_service_manual.pdf contains the resistance reading for the motor (to check if the drive motor has burnt out).
The analogue board drives the motors of the two drives.
There are two (2) separate 12V supplies, each one feeding one of the two disk drives.
Measure the voltage on +12VA (Drive 1) and +12VB (Drive 0).
The individual supplies are switched on pins 1 and 4 of P8 (Drive 0) and P5 (Drive 1). Pin 1 is +12V(A or B) from the voltage regulators and pin 4 is switched via a power transistor.
Armed with this information, you should be able to find out what sub-system is causing the motor not to spin on Drive 0...
Dave
Last edited:
Hi Dave
Made a lot of progress tonight. Drive 1 now fixed. The "L" shaped thingy is supposed to slot into some holes on the drive chassis, they were out so slotted them in and now working smoothly.
Drive 0, bit of an odd one. Before I tested anything I took the drive out to see if it spins freely and it does. Plugged it all back in and started spinning, put in a floppy and loaded straight up. Loaded that floppy about ten times and worked each time. Tried a different floppy in drive 0 and immediately didn't spin when I closed the door, removed the drive, moved the motor manually and when I put the floppy back in it worked.
So testing over and over again, every now and then it gets stuck, I move the motor and its fine again.
Is there going to be much I can do about this?
Selectric
Member
Be careful if you are able to insert a floppy into the Micropolis drive and the motor doesn't spin up as soon as you start to lower the lever - it can result in mis-aligned hub engagement and physically damage the hub on that floppy... not good for vintage media.
I know nothing about Commodore CBM units but from a generic Micropolis 77t/100dpi drive viewpoint, there are some things you can check out. For the CBM unit I guess you can ignore the S-100 actions and pin checks, but the overall action list below may give you some clues:
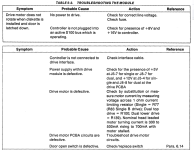
I know nothing about Commodore CBM units but from a generic Micropolis 77t/100dpi drive viewpoint, there are some things you can check out. For the CBM unit I guess you can ignore the S-100 actions and pin checks, but the overall action list below may give you some clues:

daver2
10k Member
What you need to do is to measure the voltage across the motor when it is (a) running and (b) stalled.
Report back on your findings.
If the voltage across the motor is not about 12V (when stalled), the problem is likely in the control electronics rather than the motor.
I have come across 'tight' floppy disks before now. Usually you can 'feel' the tightness by turning them gently by hand.
The motor has an inbuilt tachometer. However, if this fails, it should confuse the electronics into not driving the motor, so we should observe this when measuring the voltage across the motor in the stalled case.
Dave
Selectric
Member
Dave - good advice. The only thing I can add is that the hub/spindle motor normally starts turning *before* it engages the hub on these drives, as the lever is slowly depressed. It free runs before the floppy is clamped. So if you've got a 'sticky' floppy like you describe, the hub motor should start spinning until the mechanical clamping then stalls the motor due to a sticky floppy. Listening up close to the drive during the loading process could help us learn more.
daver2
10k Member
I don't think this is the case with the Commodore disk units.
Basically, the disk drives themselves have been stripped of all of their electronics.
The electronics (including the motor drive, speed controller and head amplifiers) is all done by Commodore.
If memory serves me correctly, you insert the disk, clamp the disk, then invoke the command at the PET to 'do something' with the disk. This should start the motor, and cause the disk to spin.
Dave
Drive 0 is fully working now. My best guess is that the motor needed to be run for a while for the bushes to clean the contacts on the windings. This was achieved at the start by slightly lowering the door to trigger the drive, then by just switching the micro switch, then by shorting the return to ground as the motor was always being supplied 12v, this made the drive turn a bit quicker as well.

