Upcoming Events:
- VCF South West - June 14 - 16, Davidson-Gundy Alumni Center at University of Texas at Dallas
- VCF West - Aug 2 - 3, Computer History Museum, Mountain View, CA
- VCF Midwest - Sept 7 - 8 2024, Schaumburg, IL
- VCF SoCal - Mid February 2025, Location TBD, Southern CA
- VCF East - April 2025, Infoage Museum, Wall NJ
-
Please review our updated Terms and Rules here
You are using an out of date browser. It may not display this or other websites correctly.
You should upgrade or use an alternative browser.
You should upgrade or use an alternative browser.
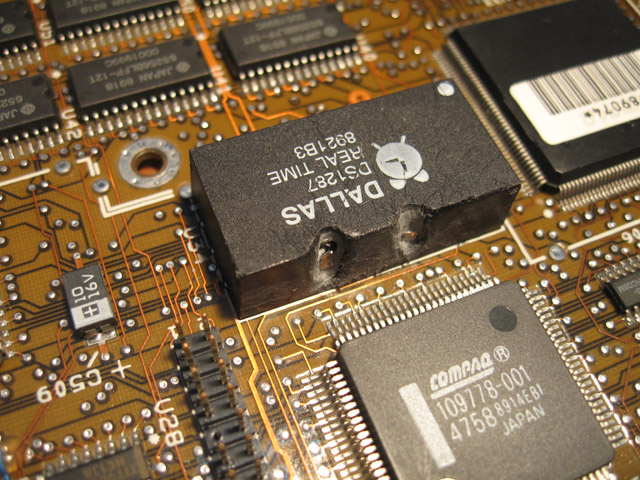
DS1287 Rework. How Am I Doing So Far?
- Thread starter DOS lives on!!
- Start date
DOS lives on!!
Veteran Member
I know it's messy. Unfortunately, the chip is soldered to the board.
Chuck(G)
25k Member
Remove the chip and rework it--all that has to happen is slip of your hand and you'll cut PCB traces--and then the fix will really look messy.
We're assuming that you know how to remove a soldered-in chip, however.
We're assuming that you know how to remove a soldered-in chip, however.
DOS lives on!!
Veteran Member
I've done the rework on a few other chips, that you could take out, but none on a soldered board. I (hope), but don't think I have damaged any traces or anything that can be damaged.
eeguru
Veteran Member
Unless you are doing this for fun, why not order a replacement module and dip socket? (~25 USD)
kishy
Veteran Member
Replacement module is just as senseless as the original - it makes the most sense to convert it to a socketed battery attached to the module or nearby. There is literally no advantage to getting a new RTC module except convenience - and if you have to desolder the original first, it is far less convenient IMHO with significantly greater risk of damage to the board.
It's hard to make out exact details in the pics but I'm tempted to say my first one was rougher, so that can only be good for you. I was working on a socketed one that I was holding while using the saw of a pocketknife to get into it...ended up with lots of little holes in my finger...might not be safer for the board, but it's definitely safer for you that it's soldered down
So, being unable to make out finer details, I can't say that it looks like you're on the right or wrong track. Basic idea is to get some of the plastic and epoxy mess removed, break contact with the original battery, then solder in wire leads to the upwards-folded chip pins that previously went to the original battery...and send those leads to a CR2032 button cell battery holder. So far I've done all of mine with the socket glued directly to the top of the module, but some systems will have clearance issues that don't allow this.
Just as a BTW or FYI, since I sense it coming up: lithium coin cells do not leak nearly as easily as other types of batteries, if at all in most cases. It is not a hazard to have a CR2032 close to the board.
DOS lives on!!
Veteran Member
Just got back with the rest of the soldering equipment. I'm not going to use a CR2032 button battery, instead, I'm going to use a Radioshack enclosed 2x AA battery holder to power this. And yes, that expoxy stuff is VERY messy.
tezza
Veteran Member
I did a similar thing with a compaq laptop. I decided it was risker to try to unsolder the chip than to modify it in situ. The important thing is to be very careful and not rush the job.
Tez
Tez
DOS lives on!!
Veteran Member
Where's the pin?????
Where's the pin?????
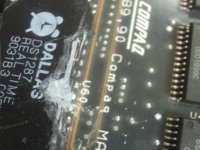
I've cut in a little farther into the chip, but I don't see any pins yet!! I cut into another DS1287 with a Dremel a while back and never did get to the pins, even though I cut almost halfway into the pin. Can the exacto knife cut the pins or part of them off or am I just getting to scared about damaging the chip???
Where's the pin?????
I've cut in a little farther into the chip, but I don't see any pins yet!!
eeguru
Veteran Member
and if you have to desolder the original first... significantly greater risk of damage to the board.
Verses rework with a Dremel, epoxy, and tack iron directly on the PCB? :confused1: You've got to be joking...
Replacing it isn't that senseless. They are generally rated for 10 years and often last 15-20.
tezza
Veteran Member
I've cut in a little farther into the chip, but I don't see any pins yet!!I cut into another DS1287 with a Dremel a while back and never did get to the pins, even though I cut almost halfway into the pin. Can the exacto knife cut the pins or part of them off or am I just getting to scared about damaging the chip???
There is a photo in the article I linked in my post above (Photo 2). Thats what you should see.
Tez
tezza
Veteran Member
Here is the photo


DOS lives on!!
Veteran Member
I'm looking at that page right now, unfortunately, the pictures and my chip don't match. It seems like you didn't have to cut in that far to get to the pins. For how far I've cut in, I should be seeing (at least) the top if not the full pin.There is a photo in the article I linked in my post above (Photo 2). Thats what you should see.
Tez
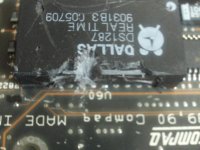
I now see a little piece of metal, near the middle of the spot where I have cut in. When I cut into one of these a while back. I ran into this metal that looked more like a metal lining.
tezza
Veteran Member
I now see a little piece of metal, near the middle of the spot where I have cut in. When I cut into one of these a while back. I ran into this metal that looked more like a metal lining.
It looks like you might be there. Clean any residue away so you can have a good look.
Tez
DOS lives on!!
Veteran Member
Now, when I (hopefully) reach the pin, I need to cut a little behind it so I can solder the wire to it, right?
tezza
Veteran Member
Now, when I (hopefully) reach the pin, I need to cut a little behind it so I can solder the wire to it, right?
Yes, you need to cut it so it's no longer connected to the battery. I didn't so much need to get behind it. Rather it's a matter of snapping the connection. I think I just used a small screwdriver and some pressure at the top of the pin. Others have used a small punch but you can't use a hammer and a punch easily when the thing is still connected to the board.
I'm assuming you have the original "how to" article . This shows the lines inside the chip and what pins they relate to. You can check if you've successfully broken the connection by doing a connectivity test.
I've got to go offline now. Good luck with the rest of the job.
Tez
tezza
Veteran Member
PS. Soldering can be tricky. Try to clean the pins well (scrape the metal) so there is a clean surface for the solder to "take".
eeguru
Veteran Member
Flux will help a lot too.
DOS lives on!!
Veteran Member
I think I may either have cut in the wrong place (very unlikely) or I did something crazy. I think I have actually cut in far enough to reach the battery inside the chip! I cut in right above the A, which should be correct.


