• Please review our updated Terms and Rules here

Dusting off my Processor Technology Sol-20

If it was early 1960's then I was in high school or just out. Doesn't that make us OLD?

Anyway, today, I finished the key pads and got them installed. After testing the keyboard I have at least 3 questionable keys. I also have an occasional problem with the shift key or keys? I'm not going to reopen the keyboard until I run the machine for a few days to further test the keyboard.

I cleaned up my drive box and connected to the SOL. Geezzz.... I have forgotten how to make this machine work. I'm going to have to read the manuals again. The CONSOLE program seems to work and I can start DOS, I get a sign notice of "NORTH STAR DOS 5.2S" Here I can display memory do a LI (DIR) of each disk. I can even load a SOL System Monitor 5.2 and do a couple of functions. So, the next item for attention is to re read the manuals and continue to test what I have. Then later, maybe in a week see if I can repair the remaining keys, once I have a more complete list. Thanks for the help. I may have additional questions of how this machine works, Last time I used any programs on this was in the middle 1980's. Because of the fact that I can't seem to remember what I had for breakfast, I don't find that out of line. Mike

Good progress.

If you have a group of keys that are not working, even though not seemingly related, if you look at the keyboard's schematic you might find that they are related by being on the same row or column, where they have been assigned a number also.

Those numbers of the keys are also printed as pcb tracks on the rear (visible side) of the pcb surface. The columns are electrically robust as they are driven by TTL iC outputs, but the rows not so much as the feed the inputs of two CD4051 cmos multiplexer IC's. Sometimes those IC's might get a failed input.

But if the non working keys are on different rows and columns, most likely its an issue with the pads.
 
So far there seems to be about a half dozen keys that exhibit some extra action. They all seem to be unrelated. A couple will act up all the time and the others will only occasionally show a double character. I still want to wait until I re open the keyboard until I know precisely which keys are troublesome.

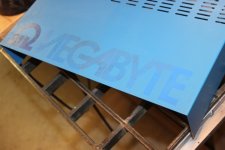
I have re connected the disk drive system to this machine. It is a 'OmegaByte 262 Kb Triple Disk' unit. The controller card is a North Star MICRO-Disk MDS-A. The disk drives are Shugart SA400 hard sector drives. After cleaning them up best I can, #1 works the best and 2&3 less so. I find the OmegaByte unit interesting in that there is no nameplate on it. The only ID is the cover.
IMG_1499a.jpg
The interesting part is that inside there is a sticker that says Serial Number 006. The unit is only the 3 Shugart Drives and a a power supply, but I have no information on it other than a Shugart book.

The two drive that are troublesome will display error messages, which give a hint to the trouble is. My documentation only explains the first 7 number codes. Yet sometimes I'll receive code number like 24 or 34. Unless this means both #2 and #3 error. Anyone have any experience with these?

As I use the drives, they seem to loosen up and display fewer errors. I'd like to exercise the drives. Is there any drive programs available to do so? Thanks Mike
 
Happy to say, I remember that song when I was little. Had not heard it in years. Thanks.

I'm a little older and I remember it something like this:

On top of Old Smokey,
Where nobody goes;
I saw Bette Grable,
Without any . . . . . :oops:
 
So far there seems to be about a half dozen keys that exhibit some extra action. They all seem to be unrelated. A couple will act up all the time and the others will only occasionally show a double character. I still want to wait until I re open the keyboard until I know precisely which keys are troublesome.

Interesting that double character thing. The design was clever in that the sensitivity of the key threshold detector was altered by the /PKD signal only after the pulse associated with a closed key out of the detector was detected twice, so as to avoid false triggering. Even if the capacitance increase of some of your pads was borderline low, it wouldn't really explain that effect.

Put a scope on the output of the key detector circuit and compare the pulses there with the troublesome vs the non troublesome keys. The place to connect it is easy to find if you use the pcb diagram in my article mentioned on this thread earlier. And double check from the numbering diagram that the defective keys are definitely not on the same row. If that was the case, it wouldn't help to disassemble the keyboard again.

By scoping the key detect circuit you can also find out if the problem is a too low capacitance increase when the keys close indicating that the film you used had too thick a dielectric layer over the metallic film.
 
I've been spending time with the OmegaByte 262 Kb Triple Disk unit that works with my SOL-20. Drive number 1 seems to work most times, but mostly fails the DOS DT utility. Drive #2 is the worst of the bunch. It works some. Drive #3 seems to be the best of the bunch. I am unsure whether my problem is drives, media or controller. I have no way of testing the Shugart SA400 drives as a hard sector unit. In an effort to attempt to eliminate the drives I removed the Shugart and connected to a PC as a soft sectored unit. I used ImageDisk (IMD) and ANADisk to test the 3 drives. I set the drive parameters to 35 tracks, 18 sectors, 128 bytes/sector, 250kb FM. Image disk will format each disk. But I believe that both programs will format a disk but will not verify the format, so that in it self is not proof of functionality. IMD will analyze the disk and drive and finds it OK. I never found any errors on either #1 or #3 drive. #2 fails, there is definitely something wrong with #2, Yet, the SOL will get the #2 drive to work sometimes. I get similar results with ANADisk. I tried to write an IMD image to a disk, but this failed. I don't know why exactly, but I'm thinking that the images I have are for my 8 inch CP/M system. Maybe the parameters are kept on the image file and corrupts the disk. I think this because I have to reformat the disk after I attempt a write.

Using the DOS utility DT disk test, drive #3 work every time. Drive #2 Fails every time and Drive #1 will work only when all the equipment is cold. After it warms up, #1 will fail every time. So, I let the SOL (including the controller) to stay warm and allowed the drive unit to completely cool off, DT failed. Next, I allowed the SOL to cool off and let the Drive unit to stay warm. This seems to work. I want to see if I can repeat this a few times. But this suggests a thermo problem on the controller board. Maybe the other problems are also on the controller. More to come, thanks, Mike.
 
Well..... I'll be damned. I had a plan to record each drives characteristics and then move the DS straps. I thought that if the problem moved with the strap the problem would be on the controller card. If the problem stayed with the drive the problem was there. BUT.... for some reason I could not make anything fail. I tried the DT test at least a dozen times on each drive, they all worked. I took the dog for a walk and when we returned the drives continued to work. So, I decided to let the drives be, maybe they will fail again later.

Back to the key board. I read Hugo's document and started in on the keyboard. I found the clock to be OK and the outputs of the column drivers 7442 to be OK. Next I looked at the output pin 3 of the CD4051, the analog MUX. The good keys would show a high (+5) and a short low pulse about 1 mSec apart. A bad key (the top 2 in this case) would most always print the 2 followed by a lot of junk. Looking at Pin 3 of the 4051, I would see the short low pulses at about 80 uSec apart when the junk occurred and 1 mSec when only the 2 printed. So something is wrong here, but so far I'm unsure what. I need to study the circuit a little more. Mike
 
Back to the key board. I read Hugo's document and started in on the keyboard. I found the clock to be OK and the outputs of the column drivers 7442 to be OK. Next I looked at the output pin 3 of the CD4051, the analog MUX. The good keys would show a high (+5) and a short low pulse about 1 mSec apart. A bad key (the top 2 in this case) would most always print the 2 followed by a lot of junk. Looking at Pin 3 of the 4051, I would see the short low pulses at about 80 uSec apart when the junk occurred and 1 mSec when only the 2 printed. So something is wrong here, but so far I'm unsure what. I need to study the circuit a little more. Mike

Perhaps the dielectric film on that pad is defective and the metallic layer is intermittently shorting the pcb pads together. If you can locate the track connection that leads to that key, try connecting something like a discharged 22pF capacitor across them and see if you get a clean character generated. Make sure to hold the capacitor's plastic body and connect the lead first to the side that connects to the keyscan array columns (not rows) as these are TTL outputs, then the second lead after that to the row connection that goes to the 4051 , or you can inject lots of coupled stray noise in there from your body confusing the test. Or set up a small jig with a switch and test capacitor for better isolation from your body's capacitance.

Check if other keys on the same row are working ok, if they are likely its the pad on that particular key.
 
I'm pretty sure the majority of the keys are unrelated. There are 7 keys that are troublesome. The top row #2, DELETE and Clear are the worst. The L and O do the double character once in a while and the J doesn't work at all. I plan on opening the keyboard this afternoon or tomorrow. Today I have a sick 1916 Model T that needs attention. Thanks for the help, Mike
 
Well..... today I opened up the keyboard to first inspect the troublesome keys. They didn't look too bad, but here is what I determined. The 'J' would not work at all. The problem here was that there was two layers of Mylar on the pad. When I punch the Mylar I have 16 layers of Mylar and punch 16 at a time. But my punch, no matter how well I sharpen it, will fuse some of the newly cut disks together. I have to split them apart and then measure their thickness to be sure I have only one layer. This one must have escaped the process. The 'L' and 'O' would repeat once in a while. I could not determine why this was. The Mylar disk was turned down a little on one of these and there was a crease in the other pad. Maybe this affected the capacitance. The remaining keys would display the character followed a half dozen or so junk characters. I believe the problem here was that I was a little sloppy with the contact cement. I think noticed that the pad would stick a little when depressed. I think this because a little sticky cement was grabbing and causing some contact on a longer than the noise immunity. So, this time I prepared 7 new pads and tried to be as careful as possible while making the pad. After allowing them to dry a long time, they were re installed and they all seem to work just fine. Time will tell.

Got back to testing the disk drives and this time I found that Drive #1 would not pass the the DT test, while the others would. Because of the erratic results of my testing, I figure the problem is connections. I removed all the chips from the controller board and polished the leads. They are all in sockets. I also cleaned the s-100 edge connector contacts on the two boards in the machine. Now the drives seems to work, but again, it may fail tomorrow. I really detest these intermittent problems. Thanks for the help, Mike.
 
I believe the keyboard is completely functional. Yesterday and today, I have been moving the DS strap and the circuit boards between the drives. Then running DT on each combination. I must have run DT at least 100 times. I thought I would see pattern which would point to the piece that needed attention, but nothing would fail. I think that the overall problem was connection trouble, either the IC's to socket, edge connector to the s-100 bus or the edge connectors within the drive. Probably the moving the parts around cleaned the bad connection. Time will tell.

During the wait time of testing, I was searching for other documentation and parts that I have for this machine. I found about 16 disks I had stored in a plastic case. They all seem to be OK. They will format, take files and execute the files. Is there a source for more Hard Sector Disks that will work with this machine? I see that Anatha doesn't make the anymore. Some guy in California bought them out. About a year ago I picked up a few dozen 8" disk for my CP/M machine. I'll call him and see what he has. Does anyone know of another source?

I also found that I have a 3P+S card, with no documentation. I'll have to search around the house and internet to see if I can find some supporting information.

During my search for information I found that Dave Dunfield has a program called NST, North Start Transfer. I downloaded the files. I'd like to read up on this and see if this will allow me to transfer files like CP/M for North Star to my machine. Thanks for the help. Mike
 
Here is the PC2FLOP utility for writing a disk from an image transferred from a PC. A few Sol-20 disk images are here too including CP/M and North Star DOS. A disk exerciser utility is here too. You can create a disk on a “cold” machine by loading PC2FLOP through the serial port as a .ent file. The CP/M disk images include utilities for exchanging single file ps with a PC (PCGET, PCPUT).

https://deramp.com/downloads/processor_technology/sol-20/software/northstar_sd_controller/

Mike
 
I looked over your programs and forgive an old man, but I'm a little confused. The FLOP2PC program goes into the North Star computer and the PC2FLOP goes into the PC? And the PC is a CP/M machine or a DOS machine? Thanks Mike
 
See the “ReadMe” file in the same directory as PC2FLOP and FLOP2PC for more information. The programs run on your Sol-20. PC2FLOP writes a floppy disk on the Sol-20 with a disk image sent from a PC (e.g., modern Windows machine). The XMODEM protocol is used to transfer the disk image, so simply run a terminal emulator like TeraTerm on your PC that supports XMODEM transfers.

FLOP2PC goes the opposite direction and archives a real floppy disk read on the Sol-20 to a PC.

Mike
 
Mike, Thanks for the pointer.

Today, I thought I'd investigate the serial port on the SOL-20. Since I do not remember anything about it. I know that it was set up to print to my Teletype Model 43 printer, but that is all. Looking at the prints for the SOL-20 I found these DB25 connections at the back of the SOL-20
1 Ground
2 Transmit Data +-12 volts
3 Receive Data +-12 volts
4 RTS
5 CTS
6 DTR
7 Ground
8 Carrier Detect
9 Transmit Data TTL (I think this was added)
11 Current loop out
12 & 13 Current loop in
20 DSR pulled high
23 Current loop source

The S4 switch sets the parameters of the TMS6011 UART
1 Parity
open = high = Even parity SET
closed = low = Odd parity
2 Word length 1
3 Word length 2
S4-2 S4-3 Bits
closed closed 5
open closed 6
closed open 7
open open 8 SET
4 Stop bits
closed = low = 1 stop bit SET
open = high = 2 stop bits
5 Parity inhibit
closed = low = use parity bit
open = high = no parity SET
6 Duplex
closed = low = half duplex
open = high = full duplex SET

The S3 switch sets the baud rate
1 75 open
2 110 open
3 150 open
4 300 open (closed for TTY43)
5 600 open
6 1200 open
7 2400/4800 open (don't know why this is two rates on one switch)
8 9600 closed for this transfer

Next I had to make a cable to connect an XP machine I have to the SOL-20. The XP has a DB9 serial connector and the SOL-20 has a DB25. I only connected the ground, transmit and rec pins of each, crossing the TX and RX pins.

Next I loaded DeRamp's loader program in the SOL-20. Start the CONSOL @ C000 and use EN starting a address zero and enter the program LOADER.ASM machine code. I did this, but could not stop the program. It was in an endless loop. There is no RESET button on the SOL and I have to power down to stop it. This will lose any data that maybe transferred. So I added a compare to the program, so that if a space is received over the transfer the program will jump back to CONSOLE.

Next I used PUTTY to transmit data to the SOL-20. I set PUTTY to SERIAL COM1 9600 baud 8 bits 1 stop bit no parity. Connected up the two machines, started the LOADER in SOL-20 using EX 0 and started to type on the PUTTY terminal. When the space key was used the SOL-20 jumped back to CONSOLE. I inspected address 0100H and found the keys that I used in PUTTY.

Next I have to determine how to send and receive a file using PUTTY, but maybe later, Mike
 
You can reset the Sol-20 from the keyboard by holding down the REPEAT key and then pressing the UPPER CASE key.

The easiest (and most common) way to load programs into the Sol-20 from a PC is as a .ent file. This way you don't have to key in the binary loader. The 2nd load option mentioned in the ReadMe file is the .ent file technique.

Putty does not work well as a terminal emulator for vintage computers. I'd go with TeraTerm on a Windows machine. Here's a download link with notes: https://altairclone.com/downloads/teraterm477.zip

Mike
 
Mike, thanks for the tip about RESET. Either I never knew about it or have just forgotten it, anyway it works. SO I added a jump to CONSOLE at the beginning of the LOADER. This way once a file is transferred to SOL, I can get out of the loop.

I downloaded TERATERM and it looks rather simple, which is good, at least for me. I wrote a short TEST.TXT file and sent this from the XP to the SOL. It worked fine. Being optimistic I sent PC2FLOP.COM and executed 100H. The SOL hung. I then resent PC2FLOP.COM and checked what was in the memory addresses 100H etc. I only saw the first two characters 31 and 2E, the start of LXISP, the rest was not even close to what is in the file. I should add, no matter what I do I can't get XMODEM or Y or Z to work. I set the flow control to none. Once XMODEM is started, I get a window that shows the filename name and a box that would have elapsed time, but is grayed out. To get a file to transfer I use send file. Next I tried to send a larger text file. I used the TERATERM license.txt file and this worked. I could read (in ascii) the license agreement. Right now I'm stumped as to why the COM file will not transfer. I also compared the HEX file and the COM file and they both are the same (at least the first few characters), but different from what is sent. Mike
 
Well...... I gave up on TERATERM and tried Real Term. Using the same machine, same cable and I think the same settings, Real Term and the SOL communicated and I have a copy of PC2FLOP on my SOL-20 disk. This file also seems to run. I get the title PC to Floppy Image Transfer Version 1.3. I think I'm going to take a football break and read some more about what I have to do next. Mike
 
Back
Top