• Please review our updated Terms and Rules here

pdp11/34a in BA11-L box, H777 schematics

Roe

Experienced Member
Joined
Dec 28, 2012
Messages
240
Location
Regina, Canada
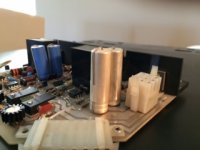
Can anyone point me to the field maintenance print set for the H777 power supply in a BA11-L enclosure?

The closest I can come with Google-chi is the entire 11/04 prints, more than 400 pages, and if the H777 is there, it's not in the table of contents.

Thanks, I'm finally back to unibus after a long qbus break :)
 
I'll look in my private stash, but at first glance, the BA11-L TM looks pretty good. (check out Chapter 3)
 
Thanks, guys, that helped. I've checked the schematics, matched the onboard caps that have obviously leaked, and I need two 180MFD 50V and one 1200.

Please consider I'm a software guy for this question: these caps have two radial leads -- just what I would expect -- plus an axial lead from the top of the cap running down the side of the can, soldered to the same board plane as one of the radial leads. Can I replace this with a simple two-lead radial? And what is the axial lead -for-??

Thanks in advance.

Are those the "standing" output filter capactotors? I had no problems with those when I was repairing my 11/04. I don't remember them to have two radial leads but this was some time ago so my memory may have leaked away... Maybe you could post a photo? The extra lead from the top could be some kind of structural support instead of glue or silicone which is common today.

In my case the big 5V output filter capacitor was really bad. No visible leak, but the capacitance wasn't what it used to be. Then there were also the crowbar SCR that was bad.
 
Last edited:
Hi All;
Thank You, MattisLind, ""Then there were also the crowbar SCR that was bad."" When I last tried to fire up my 11/04, even the +5 Volt wouldn't work, (and it had before that time) and SO not knowing where to begin.. I put it away.. I think You gave me a place to check out and replace, that most likely is/was the cause of that problem.. I will have to remember that..

THANK YOU Marty

If your crowbar has been triggered then it is likely that the switch transistor is short circuit (or possibly a driver failure) and this will cause the fuse to blow. In my case it was rather odd. I had 5V out but no DC OK and POW OK signals. The SCR wasn't triggered but the leakage through the gate to ground has increased which consumed current out of the current source circuit which generate the ramps for the DC OK an POWER OK circuits which thus never was asserted.

No 5V could also be caused by main switch open circuit or non working control logic.
 
Hi All;
Thank You, MattisLind, I will try to remember that as well..
At Present I am in 11/45 mode.. It look like something is keeping the Timing Generator from Functioning..
THANK YOU Marty
 
Photos

Photos

OK, I'm going to try attaching photos again.

This is for the MOS regulator board. The first photo shows the board, with two of the three caps in question (the silver ones) clearly visible.

The second photo is the third of the caps, which is a 180 MFD 50 volt job, with both the radial contacts (on the bottom) and the axial (runs down the side of the cap to the PCB) visible.
 

Attachments

  • IMG_0161.JPG
    IMG_0161.JPG
    29.6 KB · Views: 1
  • IMG_0162.JPG
    IMG_0162.JPG
    19.7 KB · Views: 1
OK, I'm going to try attaching photos again.

This is for the MOS regulator board. The first photo shows the board, with two of the three caps in question (the silver ones) clearly visible.

The second photo is the third of the caps, which is a 180 MFD 50 volt job, with both the radial contacts (on the bottom) and the axial (runs down the side of the cap to the PCB) visible.

Roe:

I know exactly what you're talking about as I replaced the same caps (as well as the 390's) on an H777 MOS regulator several years ago. Appropriate axial replacements work just fine. Apparently it was common practice at some point to provide an extra (dummy) radial lead on caps used in situations where additional structural rigidity was desired. In the case of the MOS regulator, those caps are in close proximity and seem to support each other. You just need to examine the board to determine which radial lead is electrically significant.
 
Thanks, that actually makes some sense. I've ordered replacement caps (the 390s as well, just in case), and hopefully I'll have good results this weekend.
 
Back
Top