<?php
/*
    convertroms.php
    Convert binary ROM files into a data structure for the PETvet device
    Copyright (C) 2012 Michael Hill


    This program is free software: you can redistribute it and/or modify
    it under the terms of the GNU General Public License as published by
    the Free Software Foundation, either version 3 of the License, or
    (at your option) any later version.


    This program is distributed in the hope that it will be useful,
    but WITHOUT ANY WARRANTY; without even the implied warranty of
    MERCHANTABILITY or FITNESS FOR A PARTICULAR PURPOSE.  See the
    GNU General Public License for more details.


    You should have received a copy of the GNU General Public License
    along with this program.  If not, see <http://www.gnu.org/licenses/>.

    Contact the author at bitfixer@bitfixer.com
    http://bitfixer.com
*/


$roms = array();


// ====================
// begin ROM specification
// modify this to create custom ROM sets for the PETvet
// first specify all ROMs you want included
//
// for each ROM, include a line in the format
// $roms[<ROMNUMBER>] = array("<ROMFILENAME>",<ROMSIZE>,<DESTROMADDR>);
// ROMSIZE is the size of the rom in bytes
// DESTROMADDR is the address where this ROM will be loaded into the PETvet's memory.


// add ROMs to list
// basic 4.0 set
$roms[0] = array("basic-4-b000.901465-23.bin",4096,0xb000);
$roms[1] = array("basic-4-c000.901465-20.bin",4096,0xc000);
$roms[2] = array("basic-4-d000.901465-21.bin",4096,0xd000);
$roms[3] = array("edit-4-n.901447-29.bin",2048, 0xe000);
$roms[4] = array("kernal-4.901465-22.bin",4096, 0xf000);


// basic 2.0 set
$roms[5] = array("basic-2-c000.901465-01.bin",4096,0xc000);
$roms[6] = array("basic-2-d000.901465-02.bin",4096,0xd000);
$roms[7] = array("edit-2-n.901447-24.bin",2048,0xe000);
$roms[8] = array("kernal-2.901465-03.bin",4096,0xf000);


// 80 col screen editor 60 Hz
// $roms[9] = array("edit-4-80-b-60Hz.901474-03.bin",2048,0xe000);


// 40 col screen editor with CRTC and 50 Hz
$roms[9] = array("edit-4-40-n-50Hz.901498-01.bin",2048,0xe000);


// Selectable ROM sets
$romsets = array();


// Now define the ROM sets which will be selectable by jumpers on the PETvet
// To specify a set of ROMs, add a line in the format:
// $romsize["<ROMSETNAME>"] = array(<ROM1>,<ROM2>,...);
// The ROMSETNAME is a text name of 10 characters or less which describes this ROM set. This is just for your own reference.
// ROM1,ROM2,etc are the indices of previously specified ROMS.


// basic 2.0 set
$romsets["BASIC2"] = array(5,6,7,8);
$romsets["BASIC4 40C"] = array(0,1,2,3,4);
$romsets["BASIC4 80C"] = array(0,1,2,9,4);


// memory mapping
// define the memory map for the 64k address space
// memory settings for each segment include:
// "PASSTHROUGH"    - disable PETvet for this segment and just pass reads and writes through
// "WRITETHROUGH"   - enable PETvet for writes, and pass these writes through to the mainboard as well
// "READONLY"       - enable PETvet for reading only, disable for writes. Used for ROM segments
// "REPLACE"        - enable PETvet for both reads and writes, isolating CPU from mainboard


// each segment of the memory map is defined:
// $map[] = array(<SETTING>, <STARTADDR>, <ENDADDR>);
// after defining the full memory map, add it to the list of memory maps like so:
// $memorymaps[<index>] =


$memorymaps = array();


$map = array();
// addresses 0x0000-0x7fff - enable SRAM and isolate from mainboard
$map[] = array("REPLACE",       0x0000, 0x7fff);
// addresses 0x8000-0x8fff - writethrough to capture video memory
$map[] = array("WRITETHROUGH",  0x8000, 0x8fff);
// addresses 0x9000-0xafff - readonly ROM segment
$map[] = array("READONLY",      0x9000, 0xe7ff);
// addresses 0xe800-0xefff - I/O space, passthrough all reads and writes
$map[] = array("PASSTHROUGH",   0xe800, 0xefff);
// addresses 0xf000-0xffff - readonly ROM segment
$map[] = array("READONLY",      0xf000, 0xffff);


$memorymaps[0] = $map;


$map = array();
// addresses 0x0000-0x7fff - enable SRAM and isolate from mainboard
$map[] = array("REPLACE",       0x0000, 0x3fff);
$map[] = array("READONLY",      0x4000, 0x7fff);
// addresses 0x8000-0x8fff - writethrough to capture video memory
$map[] = array("WRITETHROUGH",  0x8000, 0x8fff);
// addresses 0x9000-0xafff - readonly ROM segment
$map[] = array("READONLY",      0x9000, 0xe7ff);
// addresses 0xe800-0xefff - I/O space, passthrough all reads and writes
$map[] = array("PASSTHROUGH",   0xe800, 0xefff);
// addresses 0xf000-0xffff - readonly ROM segment
$map[] = array("READONLY",      0xf000, 0xffff);


$memorymaps[1] = $map;


// now define the memory map settings for each jumper position
$memorymapsettings = array();
$memorymapsettings[0] = 0;
$memorymapsettings[1] = 1;
$memorymapsettings[2] = 0;


$filename = "romsets.bin";


// end ROM specification
// ==================
// generate binary file for ROM sets


// filename for petvet code binary
// specify the binary file which contains the PETvet main program
$code_binary_filename = "petvetcodev10.bin";
// output filename for the new binary update file
// this is the file that will be sent to the PETvet over XMODEM
$output_binary_filename = "petvetupdate50Hz.bin";


$total_rom_settings = 8;
$header_filename = "romsets.h";


function calculate_header_length($romset)
{
    $num_roms = sizeof($romset);
    // 2 bytes per address
    $address_size = $num_roms * 2;
    // add fixed length - set ID, name, and number of roms, plus 2 bytes for memory map address
    $header_length = $address_size + 12 + 2;

    return $header_length;
}


$romsets_index = array();
$index = 0;
foreach($romsets as $name=>$rs)
{
    $romsets_index[$index] = array("name"=>$name, "roms"=>$rs);
    $index++;
}


$total_specified_roms = sizeof($romsets);
$total_header_length = 0;


print_r($romsets_index);


// calculate total header length for ROM sets
for ($r = 0; $r < $total_rom_settings; $r++)
{
    if ($r < $total_specified_roms)
    {
        $romset_index = $r;
    }
    else
    {
        $romset_index = 0;
    }

    $romlist = $romsets_index[$romset_index]["roms"];
    $hl = calculate_header_length($romlist);
    $total_header_length += $hl;

    //print "hl $hl\n";
}


print "Total header length: $total_header_length\n";


// calculate start addresses for ROMs
$curr_addr = $total_header_length;
$rom_start_addr = array();
foreach($roms as $i=>$rom)
{
    print "Rom $i\n";
    $this_rom_length = $rom[1];
    print "Length $this_rom_length\n";
    print "Start Address: $curr_addr\n";
    $rom_start_addr[] = $curr_addr;

    // increment address
    $curr_addr += ($this_rom_length + 4);
}


// now calculate start addresses for memory maps
$memmap_start_addr = array();
foreach($memorymaps as $i=>$mm)
{
    print "Memory Map $i\n";
    print "Start Address: $curr_addr\n";
    $memmap_start_addr[] = $curr_addr;

    // increment the address by the size of a memory map
    $curr_addr += 128;
}


//print_r($rom_start_addr);
$fp = fopen($filename, "wb");


// now write out header
for ($i = 0; $i < $total_rom_settings; $i++)
{
    if ($i < $total_specified_roms)
    {
        $index = $i;
    }
    else
    {
        $index = 0;
    }
    //print "index is $index\n";

    $ri = $romsets_index[$index];
    //print_r($ri);


    $thisname = $ri["name"];
    $num_roms = sizeof($ri["roms"]);

    print "name $thisname\n";
    print "nr $num_roms\n";

    $addresses = array();

    foreach($ri["roms"] as $romindex)
    {
        $addresses[] = $rom_start_addr[$romindex];
    }

    print_r($addresses);

    // now write out data
    // 1 byte: set index
    fwrite($fp, pack('C', $i));


    // 10 bytes: set name
    for($b = 0; $b < 10; $b++)
    {
        if ($b >= strlen($thisname))
        {
            fwrite($fp, ' ');
        }
        else
        {
            fwrite($fp, $thisname[$b]);
        }
    }
    // 1 byte: number of ROMs
    fwrite($fp, pack('C', $num_roms));

    // 2 bytes per rom address
    foreach($addresses as $addr)
    {
        // back big endian unsigned short
        fwrite($fp, pack('n', $addr));
    }

    // 2 bytes: address of memory map
    fwrite($fp, pack('n', $memmap_start_addr[$memorymapsettings[$i]]));
}


// now write out ROM contents
foreach ($roms as $rom)
{
    // write 4 byte header for this rom
    // first 2 byte destination address
    fwrite($fp, pack('n', $rom[2]));
    // then 2 byte ROM length
    fwrite($fp, pack('n', $rom[1]));


    // get contents of this ROM and write out
    $romcontents = file_get_contents($rom[0]);
    // write each byte
    for ($i = 0; $i < $rom[1]; $i++)
    {
        fwrite($fp, $romcontents[$i]);
    }
}


// now write out memory maps
foreach ($memorymaps as $mm)
{
    $thismap = array();
    foreach ($mm as $memseg)
    {
        // get this segment of memory
        $segtype = $memseg[0];
        $startaddr = $memseg[1];
        $endaddr = $memseg[2];

        // show information
        print "$segtype: $startaddr, $endaddr\n";

        // get start and end indices into the memory map
        $startind = floor($startaddr / 512);
        $endind = floor($endaddr / 512);

        print "s $startind, e $endind\n";

        // generate memory map for this segment
        for ($i = $startind; $i < $endind; $i += 2)
        {
            // write mapping bytes for the selected type
            if ($segtype == "PASSTHROUGH")
            {
                $thismap[$i] = 0x00;
                $thismap[$i+1] = 0x00;
            }
            else if ($segtype == "WRITETHROUGH")
            {
                $thismap[$i] = 0x08;
                $thismap[$i+1] = 0x00;
            }
            else if ($segtype == "READONLY")
            {
                $thismap[$i] = 0x00;
                $thismap[$i+1] = 0x09;
            }
            else if ($segtype == "REPLACE")
            {
                $thismap[$i] = 0x09;
                $thismap[$i+1] = 0x09;
            }
        }
    }


    // write the memory map
    for ($a = 0; $a < 128; $a++)
    {
        //print $thismap[$a]." $a\n";
        fwrite($fp, pack('C', $thismap[$a]));
    }
}


fclose($fp);


// also write header for inclusion in source code
$fpheader = fopen($header_filename, "w");
fprintf($fpheader, "unsigned char romdata[] __attribute__ ((section (\".ROMdata\"))) =\n");
fprintf($fpheader, "{\n");


$bincontents = file_get_contents($filename);
$numbytes = strlen($bincontents);
print "num bytes: $numbytes\n";
for ($i = 0; $i < $numbytes; $i++)
{
    $byte = $bincontents[$i];
    //print "byte: $byte\n";

    $dec = unpack('C', $byte);
    $dec = $dec[1];

    $hex = dechex($dec);
    $addrhex = dechex($i);
    fprintf($fpheader, "\t0x$hex,\t//address $i (0x$addrhex)\n");

    // split into two arrays
    if ($i == 32765)
    {
        fprintf($fpheader, "};\n\n");
        fprintf($fpheader, "unsigned char romdata2[] __attribute__ ((section (\".ROMdata2\"))) =\n");
        fprintf($fpheader, "{\n");
    }
}


fprintf($fpheader, "};\n");
fclose($fpheader);


// now create new firmware binary for updating PETvet
// attach code segment to ROM contents


// open code segment
$codebin = file_get_contents($code_binary_filename);
$output_bin = $codebin . $bincontents;


$fp_output = fopen($output_binary_filename, "wb");
fwrite($fp_output, $output_bin);
fclose($fp_output);


?>
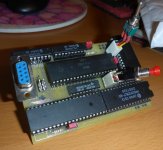
") it works !
it works !