GearTechWolf
Experienced Member
Recently, as part of working on a couple projects, I dug deep into my cluttered storage-spaces and dug out my old UVEPROM eraser and did a tear-down/clean-up.
It ended up being buried deep in my shed when I finally found it. It needed cleaning because it had previously stored in a location that had gotten damp.
Heavily yellowed with heat/age, mild melted spots right next to the UV bulb, and musty-smelling from mildew exposure, but otherwise intact!
For the most part, just a bunch of scrubbing the plastics, sterilizing everything with cleaning wipes, and cleaning out dust/dirt/mildew.
However, one wrinkle did come up after I removed the bulb, one of the bases had come unglued! Then, while I was inspecting that, one of the wires came loose!
Then I had to release the remaining wire (heated the pin with a lighter) and re-glue/re-solder the base back onto the tube.
Had to scrape the filament-wires to get the solder to stick to them, then I poked a hole in an old tube of super-glue and used that to re-seat the base.
A little soldering and it was good as new! Already ran a couple chips through it, 15 minutes should be enough and it didn't get overly warm during that time.
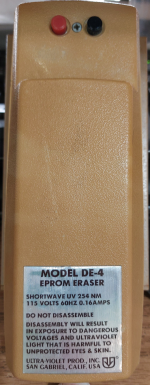
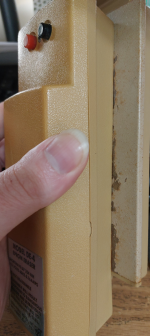
Here's the yellowed old thing, all reassembled-

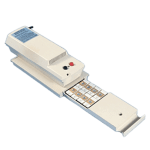
A little rusty, but not bad. Here's what a new one looks like-
And, lastly, I included the original manual that I found.
A pretty simple unit, just bulb, ballast, and on/off switch. No timers or anything beyond the bare necessities.
Pairs nicely with my EP1132 programmer.
It ended up being buried deep in my shed when I finally found it. It needed cleaning because it had previously stored in a location that had gotten damp.
Heavily yellowed with heat/age, mild melted spots right next to the UV bulb, and musty-smelling from mildew exposure, but otherwise intact!
For the most part, just a bunch of scrubbing the plastics, sterilizing everything with cleaning wipes, and cleaning out dust/dirt/mildew.
However, one wrinkle did come up after I removed the bulb, one of the bases had come unglued! Then, while I was inspecting that, one of the wires came loose!
Then I had to release the remaining wire (heated the pin with a lighter) and re-glue/re-solder the base back onto the tube.
Had to scrape the filament-wires to get the solder to stick to them, then I poked a hole in an old tube of super-glue and used that to re-seat the base.
A little soldering and it was good as new! Already ran a couple chips through it, 15 minutes should be enough and it didn't get overly warm during that time.
Here's the yellowed old thing, all reassembled-


A little rusty, but not bad. Here's what a new one looks like-

And, lastly, I included the original manual that I found.
A pretty simple unit, just bulb, ballast, and on/off switch. No timers or anything beyond the bare necessities.
Pairs nicely with my EP1132 programmer.

