• Please review our updated Terms and Rules here

We could probably make a reproduction Heathkit H8 enclosure.....

bladamson

Veteran Member
Joined
Nov 11, 2018
Messages
988
Location
Appalachia
I ganked this out of that other thread so as to not spam up that gentleman's sales attempts.

Basically this hackaday article, and the site that it links to: https://hackaday.com/2021/10/27/vcf-east-2021-preserving-heathkits-8-bit-computers/ . Someone has cloned most of the boards necessary to build an H8.

I could build the whole thing from scratch, and a few people have, but the cabinet for the H8 has an iconic look and feel to it. I've been keeping an eye out for someone who either has a cabinet, or an H8 in disrepair, or one that's complete but cheap (in that case I'd either use or save the original boards).

Every so often I get a wild idea to grab a vintage computer I don't already have and start making new pcboards for it. Undoubtedly I'd end up making an H8 speech synthesizer.

Scott

I've never seen an H8 up close, but it looks like it's the same enclosure as my H11. If that is the case, all of the bends are straight and parallel, and there doesn't appear to be any press-forming with dies or anything like that. It shouldn't be too awfully hard to manufacture a very similar case with a home-made sheet metal brake (some angle iron, a bench vise, several vice-grips, an angle level, and a piece of pipe for a handle, basically). The hardest part would probably be the folded over lips at the front edges where the top goes on. Hmmmm. Doable though I think, although it may take better clamping action than you could get with vice-grips. Might have to make something that went on that edge and drew down tightly across there with several bolts or something...... 🤔

I guess the sides are some kind of routed out particle board with a plastic coating on the outside? I bet there is some kind of coating you could put on plywood and then sand to get the same effect. All I know is it looked like white plastic under the paint on the sides where my H11 was scratched up before I touched it up.

The holes in the back would be troublesome without some punch dies, but I bet something could be ginned up where you cut a rough hole in the back with a sabre saw or something, and then had some kind of 3d-printed bezel that snapped in to make it all pretty and such.

My redneck fabricobbling "skills" don't extend much past "good enough for farm work" though. Any of you gentlemen have any wisdom to add to this harebrained thought?
 
I've never seen an H8 up close, but it looks like it's the same enclosure as my H11.

I'm fairly sure the H8 is smaller than the H11. (I can't quickly find a picture of the two sitting on top of each other or anything, but if you look in the old Heathkit catalogs both units are about as wise as dual-drive disk enclosure... but the drives attached to the H11 are 8" instead of 5.25".) But, yeah, they share the same profile. Something about them makes me suspicious that they might have been contracted to a company making the boxes as a generic enclosure for lab equipment... but I completely can't prove that. ;)

If I wanted to make something "close" I'd probably wimp out and make it mostly of wood, maybe with an acrylic front panel sloped at a similar angle but missing the rakish curves, but that's because I know doing a decent sheet metal bend is well outside my skill set.

Yeah, I too suspect that the H8 and H11 enclosures came from the same vendor. If it was indeed a generic lab equipment enclosure, it would be amazing if we could figure out who made it. Because then we could probably obtain documentation with dimensional diagrams. Hmmmmmm......
 
thanks for starting a thread on this!

I've been thinking about just building one myself as well. The sides I could make out of wood, either particle board or hardwood, and paint it black. The front is where my skills probably come up a little short. I may be able to build a sheet metal brake, or perhaps a place like harbor freight has one that would survive just long enough to build an H8 or two. There's youtube videos on how to do sheet metal work.

The top might be a challenge as it have ventilation louvers in it. Maybe you don't have to get it 100% right. Maybe an acrylic top would actually look cooler than the metal top.

If someone had accurate dimensions that would be a big help.

Scott
 
There has been a lot of discussion on the sebhc google group/mailing list on this topic. Probably best to engage there and avoid duplicate work.
 
There has been a lot of discussion on the sebhc google group/mailing list on this topic. Probably best to engage there and avoid duplicate work.

Thanks for the heads up. Not a fan of google, but I'll suck it up and head over there and check it out anyway. :p

The top might be a challenge as it have ventilation louvers in it. Maybe you don't have to get it 100% right. Maybe an acrylic top would actually look cooler than the metal top.

If someone had accurate dimensions that would be a big help.

Yeah, I didn't realize that the top was vented. That's more complicated, and would require some kind of form that would be difficult for the amateur manufacturer, and require a shop press or something. I've seem videos of people 3d-printing such forms, but they only last for 1 or 2 uses before breaking and flex enough that the results are sloppy. I guess you'd kinda have to have a real CNC mill to make something like that. :(

Although if something with similar vents could be found and modified with simple hand tools to suit, that would be an option.

The H11 is not vented on top, but instead on the bottom. Perhaps a repro case could be flat-topped and vent in the upper rear instead. If the fans blew in the sides, the air would maybe flow between the cards, then up and along back under the top cover and out a rear vent.

Another question is where to get appropriately retro keycaps for the keypad. Perhaps a red filter over a modern red 7-segment LED display could give that more vintage deeper red color that I suspect the originals have. Although if/when I try to make one, I'll probably try to make something nutty with surplus russian IV-6 tubes, heh.
 
Thanks for the heads up. Not a fan of google, but I'll suck it up and head over there and check it out anyway. :p


Yeah, I didn't realize that the top was vented. That's more complicated, and would require some kind of form that would be difficult for the amateur manufacturer, and require a shop press or something. I've seem videos of people 3d-printing such forms, but they only last for 1 or 2 uses before breaking and flex enough that the results are sloppy. I guess you'd kinda have to have a real CNC mill to make something like that. :(

Although if something with similar vents could be found and modified with simple hand tools to suit, that would be an option.

The H11 is not vented on top, but instead on the bottom. Perhaps a repro case could be flat-topped and vent in the upper rear instead. If the fans blew in the sides, the air would maybe flow between the cards, then up and along back under the top cover and out a rear vent.

Another question is where to get appropriately retro keycaps for the keypad. Perhaps a red filter over a modern red 7-segment LED display could give that more vintage deeper red color that I suspect the originals have. Although if/when I try to make one, I'll probably try to make something nutty with surplus russian IV-6 tubes, heh.

Waiting for my approval to join the sebhc group... Looks like a great resource. There is a case project over there, but it's a straight front rather than a slanted front. Looks very nice, costs almost $1K, but IMO comes up just short of looking like an H8.

For the vented top, I do wonder if something from the hardware store could be modified to have an appropriate look and feel. There's lots of air conditioning vents that are louvered. Of course, none would be the right size, but made some combination of sheet metal together with hardware store AC vent could make some that fits the part.

Buying custom Cherry keycaps in the color of your choice, with the print of your choice would not be a problem. Is it exactly the same? Probably not, but it could fit the part.

I've seen people purchase red bezel for other projects. There's some colored filters available online. Think I might have even bought a pack of multicolored filters and have then stashed around here somewhere.

In short, seems like everything is doable, but you need to nail it on the front panel to make it look right. Needs to be slanted the right way.
 
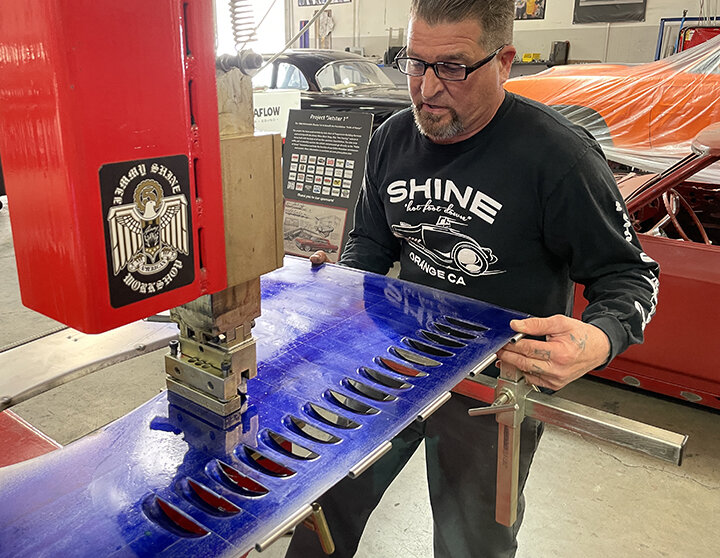
Did someone say something about punching louvers?

Be advised that if you're intending to punch lots of louvers, the cost of industrial strength punches gets, well, rather industrial.

But like everything else, if you're just looking to do a few your tooling doesn't need to be as bulletproof.

Anyway, here's an article on how "the big boys" do it.

 
Waiting for my approval to join the sebhc group... Looks like a great resource. There is a case project over there, but it's a straight front rather than a slanted front. Looks very nice, costs almost $1K, but IMO comes up just short of looking like an H8.

For the vented top, I do wonder if something from the hardware store could be modified to have an appropriate look and feel. There's lots of air conditioning vents that are louvered. Of course, none would be the right size, but made some combination of sheet metal together with hardware store AC vent could make some that fits the part.

Buying custom Cherry keycaps in the color of your choice, with the print of your choice would not be a problem. Is it exactly the same? Probably not, but it could fit the part.

I've seen people purchase red bezel for other projects. There's some colored filters available online. Think I might have even bought a pack of multicolored filters and have then stashed around here somewhere.

In short, seems like everything is doable, but you need to nail it on the front panel to make it look right. Needs to be slanted the right way.

Hmmmm yeah, let's see...... I have some work-related projects that I need to finish the next few days, but maybe next week sometime I can do some experiments with bending some scrap metal with a cheap/junk brake just to see how it goes.

I wonder what gauge sheet metal it uses. I can measure my H11 if I can figure out where I put my dial caliper, lol. I suspect that it's thicker than what I've tried to bend with a makeshift brake in the past.

For the end pieces, I have one of those crappy 3018 engravers that could probably route out the tracks in the wood, but I suspect I'd have to make a jig to be able to flip it around and do it in two parts while retaining zero. All that gcode stuff is really new to me so I have a lot to learn in that regard. D:

Once I get approved on the sebhc list, I'm going to see if I can nag someone over there into making up a dimensional diagram. Their case project is cool and I respect it, but I think I want to make something with a slanted front panel and overhanging wooden sides like the original.

This is all assuming that I don't chase some other shiny squirrel first. But this is a nice way to fool with something while I finish cleaning out my store rooms so I can clean up in here, move a bunch of junk out of the way, and get the electronics bench into a shape where it's fit to do projects on again lol.
 
PS: 3d printing vents to be affixed into a bit rougher-cut opening in the top cover might also be an option, but cutting a bunch of holes would probably make the metal pretty flimsy.
 
I hear ya, I'm only good until something else draws my attention away. :) The H8 is actually supposed to be on the queue well behind a dozen other things, but when you get excited, you get excited.

3D printed vents I just don't think will look right. You'd have to thicken then up to get sufficient strength, and you may have to print in sections unless you have a really big printer.
 
Back in "za ole days", I worked with a guy that had an H8. Due to the fact that the connectors were tinned, not gold plated, he spent more time cleaning corrosion and trying to maintain good connections than he did running it. Hopefully the repop boards you're talking about have properly dealt with that particular problem.

One of the odd things I remember about his was that the motherboard/backplane is more of a "sideplane" and the cards actually are laid back at an angle that matches the angle of the front panel.

Here's a look inside of one being restored.

 
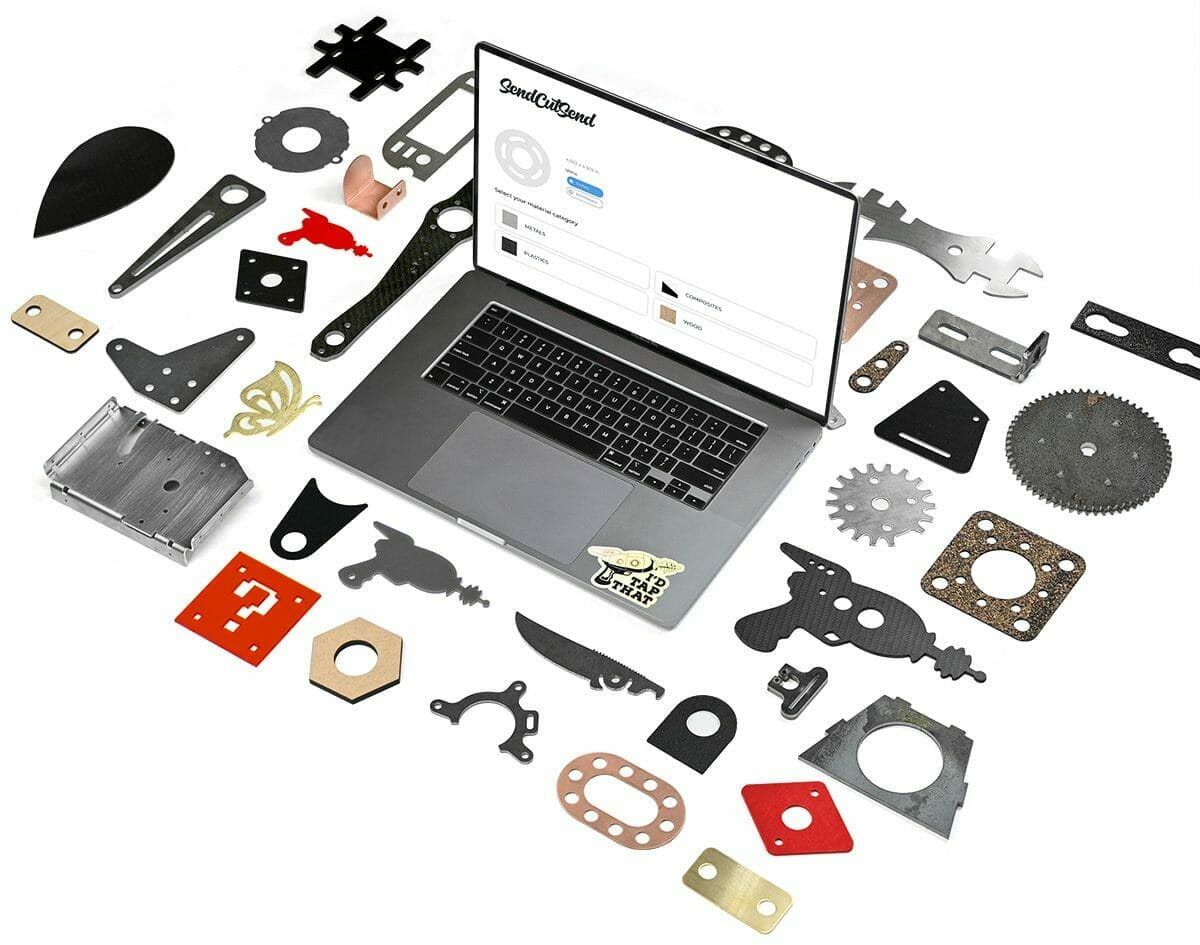
There are some places that will cut and bend sheet metal that don't seem that expensive:


I think if a DXF or SVG could be produced, these guys could produce the metal part for on the order of $100.
 
Oh now that's interesting. It appears the enclosure is in many more pieces than the H11.

Maybe we're making this too complicated (I have a bad habit of incurring scope bloat on things like this; please feel free to hit me with the clue stick at any time lol). It doesn't have to be a *perfect* replica. The front panel is what is distinct and conveys that H8-ness. The rest of it is just a box.

The sides and bottom can be made of wood. The exterior dimensions would be a little different than the real thing, but oh well. We can cut some "speed holes" in the bottom for ventilation. The bottom of the metal tabs on the cards can fasten to the bottom via short wood screws w/ pilot holes.

The front panel is what gives the H8 its charm, imo. If one just wanted a simple slanted front panel without the bottom foot and top overhang, it could be a single sheet of steel, perspex, lauan, or even PCB, riding in slots milled in the wooden sides + bottom. If we used something non-metal it would be a lot easier to mill the openings at home. But that foot along the bottom and that top overhang are worth trying to reproduce, I think. On closer inspection, the foot at the bottom looks like it might be too complex a bend for the usual sort of sheet metal brake, but I still think we could make our own tooling to do it. But another option might be to make the foot as a separate part, even from a different material than the front panel, fasten it to a flat front panel, and then hide the joint with body filler or something before painting.

An unvented top would be pretty easy to make in a brake I think, although it could be made of wood too. I think we'd want to make it of something beefy enough to stack on though, not just a piece of lauan or something.

The back could be metal or wood. It would be more difficult to mount connectors in wood, but not impossible. Just a little janky maybe, but you don't have to look at the back all the time. :p Without a vented top, we'd probably want the ventilation outlet in the back. Assuming the use of reproduction/anachronistic cards in the machine, it probably wouldn't generate nearly as much heat as the real thing anyway. One small and silent fan in the back would probably provide sufficient air-flow in lieu of passive air movement out the vented top, right?

The case badge could be 3d-printed and painted like a D&D mini. Raised lettering for the "H8 Digital Computer" part to make it easier to paint.

It looks like card brackets could be easily bent from aluminum stock with nothing more than a hacksaw, bench vise, and block of wood + hammer, and maybe some emery cloth to break the edges. Looks like the originals are threaded, but tap sets are cheap at Horrible Fright.

I suspect that we can gin up an attractive enclosure, easily buildable by the home hobbyist without any extreme tooling other than maybe a table saw, at a price point far below $1000 (not counting tools), that could be resized and/or used for other projects as well. And given the generosity of this community, I am sure that someone with the fancier tools would be happy to make some of the funnier parts for people who didn't want to make that investment.

Hmmmmmmmmmmmm......... Am I insane / full of poo / grossly delusional?
 
Many people out on sebhc have done many different things to (try to) solve the problem of the H8 enclosure. Your ideas are not out of line at all. With modernized H8's, using switcher power supplies and eliminating the regulators - for example - there is less need for the ventilation, too. People have also discussed and tried various ways of making wood side panels. They turned out quite nicely.

One aspect of the construction of the front panel, though, is physical strength needed to handle pressing of the keys. They've had problems even with building new front panel PCBs, getting the PCB thickness right and adding angle-iron (which the original also has) to further brace it. All that depends on the front panel sheet metal for support as well.
 
Back in "za ole days", I worked with a guy that had an H8. Due to the fact that the connectors were tinned, not gold plated, he spent more time cleaning corrosion and trying to maintain good connections than he did running it. Hopefully the repop boards you're talking about have properly dealt with that particular problem.
Norberto Collado, Heath hobbyist extraordinaire, designed a replacement back, err, sideplane board and specced gold-plated pins for it. If you are involved with Heath gear at any level I sould strongly suggest joining the SEBHC mailing list. Extremely high S/N ratio and very smart, engaged people.
 
As an aside, in that video, I love that S-100 adapted memory card. That was very clever and clean conversion.
 
Back
Top