• Please review our updated Terms and Rules here

New, to me DEC PDP8E

Hi All;

I have to be gone for awhile, but I will look later and see if I can find the Number that is equivalent to the 380, DEC has a replacement for that number that was a better IC..
I found it, it's an 8640 !!

THANK YOU Marty
 
Last edited:
Thanks for the suggestions. Dave I ordered a couple of those 380 that you pointed to, thanks. Also regarding the 8881 chip, as a replacement it looks like the 7401 can sink about 16ma where the 7439 can sink about 60ma. So if I can find the 7439, I'll use them. Thanks again, Mike
 
Thanks for the suggestions. Dave I ordered a couple of those 380 that you pointed to, thanks. Also regarding the 8881 chip, as a replacement it looks like the 7401 can sink about 16ma where the 7439 can sink about 60ma. So if I can find the 7439, I'll use them. Thanks again, Mike

Hi Mike, if you can find some 7439.s then they would definitely be better, and I think they have been seen on DEC cards in a 8881 position as the original chips. if not then take a look at the 7438, ok the pin out is wrong however if you mount then UPSIDE DOWN with the Vcc and Gnd suitably adjusted ( bodged ) then they will work. I had no luck looking for 7439 but bought 20 7438's, not needed them yet though.
Cheers
Dave
 
Hi All;

I hope that I am not horning in on a private enterprise..
If I can add to this, I would be glad to get 25, Especially if it helps, I sure could use them for my 11/45..

THANK YOU Marty
 
For the last day or so, I've been working on the front panel lamps and pin sockets. More than half of my lamps are bad. I found that Mouser has replacements CM7371, So I purchased all new ones and will use the old good ones as spares. Many of the pin sockets for the lamps were corroded to the point where the lamp was froze in place.

IMG_0311[1].jpg

Removal of the lamp resulted in pin failure. So most of the pin sockets were removed and soaked in vinegar. This mild acid loosened up many of the broken pins and also cleaned out the corrosion to where I think they will work. A few sockets had the lamps pin break off flush with the top of the socket making it difficult to remove the pin. I soaked these over night with no result. To fix these, I gently ground off the bottom of the socket and re soaked them in vinegar. Later I could push the pin out with an old lamp pin. I think I can reuse these pins also, if I'm careful, not to allow solder to wick into the socket from the back end. I asked Mouser if they could find replacement sockets for the CM7371 lamps. They came up with a number CM4999-004, but do not stock it. I asked for a quote, but who knows it one will come. Maybe, here's hoping.

Mike
 
The CM7371 has a slightly smaller pin diameter than the original bulbs. I had to put a kink in the bulb leads so they would make good contact in the sockets.
 
I really am enjoying reading this. I do like it when a machines get a total strip for the first time and a crazy attention to detail goes into restoring it before it ever sees the keyswitch turned for the first time.
Same with detailed photos. Always worth the look.
 
I had never heard of ABRA until a few messages back in this thread. Je pense que Je dois visiter ce magasin la prochaine fois que Je suis a Montreal!

Lou(is)
 
Last edited:
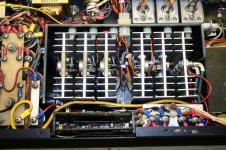
Well, I finished up the heat sinks and re-assembled the pass transistor cage. The power supply is as clean as I'm going to get it. It's not perfect but it's a LOT better than when I started. Getting the pass transistor cage in and out of the power supply is not difficult, but there was evidence of punched wires. So when I put the cage back I was careful, yet I still had one pinch I had to fix. I also replaced all the jacks and plugs J1-J7.
IMG_0316.jpg

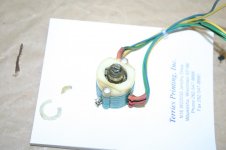
When I was replacing J6, I inspected the front key switch and it was broken. It would turn, but was hard.
IMG_0321.jpg

Apparently, it must have been struck from the front somehow and the top plastic where the brass rod goes through was broken out. So I opened up the switch and found that three wafers that hold the contacts were either broken or cracked.
IMG_0325.jpg

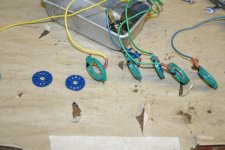
I started to look for a replacement, but that didn't result in anything, beside what I was looking at was in the expense side. So, I decided to try and repair this switch. I figured that some crazy glue would repair the wafers, but how to fix the front cover? I thought of trying to mold something or fill the broken part off, but that usually never results in a firm repair. I decided to make a small steel plate to fit over the cover and attach the brass shaft bushing to it. Then replace the rivets with bolts.
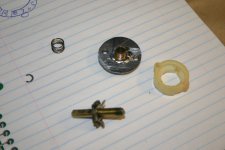
IMG_0368.jpg

I soldered the brass bushing to the steel doughnut after cleaning and lubing it. The shaft is held in place with a 'C' clip. Just underneath the cover there are two ball bearing balls that provide the 3 position 90º stops. Once lubed up it worked well.
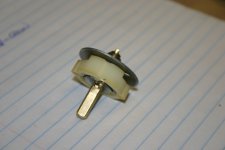
IMG_0370.jpg

Mike
 
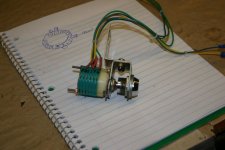
Next the green plates and wafers were cleaned. I lost two contacts on the floor twice, but fortunately found them both times. Crazy glue worked fine on the wafers. I also filed the brass shaft so they would slide on easily.

IMG_0371.jpg

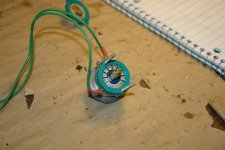
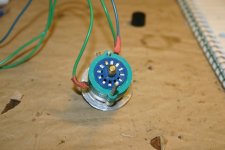
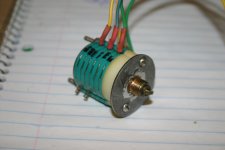
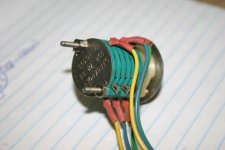
Starting from the front, I began to reassemble the switch plates and wafers. This design is kinda neat. If you flip the wafers over you can have either shorting contacts or non shorting contacts. The contacts fit into 12 different slots to make for different contact patterns. This switch is simple. Three single contacts. The green wires are the power on which is off-on-on and the blue and yellow wires are panel lock function and are off-on-off

IMG_0372.jpg

The blue wafers fit between the green plates. I would assemble one switch set and test it before going to the next. Even though this is a simple switch I got confused and had to change things a few times. Here's the finished switch

IMG_0373.jpg
IMG_0374.jpg
IMG_0375.jpg

Mounted the switch on the power supply and fired up the power supply for the first time. All the voltages are there, not exactly correct, some a little high and some a little low. Tomorrow I want to load test the unit.

Mike
 
Back
Top