• Please review our updated Terms and Rules here

PiDP-8/I

Hmm, I wonder if I messed up on my order form somewhere...

Thanks guys, I'll try getting in touch with Oscar and see what I can figure out.

Note that Oscar is doing two batches; only the first batch of buyers have been notified. The second batch should "hold fast" ...

His original words were:

• A first run of 250 units will be sent out in mid-July, a second run follows in mid-September. The limiting factor is the wooden case, of which only 250 pieces could be delivered in July.

• If you joined the mail list before May 1, expect the PiDP to be sent out in mid-July, if you joined the list on/after May 1, it’ll be mid-September (depending on how many of the first 250 people decide not to buy in the end). There’s not much I can do to speed it up. And actually, I’m quite happy about doing it in two runs because doing 250 of these kits is already quite a handful…

-----
 
Yeah, I was in the early group, and have realized that I had a typo on my order form... Might be too late to get corrected for this first batch depending if I'm lucky or not, heh.

Either way, I'll be in for one of these...
 
WOW.

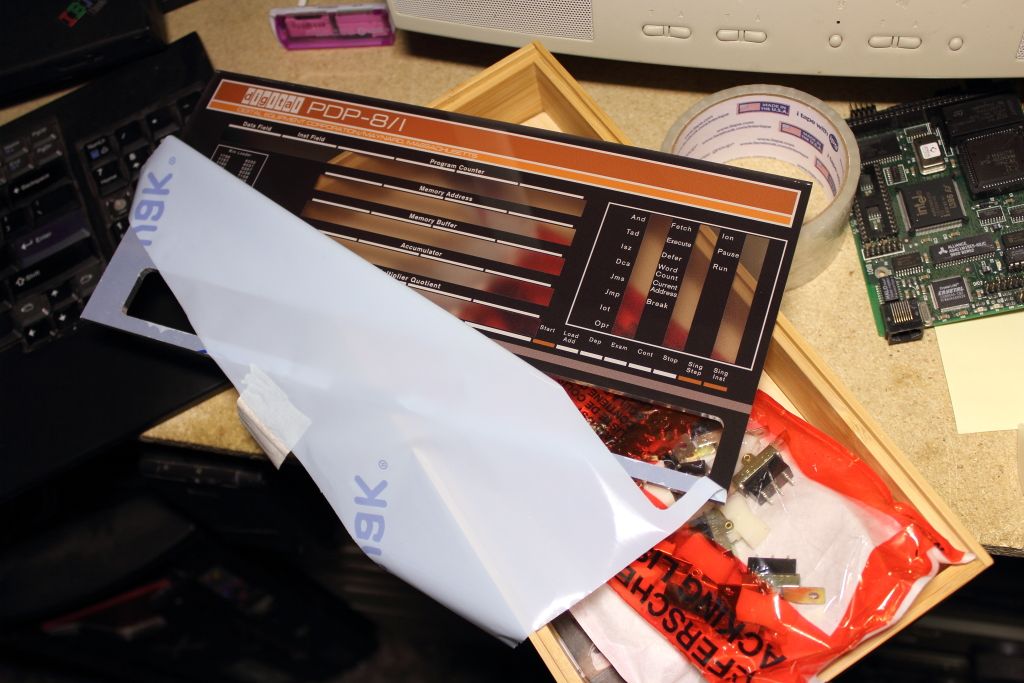
My kit just arrived. First, it came so quickly! Man. But then, opening the package... This is, by far, the best looking, best packed kit I have ever received from anywhere. Hats off!!!

I look forward to setting aside an hour or two this Saturday while my class is working on their capstone labs to put it all together and start blinking some lights on my desk!!!!
 
My kit come in yesterday. Looks really good. After I paint the switches I can't wait to assemble it.

IMG_9700.jpg
 
Painting switches:

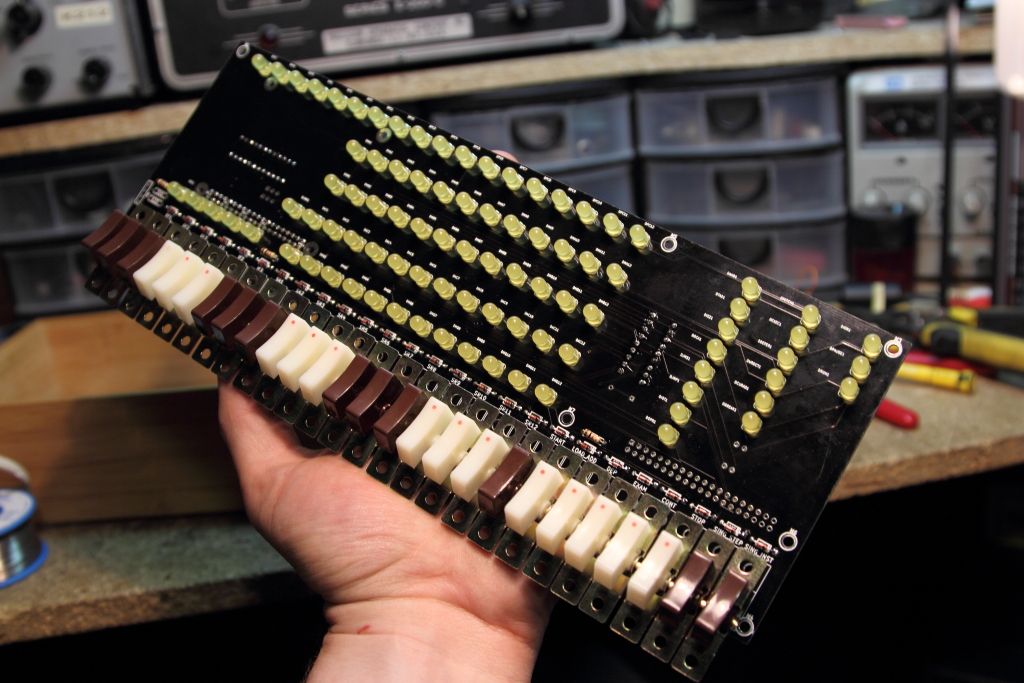
Paint the 12 relevant switches (see PiDP pictures to identify which ones) with a pinsel after you've completed the kit. 3-4 thin coats of paint, 6 hours of drying in-between. Use masking tape to protect the ones that should remain white. With a cotton swab, first clean the switch caps. You may also lightly sand down the switch tops or apply plastic paint primer. Not all that necessary, but adds strength. Then:

Easy option: The prototypes shown on many pictures were painted with acrylic colour 'Nut Brown' (RAL code 8011). Darker than the original, but (IMHO) looks good. Available everywhere.

Laborious option: ask a paint shop (any decent one can do this) to mix up an acrylic paint that matches the dark brown title bar of the acrylic panel. You can use the paint shop's colour book to pick the right colour, or mention colour code NCS S5040-Y40R. Buy either as spray paint (which can be pinseled on very well after spraying a bit of paint into a cup) or as normal acrylic paint. Satin (matte) is better than glossy. If the above colour code is not enough, here (link) is the label on my paint cans. <Note: if you have found the colour code expressed in other colour coding systems, let me know?>

I'm tempted to see if spraypaint can be substituted as it takes a lot less time and is less prone to brush strokes if you apply in two or three light coats.
 
I've received my kit as well. I plan to use a Motorola Atrix dock as the console for the Raspberry PI model B I'm going to use...
 
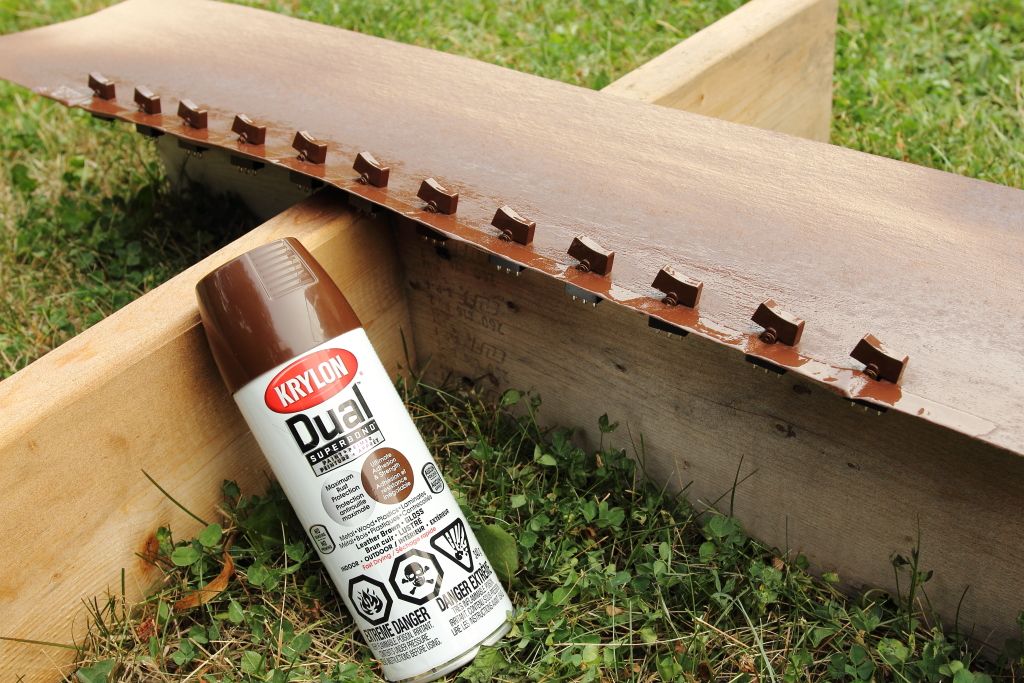
Searching for a suitable spray color that was "Nut Brown" or similar as you described on your assembly page turned up relatively unsuccessful. The closest I have come to "Nut Brown" (which in comparison to your earlier builds seems way darker than the switches pictured here) is Krylon's "Leather Brown" which is available in gloss and as a paint + primer mix. In comparison to a later photo you took It seems to be a much closer color to the final color you made your switches, but multiple shades off from the original switches.

I have a trip to Tokyo in two days so I'm totally out of time for now to even confirm with a test spray.
 
Last edited:
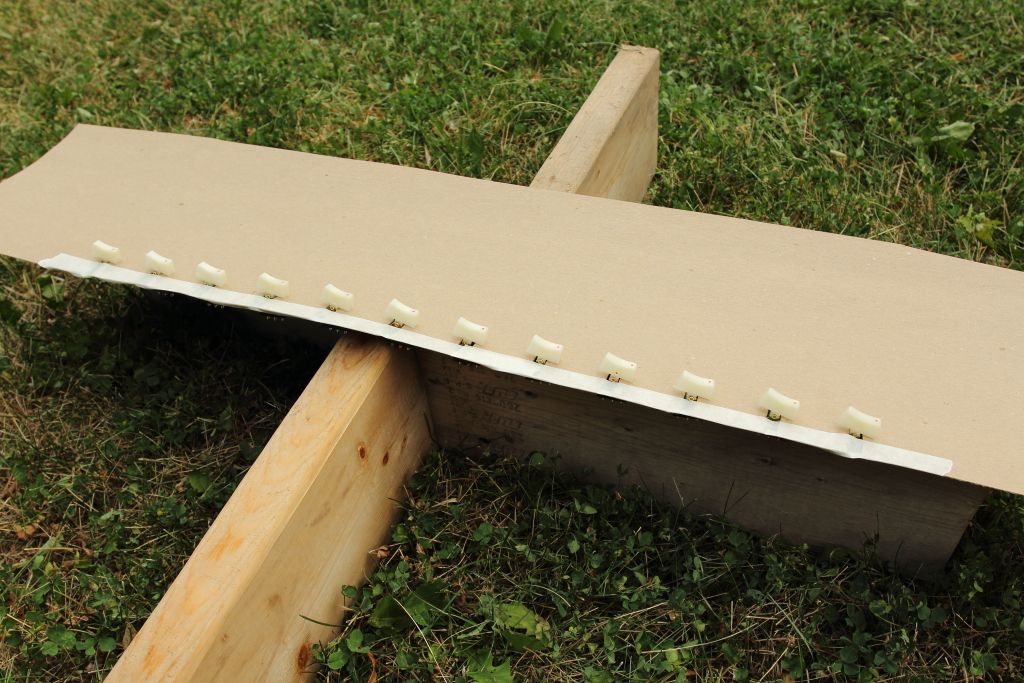
Took me a month to get back but I was finally in a position this morning to make a support to hold all the switches and do a spray. It seems to of gone quite well.

CGS_1000.jpg

CGS_1001.jpg


Two or three coats should be perfect.

Another slight modification I'm looking into is to replace the wooden cabinet with metal ears so it can be mounted in a conventional 19" rack. I'm currently sourcing stick-on fake wood vinyl sheets.
 
Oh yeah. Three coats and 24 hours to dry were perfect. Color isn't perfect but meh.

Looks good! I've been having problems finding "Nut Brown", too. I did see the Leather Brown, based on your results maybe I'll just go that route. I really need to get going on mine - I've been sitting on it too long.
 
I assembled mine this week, and compared its behavior to the 8/I at the RICM.

The lights that show the current instruction are active when you examine in the PiDP-8/I and inactive on the real PDP-8/I.
The lights that show the MB and AC are active when you single-step the the real PDP-8/I inactive on the PiDP-8/I.
The deposit switch is upside-down on the real PDP-8/I.
 
Mike,

I assembled mine this week, and compared its behavior to the 8/I at the RICM.

That is a *very* useful thing. Because actually, I've never seen a real 8/I working. All my info came from fleshing through the documentation, looking at other 8's and getting some guidance. But the front panel works subtly different across the PDP-8 range.

The lights that show the current instruction are active when you examine in the PiDP-8/I and inactive on the real PDP-8/I.

Aha... I'll fix that.

The lights that show the MB and AC are active when you single-step the the real PDP-8/I inactive on the PiDP-8/I.

Really! I had it set up like that originally, then understood they were not to be updated. Which felt very counter-intuitive, but I thought if that's the way it is, I'll do it too.
I'll undo that code change then :)

The deposit switch is upside-down on the real PDP-8/I.

That's on purpose, I preferred it that way. But it's a 1-line change - I'll add it as an option (or make it the default).

There is BTW one other imperfection I know of: the Data Break leds. It's hard to drive them correctly as the simh emulator deals with Data Breaks in a different way than the real hardware. I still have to look into that some time.

Thanks!

Oscar.
 
Back
Top